

TrialLine makes it easy for you to create customized views of your timeline by filtering out events by category. You can then share those customized views with medical experts, staff members, clients, or anyone else you may need to, right from your dashboard.
Assigning Categories to Events
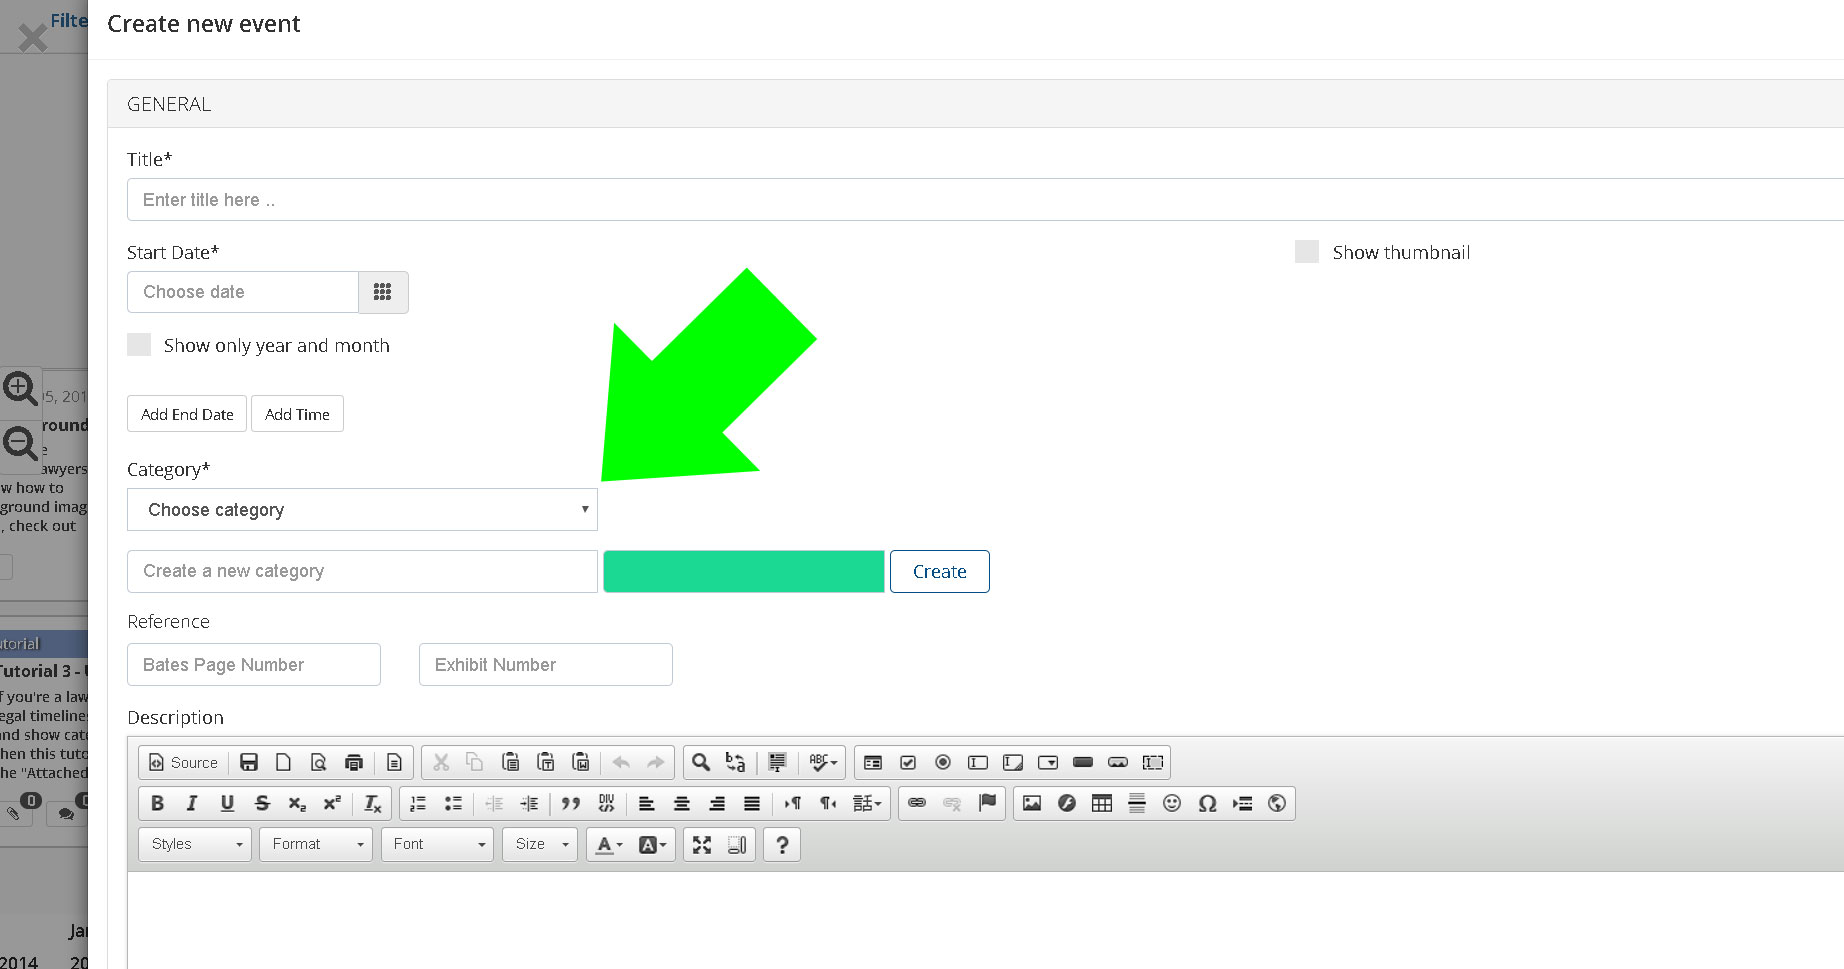
When creating an event in TrialLine, you must assign it to a particular category. You can either assign it to a category that already exists in your TrialLine, or you can create a new category by giving the new category a name, and assigning it a color:
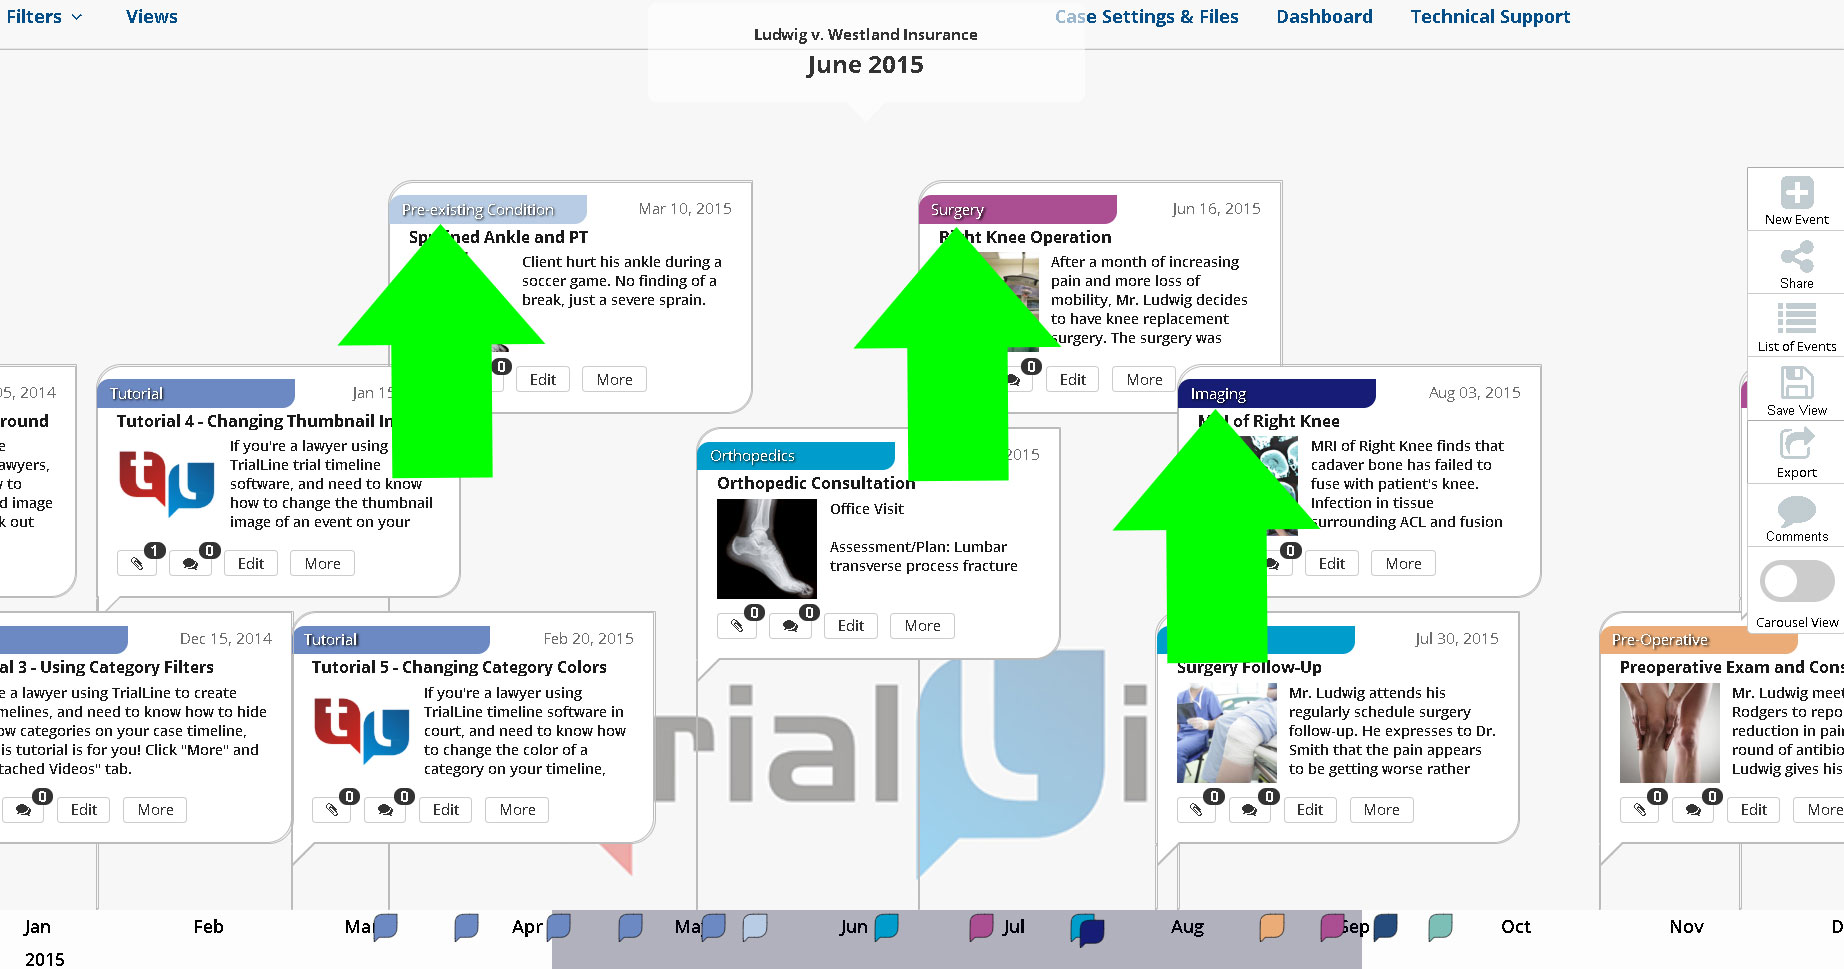
Categories are displayed in each event bubble in the ‘Relative View’ in the top left hand corner:
Creating Customized Views
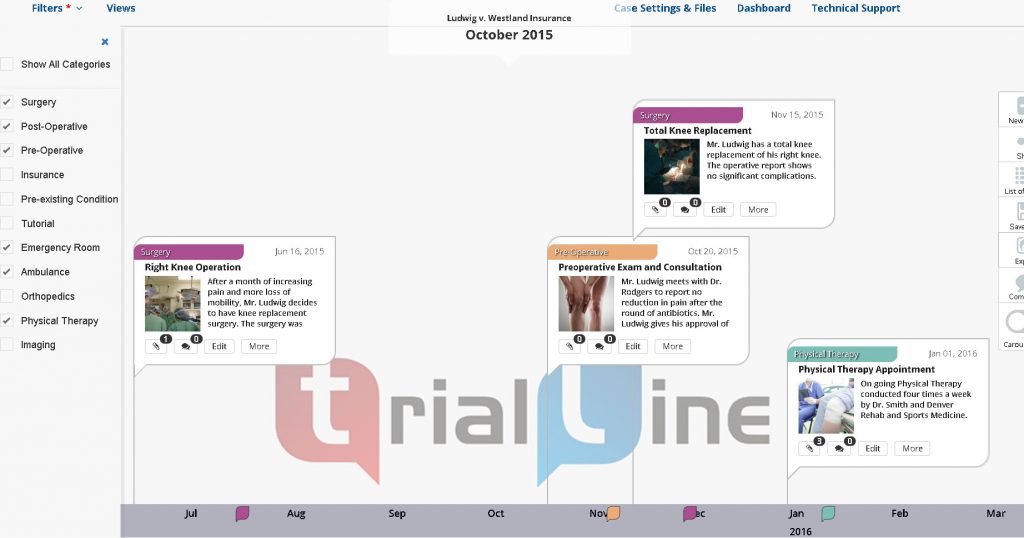
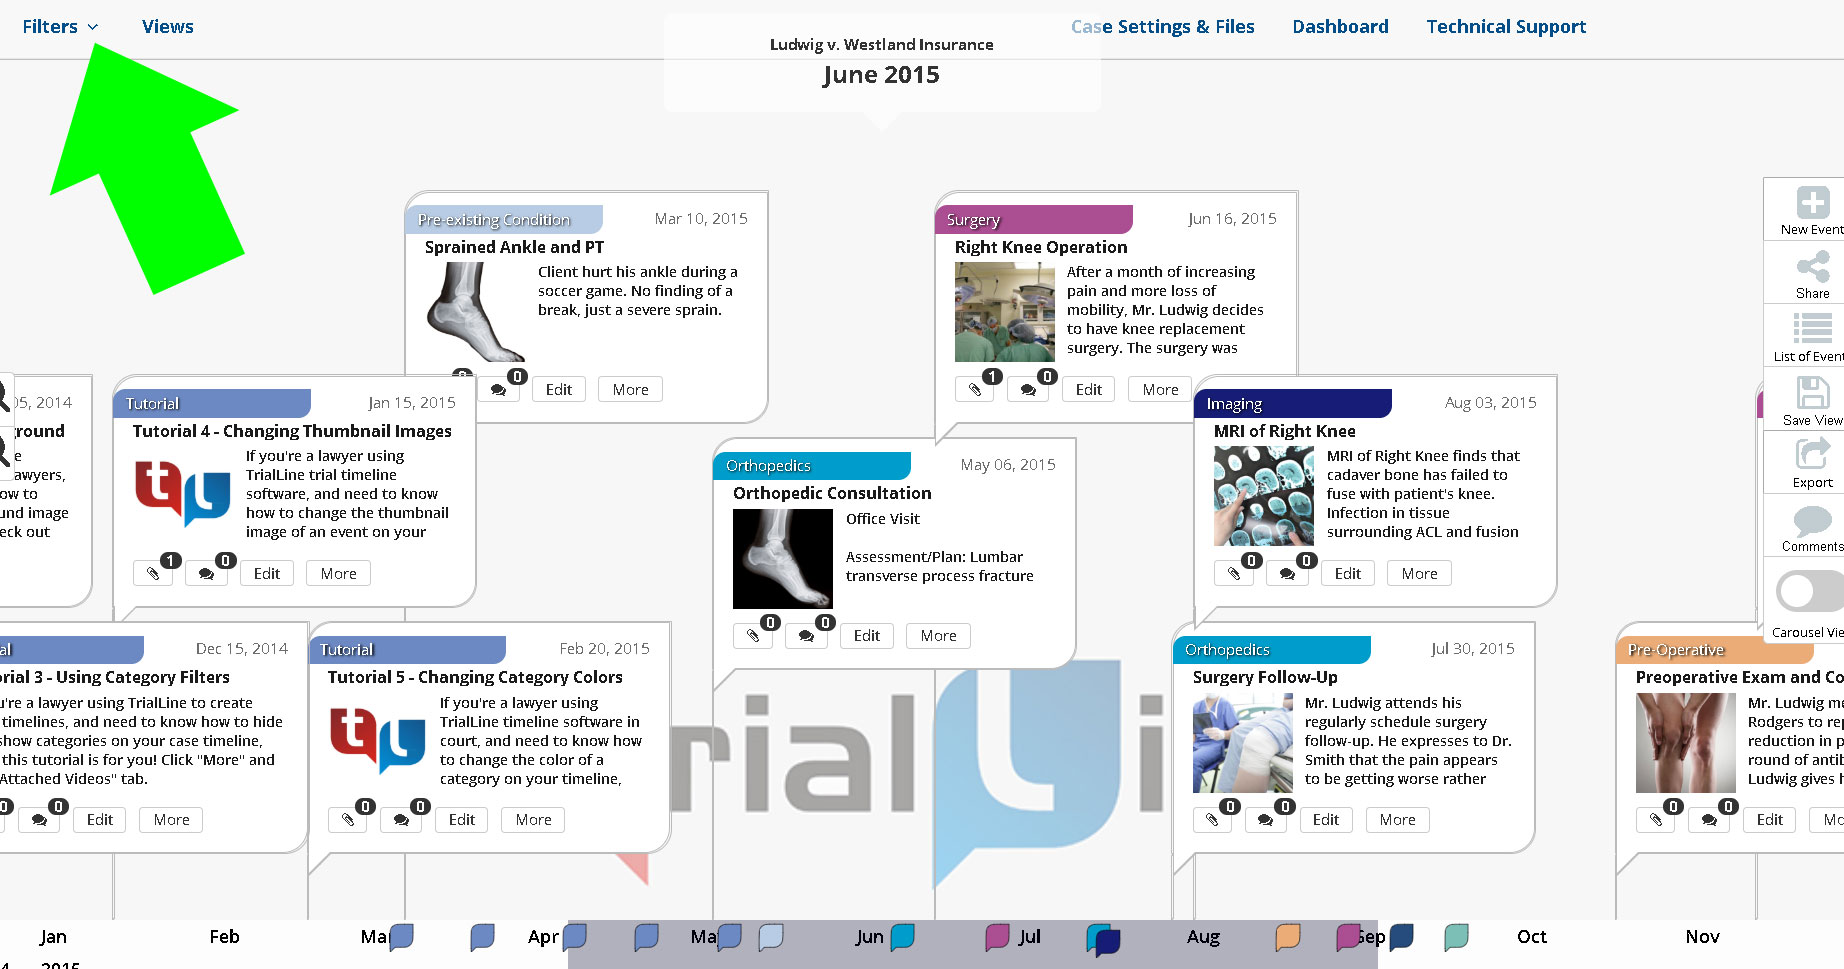
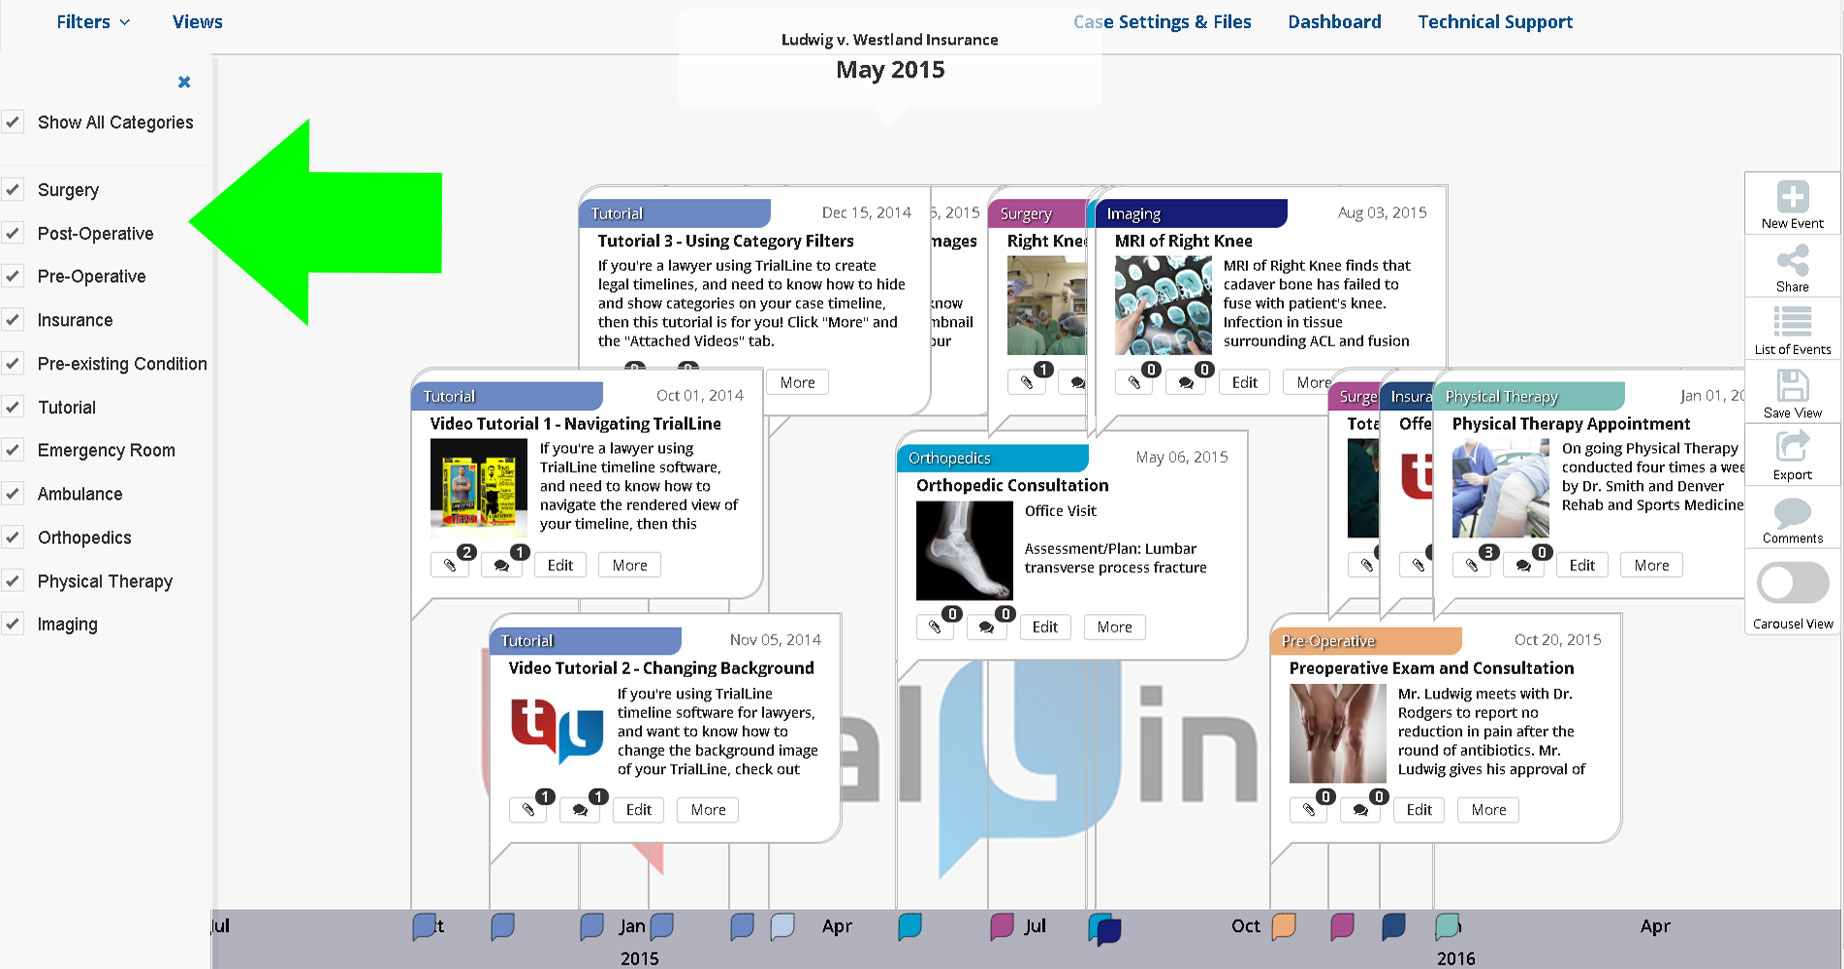
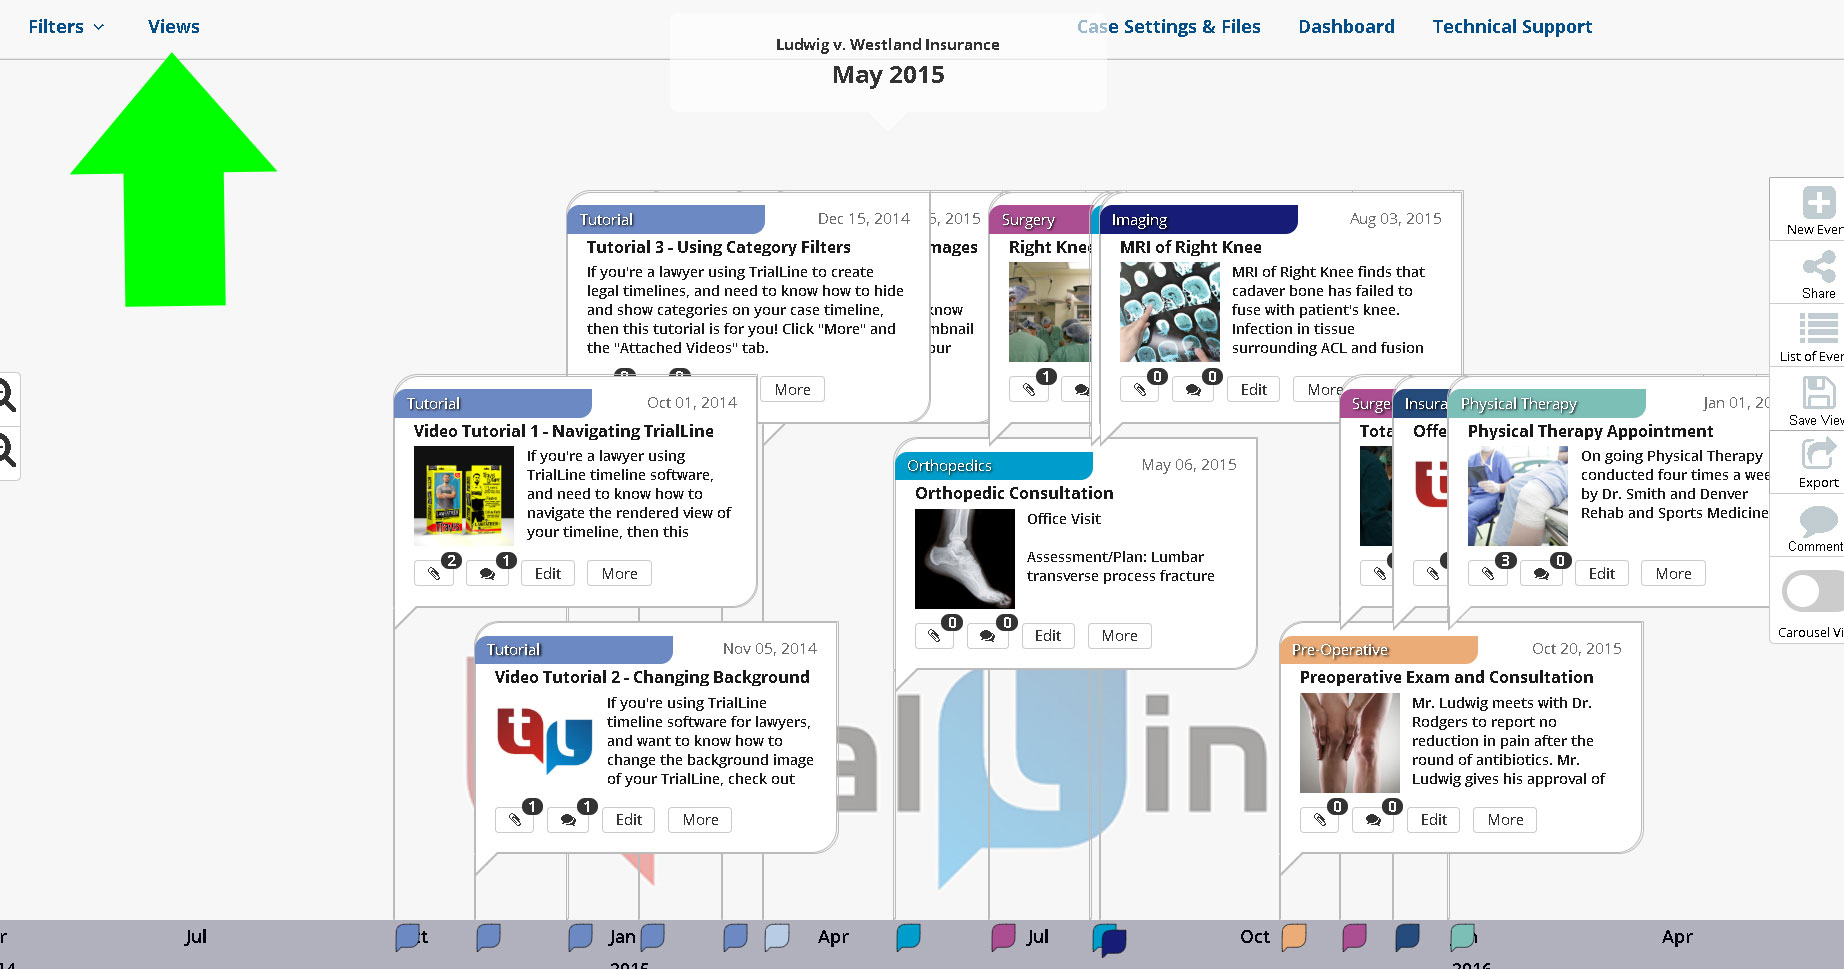
You can create customized views that only display the event categories applicable to what you’re working on, by filtering out events by category. Click on ‘Filters’ in the top left hand corner of the ‘Relative View’ for the TrialLine in question:
Select the categories you would like to see by checking the category boxes in the drop down ‘Filters’ menu:
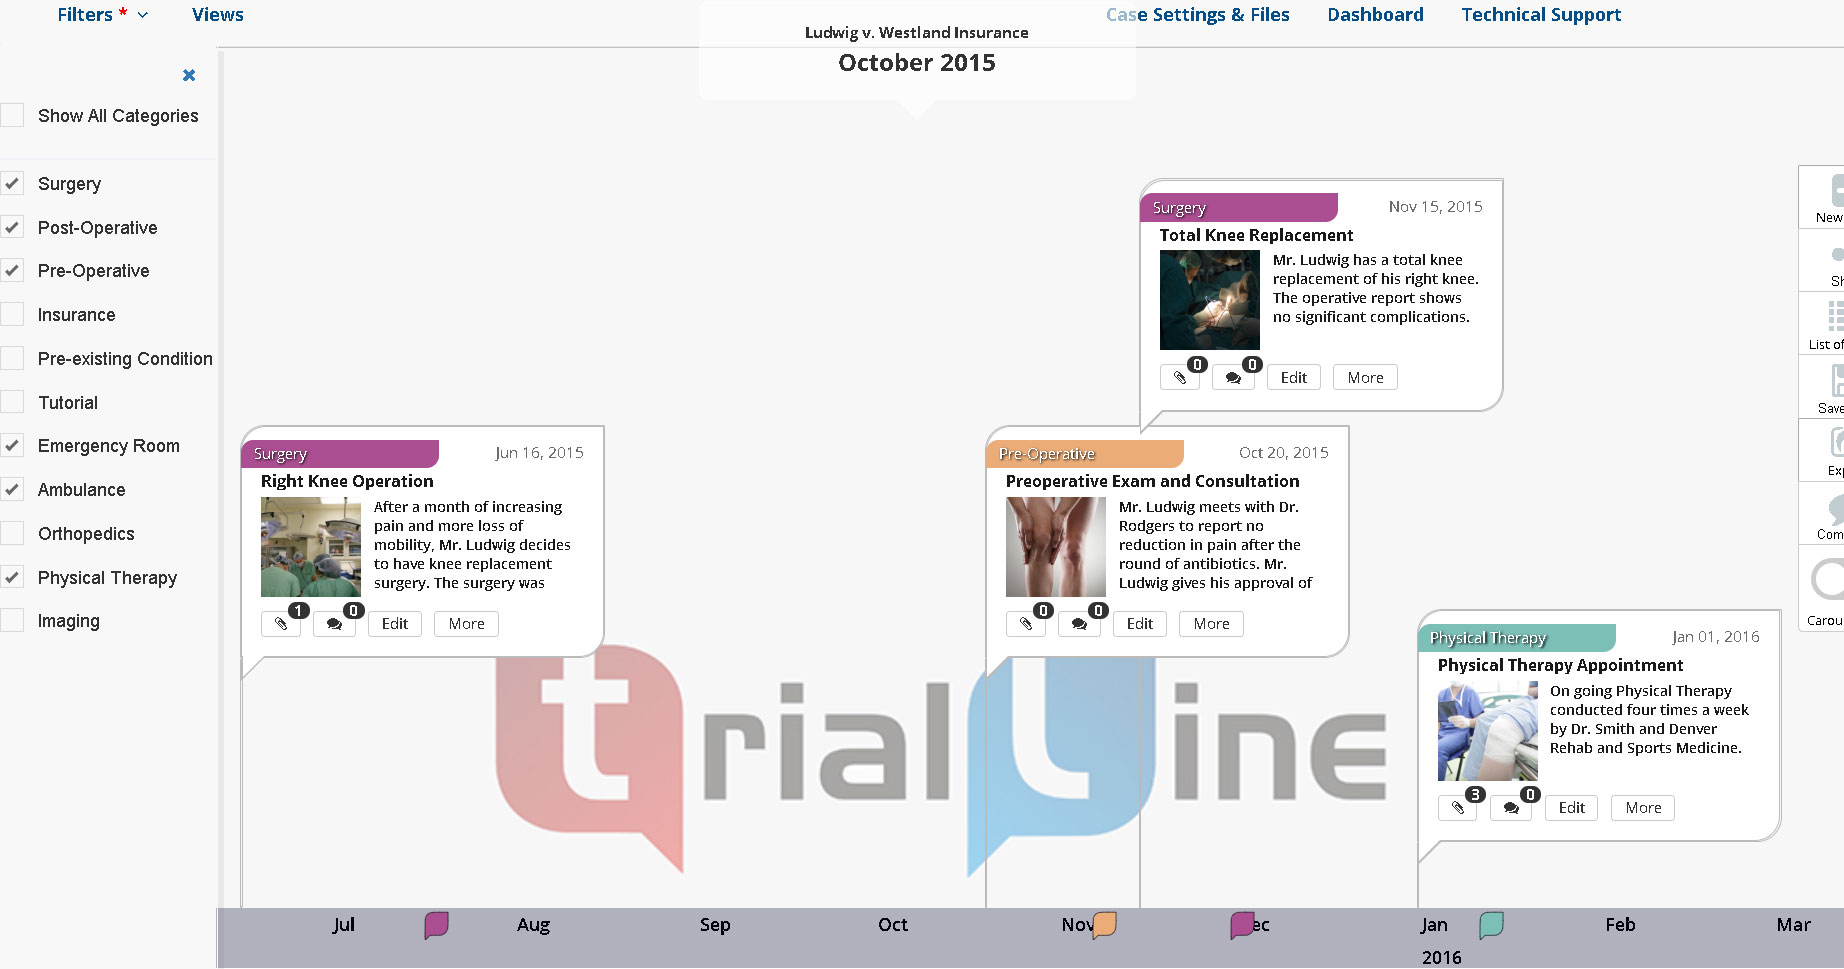
Only the events that are assigned to the categories you select will be visible on your TrialLine:
Saving and Sharing Customized Views
By selecting which categories and events are displayed in your TrialLine, you are able to create customized ‘Views’ of that TrialLine. You can then save and share those views with whomever you may need.
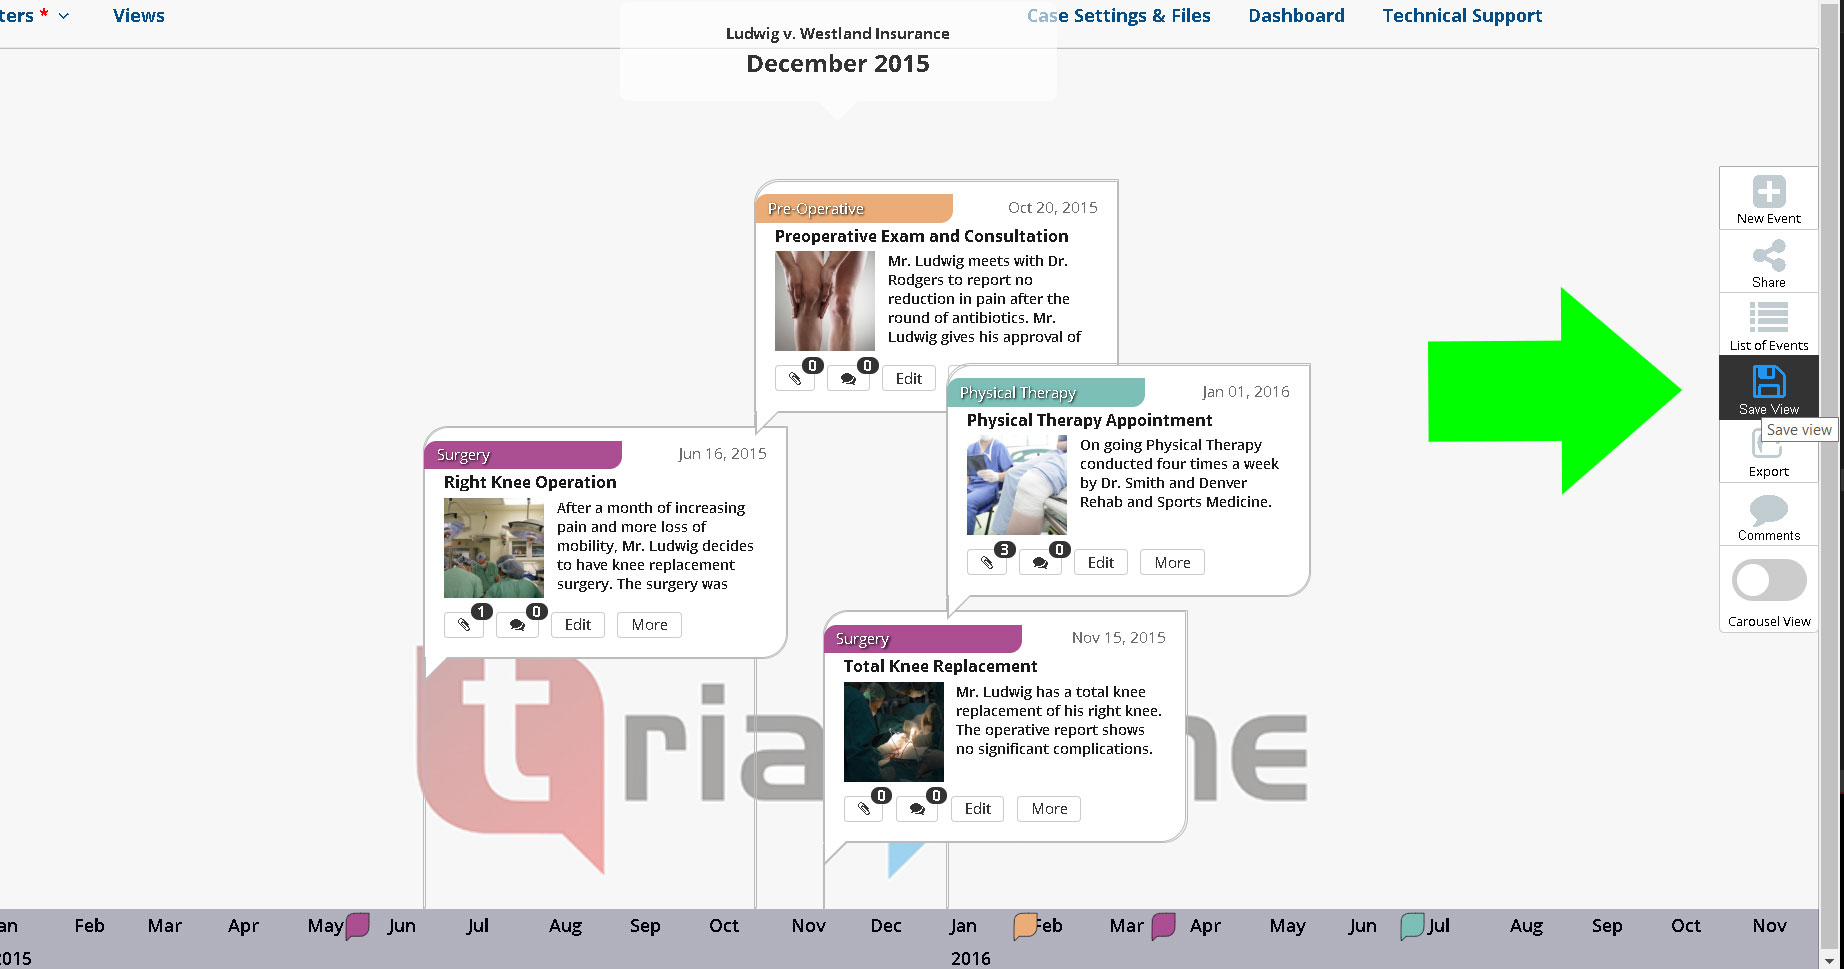
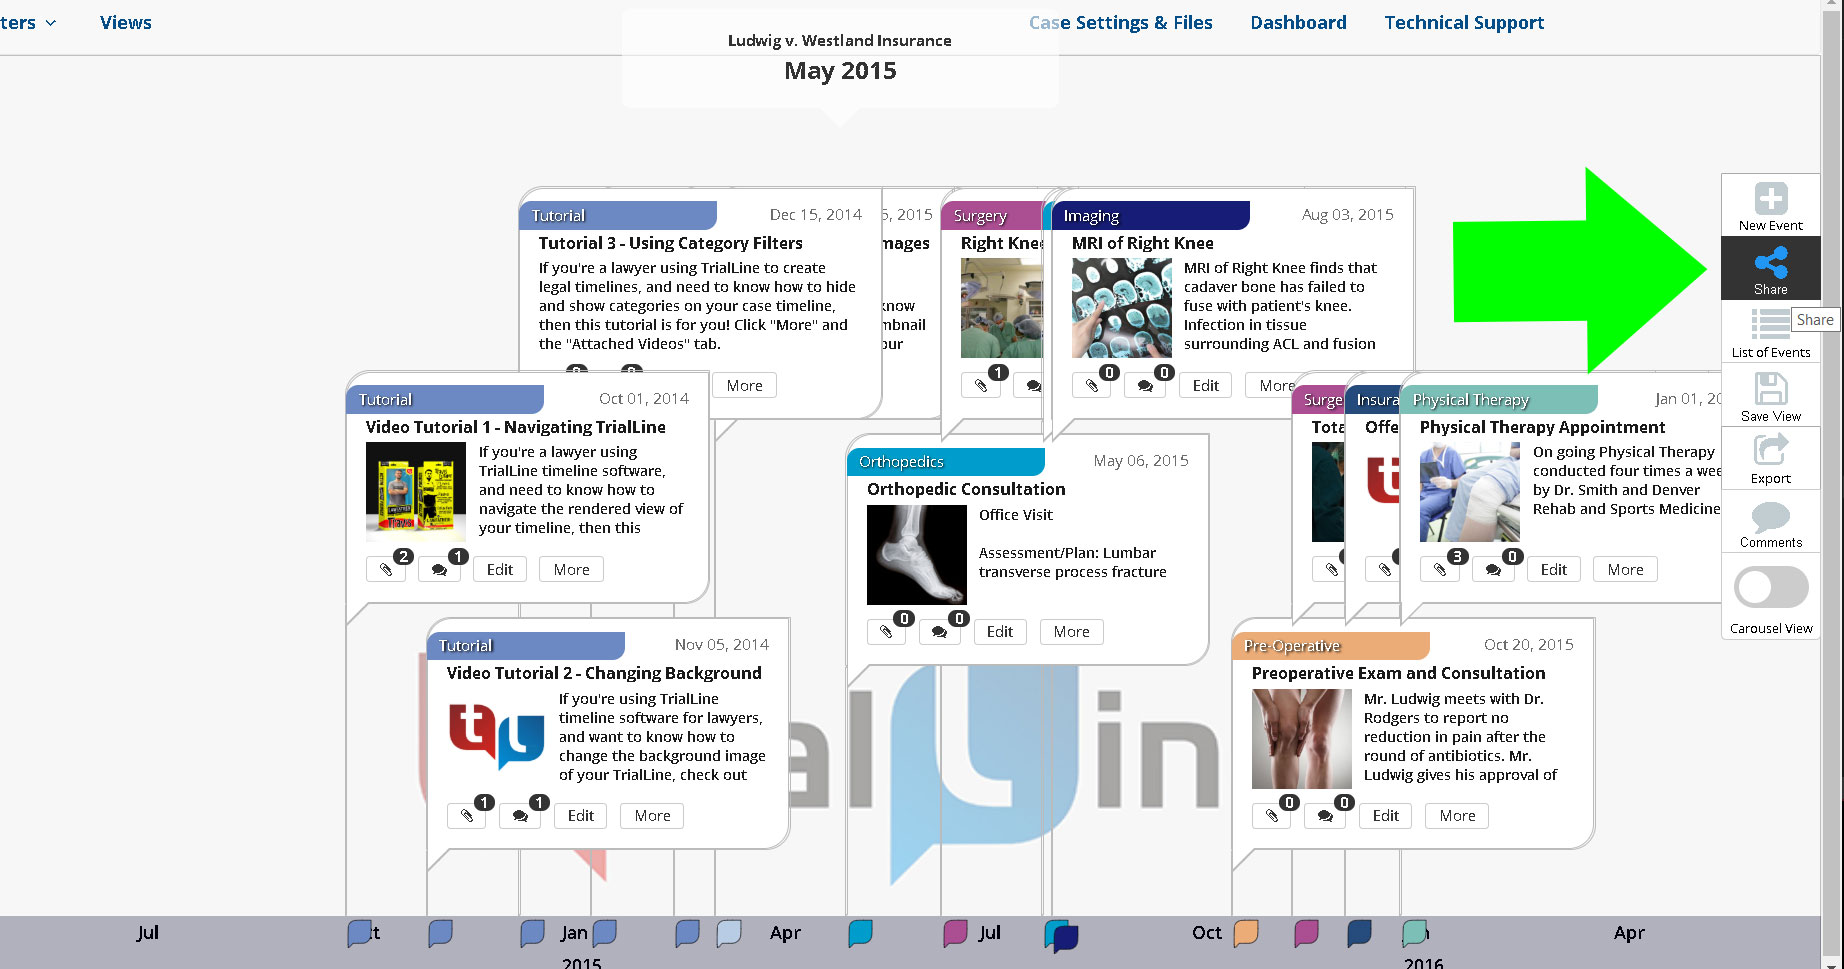
To save a view, first select which events you want to display using the filtering method above, and then click on the ‘Save View’ button in the right hand sidebar:
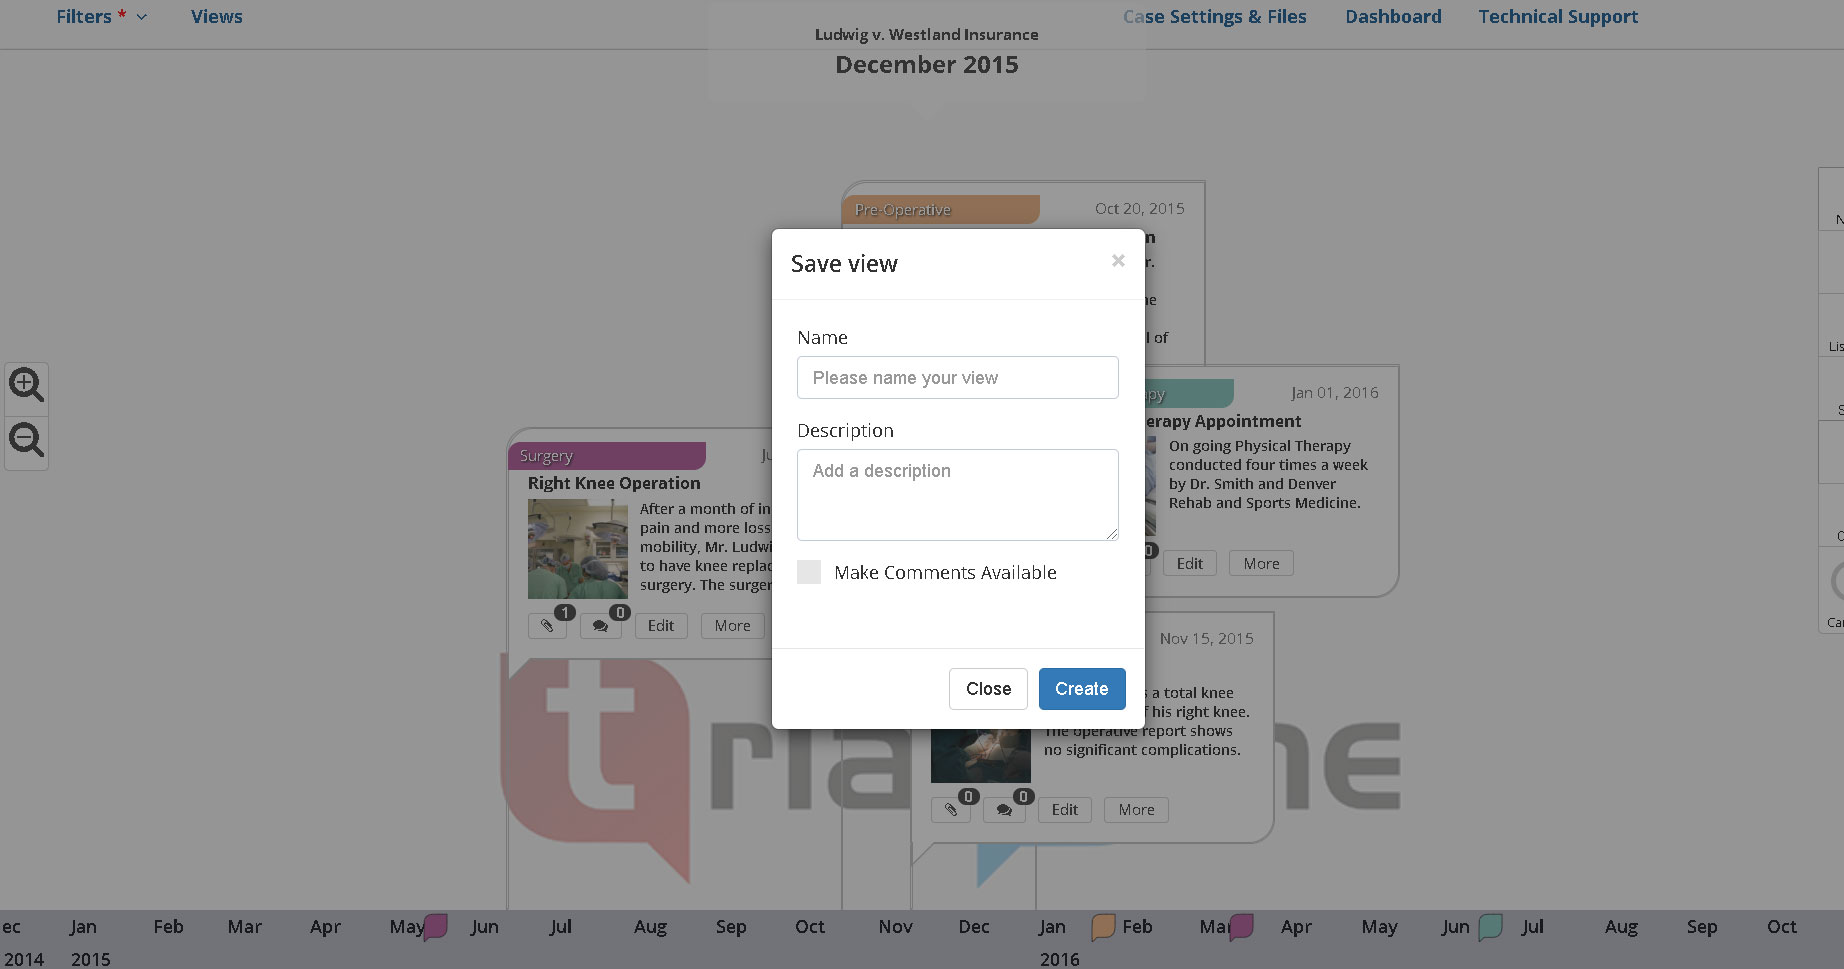
Then give your view a name and a description, click the box determining whether comments will be made available, and click ‘Create’:
All of your saved views can be seen by clicking the ‘Views’ button in the top left hand corner of the ‘Relative View’, next to the ‘Filters’ button:
Displayed will be all of the information for each saved view, along with a link and password you can use to share each view, and iFrame embed information:

If you’d like to share your view directly from the ‘Relative View’ window, click the ‘Share’ button in the right hand sidebar menu:
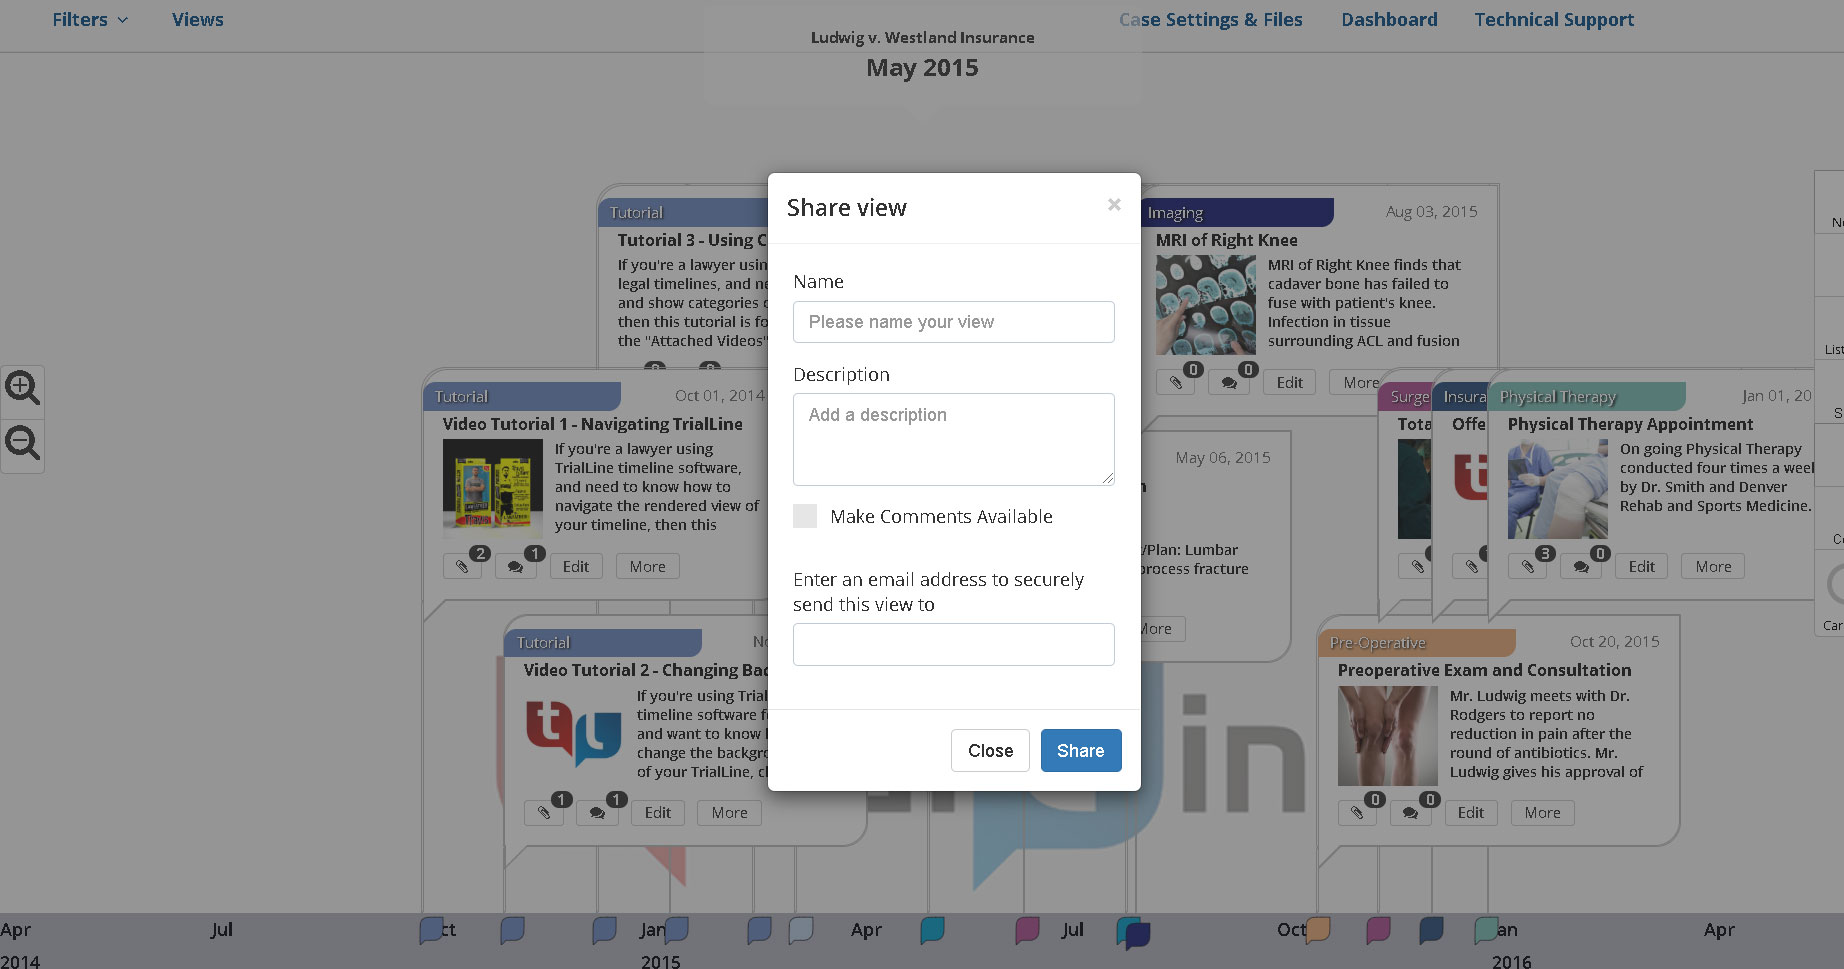
Give your view a name and a description, decide whether you want to make comments available, and enter an email address to send a password protected link of that view to:
That email address will receive an email with a link and a password so that they can securely view your TrialLine directly in their web browser, with only the events available that you want them to see. Note that this view will not have any editing capabilities:
Need More Help? Contact Us Today
![]()
At TrialLine, we’re serious about making sure you have the tools and information you need to make the most of our attorney timeline software. If you ever have any questions or issues, please contact us using the technical support form in your dashboard, and we will answer your questions and resolve your issues as quickly as possible.
“From what I’ve experienced so far, the TrialLine company as a whole has a lot of integrity and vision.” – TrialLine User Lindsay P.