

Once you’ve created a new TrialLine, the next step is to start adding events to it. In this tutorial, we’ll show you how to create new events, explain what information can be included in each event, and also show you how to attach files and supporting documents directly to your events.
Creating New Events
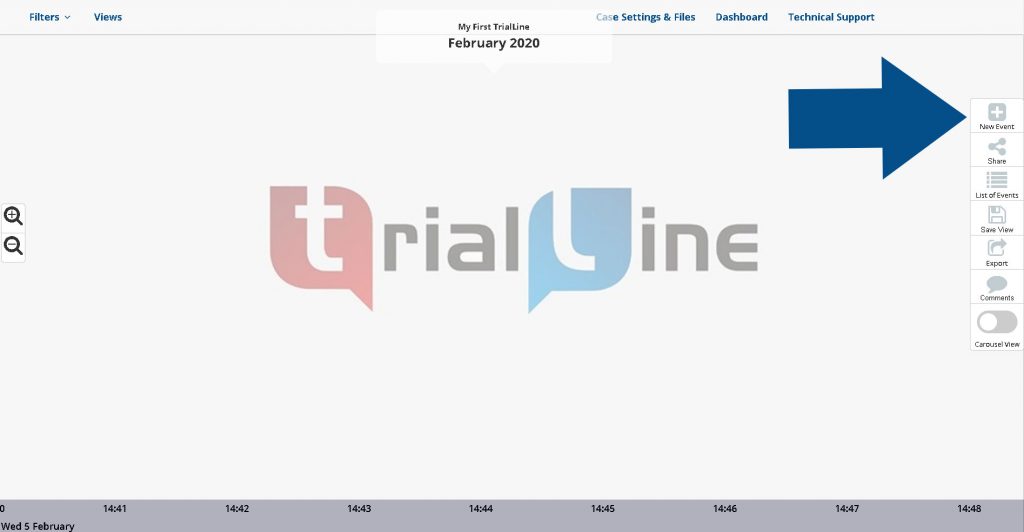
There are two places where you can choose to start adding events. The first is in the rendered view, using the ‘New Event’ button in the sidebar menu on the right side of the screen:

The other is from the ‘List View’, using the ‘New Event’ button that is to the very left of the menu:

The Event Editor Window
Clicking the ‘New Event’ button in either place will open the ‘Event Editor Window’, and this is where you’ll add all of the relevant information for your event, and attach documents. The event editor window has four different tabs where you can provide information:
General
The ‘General’ tab is where you’ll enter in the basic information for your event. Fields that have an asterix next to them are required fields, so please be aware that you must enter in a ‘Title’, ‘Start Date’ and ‘Category’ for your event, otherwise it will not display in your TrialLine.
You can also choose to add an end date, times, assign a category by choosing from existing categories, or by creating a new category, list bates and exhibit numbers, and also choose whether or not you want to display a thumbnail for the event, and even upload custom thumbnails. For best results, we recommend that your custom thumbnail images be at least 200 x 200 pixels:

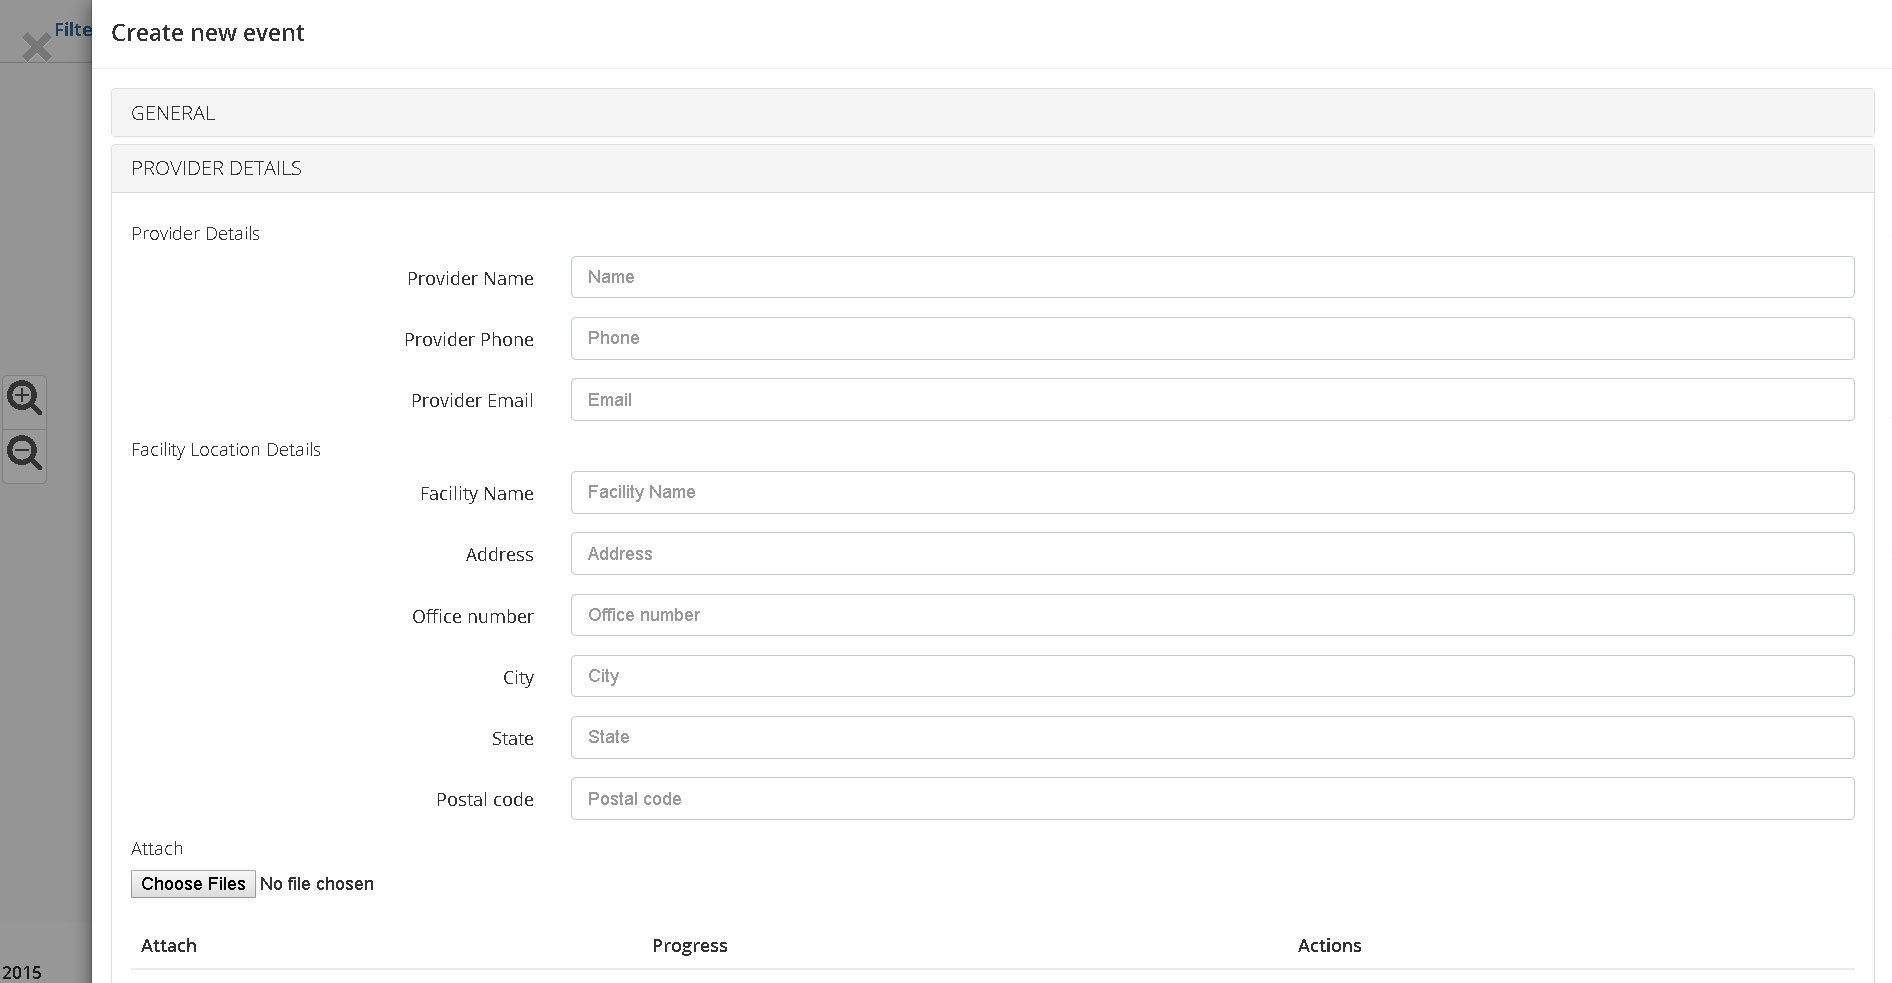
Provider Details
The ‘Provider Details’ tab allows you to enter in medical provider details including facility name, address and contact information, as well as provider specific information. You can also attach medical records and other files here:
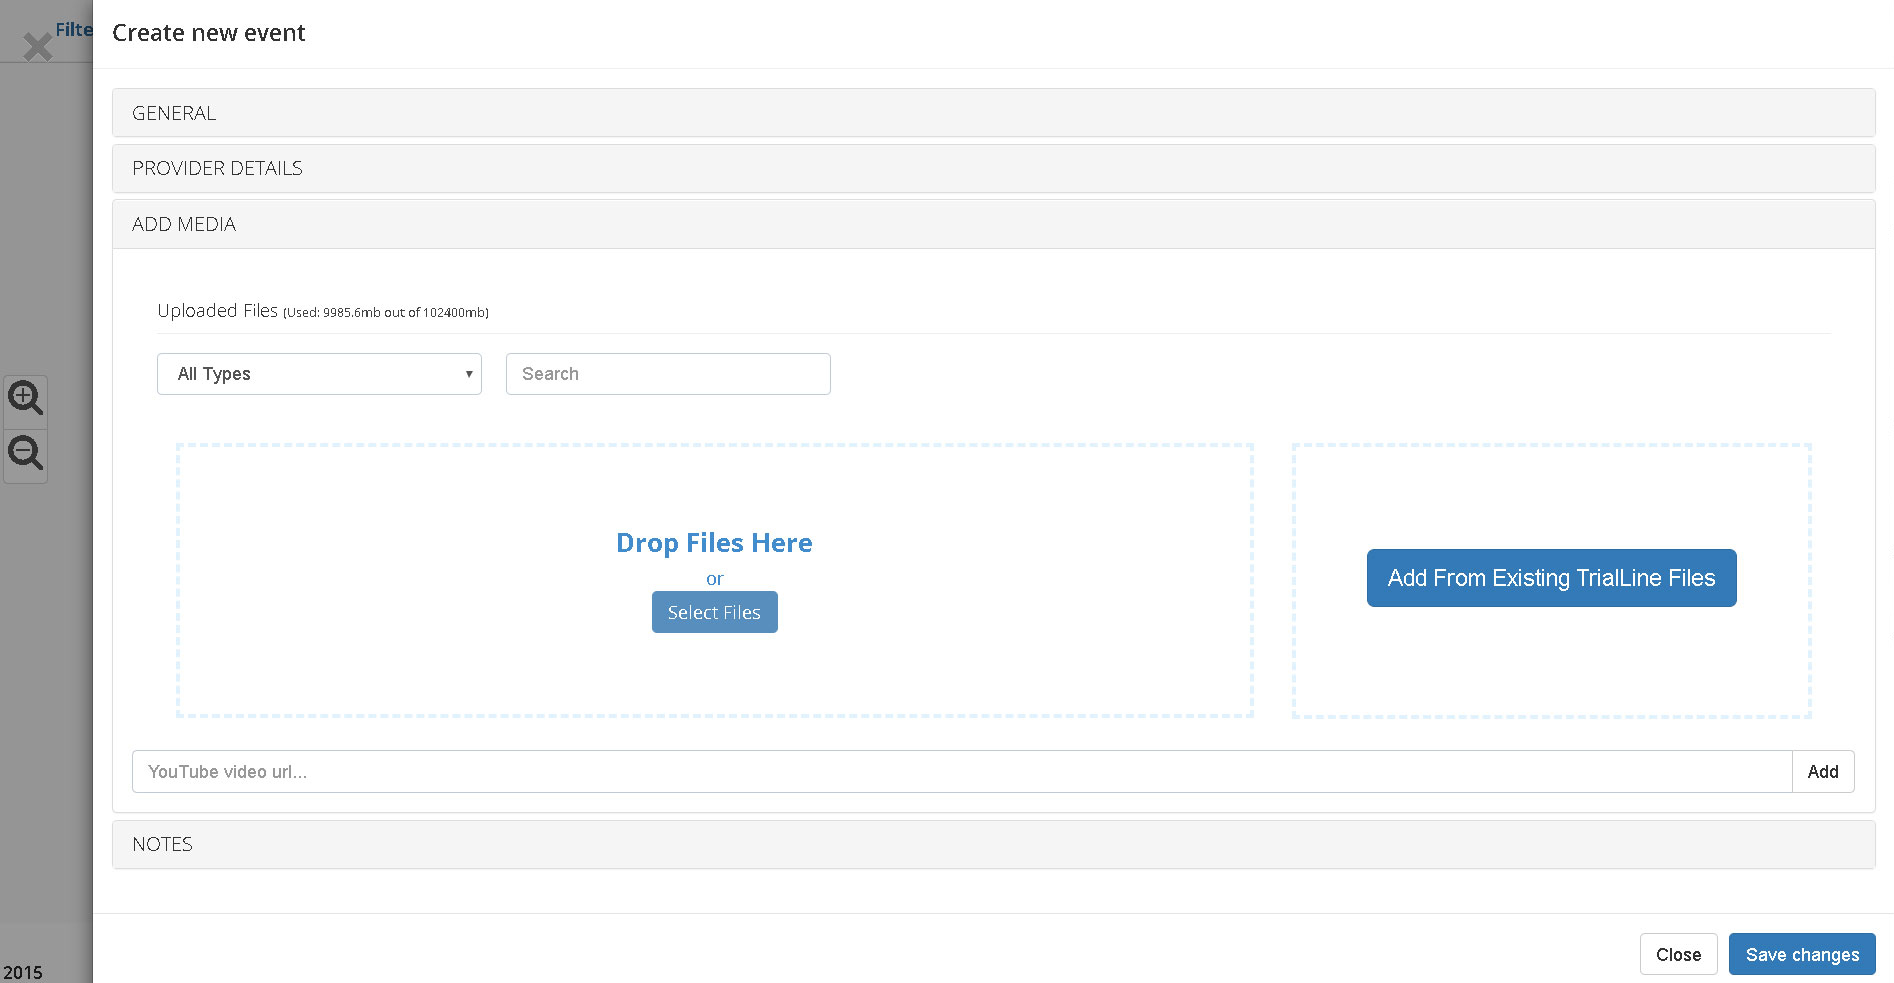
Add Media
The ‘Add Media’ tab is where you’ll add supporting documents and other files directly to a specific event (Learn more about adding video, images and files to your TrialLine here). You can drag and drop files in, select them from your computer or choose from existing files stored in your company or case file library. TrialLine supports all common file types, even video and image files. You can also link to a YouTube video here as well:
Notes
The ‘Notes’ section allows you to add additional information, be it notes to yourself or others, or information that you don’t want to include in the description, for whatever reason:

Please be aware that notes will not be visible in shared or saved views, only in the standard rendered view.
Once you have added all of the relevant information, click the ‘Save changes’ button at the bottom of the window, and your event will now be displayed on your TrialLine:

You can also choose to populate the events on your TrialLine by uploading the event data from a spreadsheet. Here is a helpful tutorial that will show you how: Importing TrialLine Events From a Spreadsheet
Previous tutorial: How to Zoom In and Out of Your TrialLine
Need More Help? Contact Us Today
![]()
At TrialLine, we’re serious about making sure you have the tools and information you need, to make the most of our attorney timeline software. If you ever have any questions or issues, please contact us using the technical support form in your dashboard, and we will answer your questions and resolve your issues as quickly as possible.
“From what I’ve experienced so far, the TrialLine company as a whole has a lot of integrity and vision.” – TrialLine User Lindsay P.