

TrialLine was designed to be extremely intuitive. If you have any experience at all using modern apps or websites, you’ll find TrialLine very easy to use. To help you get comfortable using TrialLine as quickly as possible, we’ve created this guide that will show you how to navigate in TrialLine, and what different parts of the dashboard enable you to do.
My Dashboard
When you first log into your TrialLine account, you’ll be taken to the main dashboard where you’ll see a list of all of the TrialLines you’ve created, and be able to view, edit, delete or archive them. This is also where you’ll create new TrialLines as well:
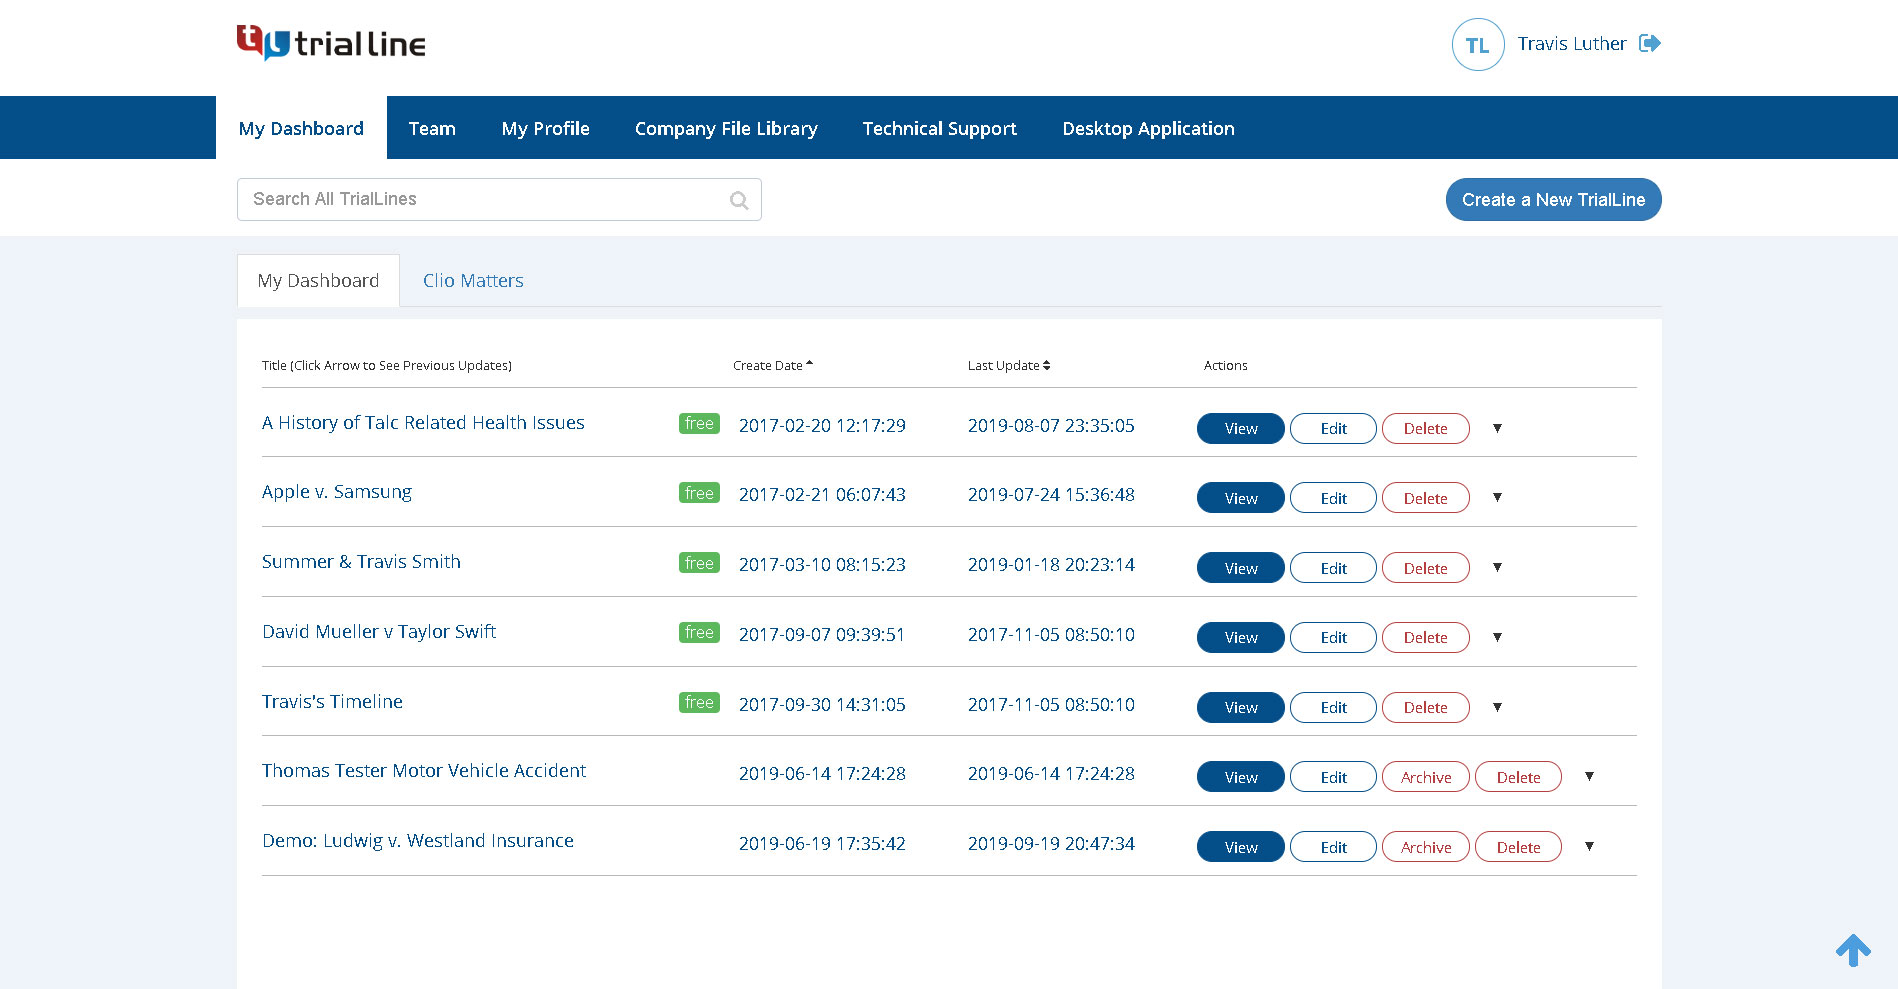
Clio Matters
Next to ‘My Dashboard’ you’ll see a ‘Clio Matters’ option. Clio users can use TrialLine to make visual legal case timelines for their matters (click here to learn how to connect your Clio account to TrialLine). After connecting the accounts, Clio users will see listed all of their open Clio matters that are available for importing into TrialLine, along with links to helpful tutorials:

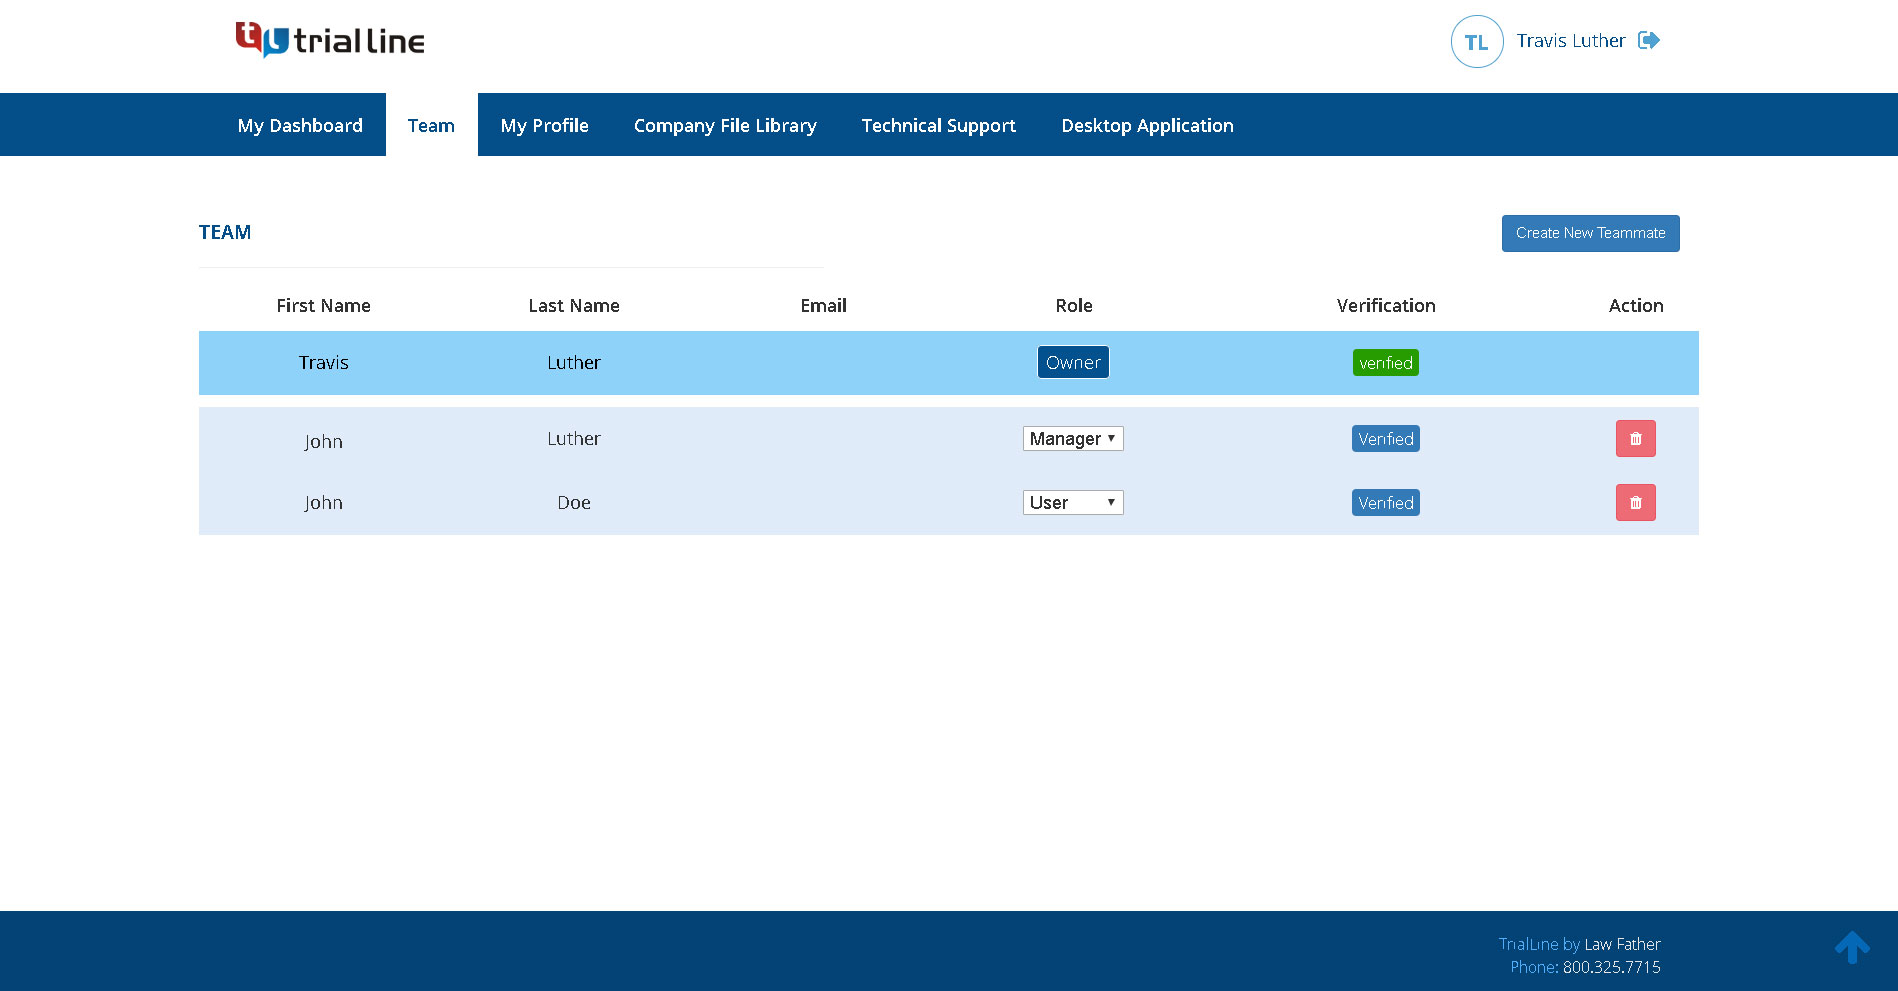
Team
Next to the ‘My Dashboard’ tab in the main navigation menu, you’ll see the ‘Team’ tab. On this page you’ll be able to see all of the team members you have added to your account (click here to learn more about working with team members), whether or not they’ve verified their account, which roles they have (‘Manager’ or ‘User’ – you can also change role assignments here), and lastly, you can add new team members, or delete old team members that you no longer want to have access:
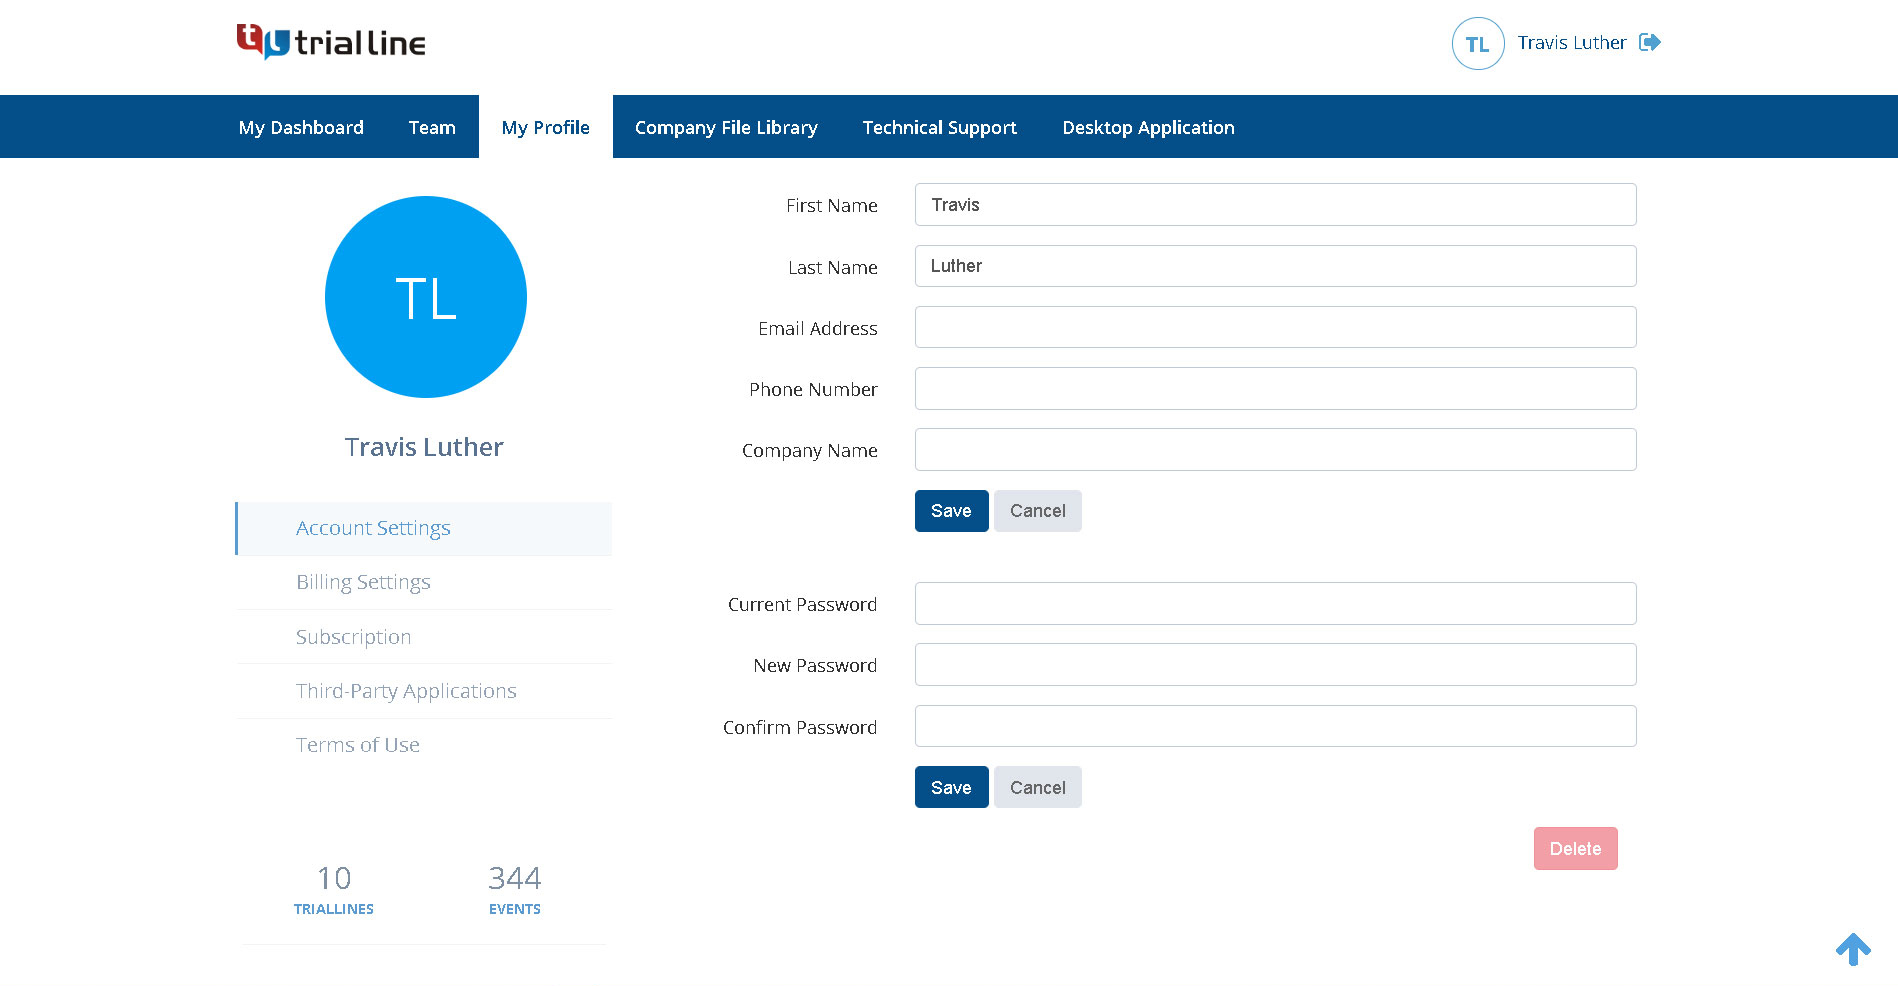
My Profile
The next tab over is the ‘My Profile’ tab where you’ll find:
Account Settings
Update your contact information and password here:
Billing Settings
Add or update the credit card you have on file, and download billing reports for your individual TrialLines here: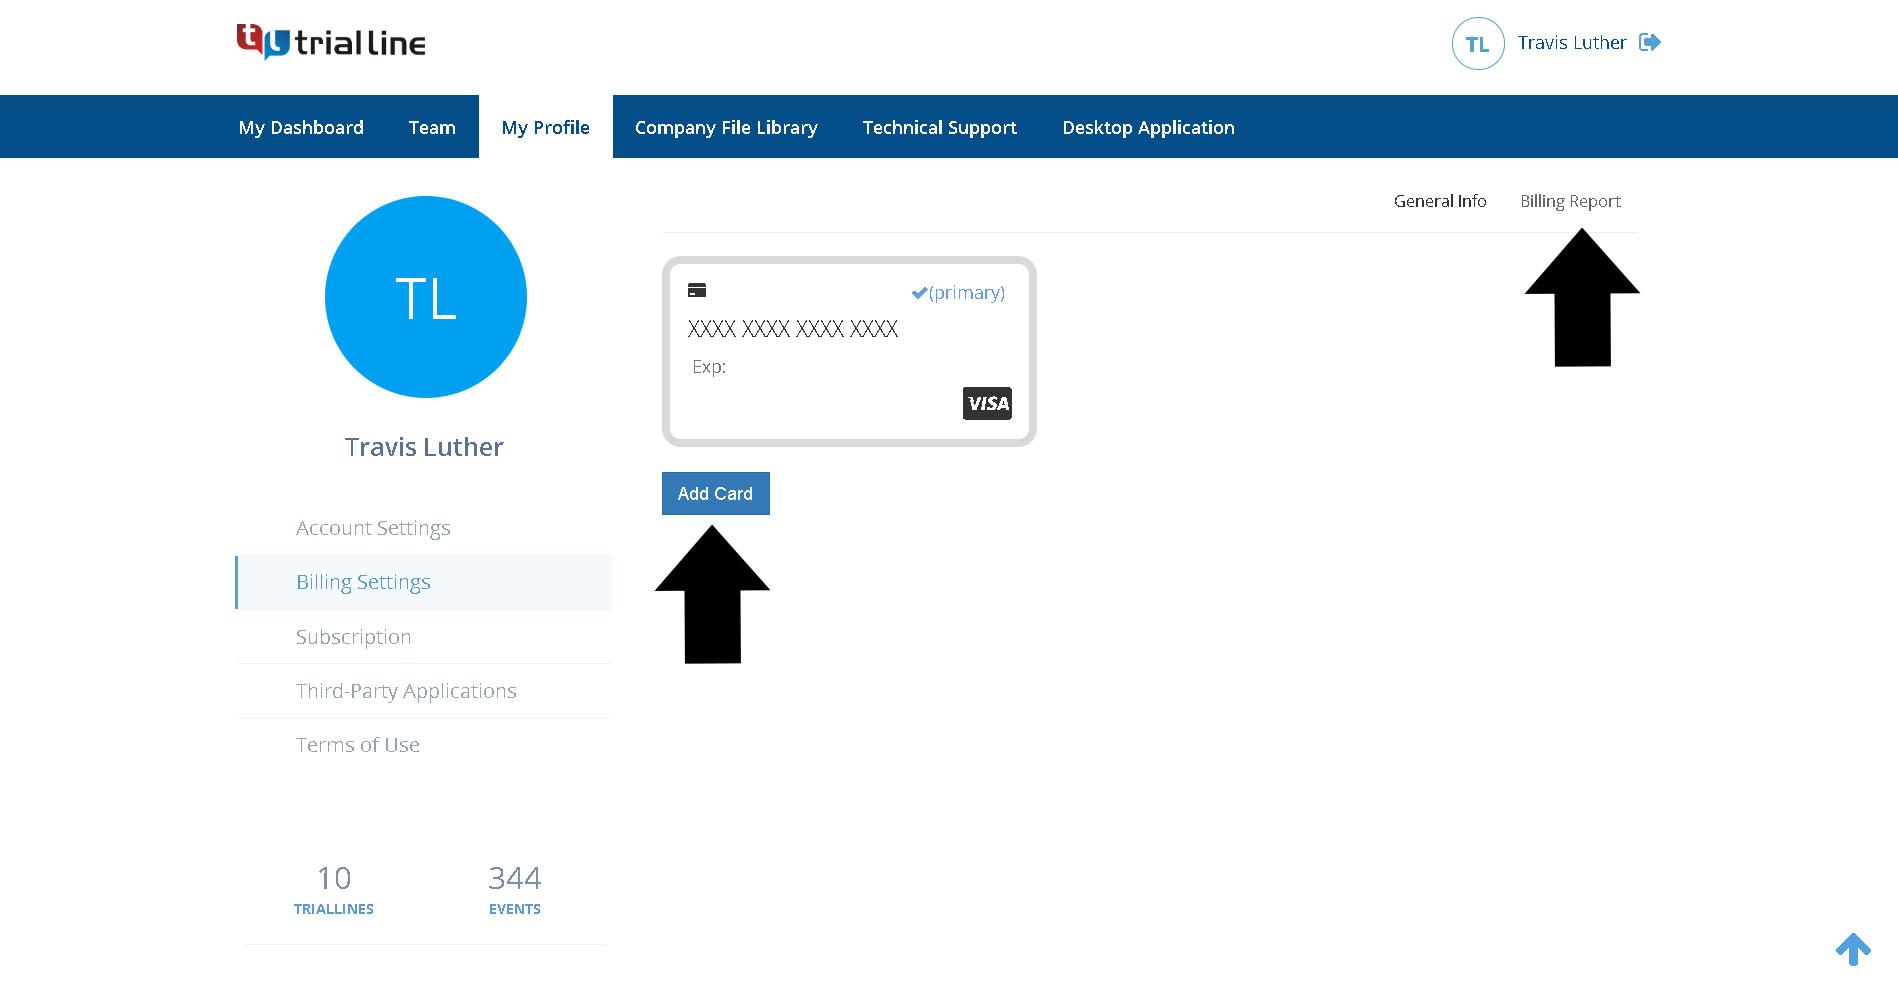
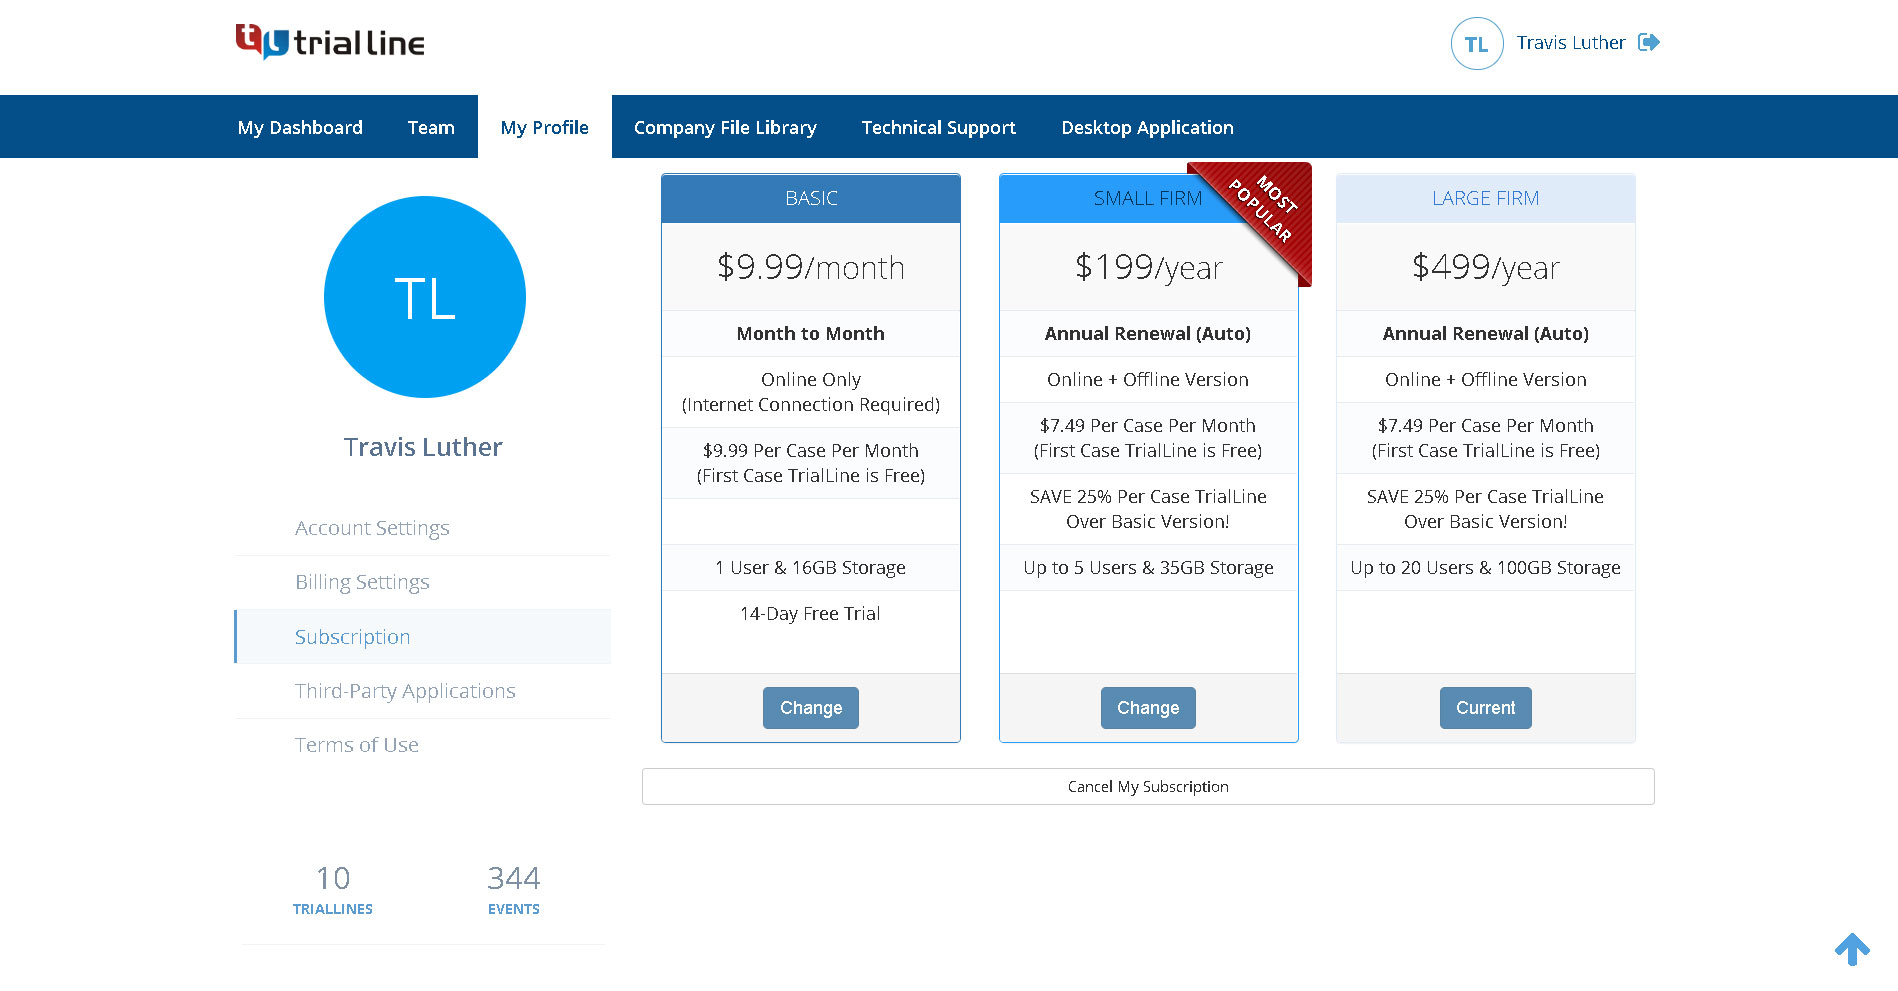
Subscription
See what subscription plan you currently have, and upgrade or change your subscription here:
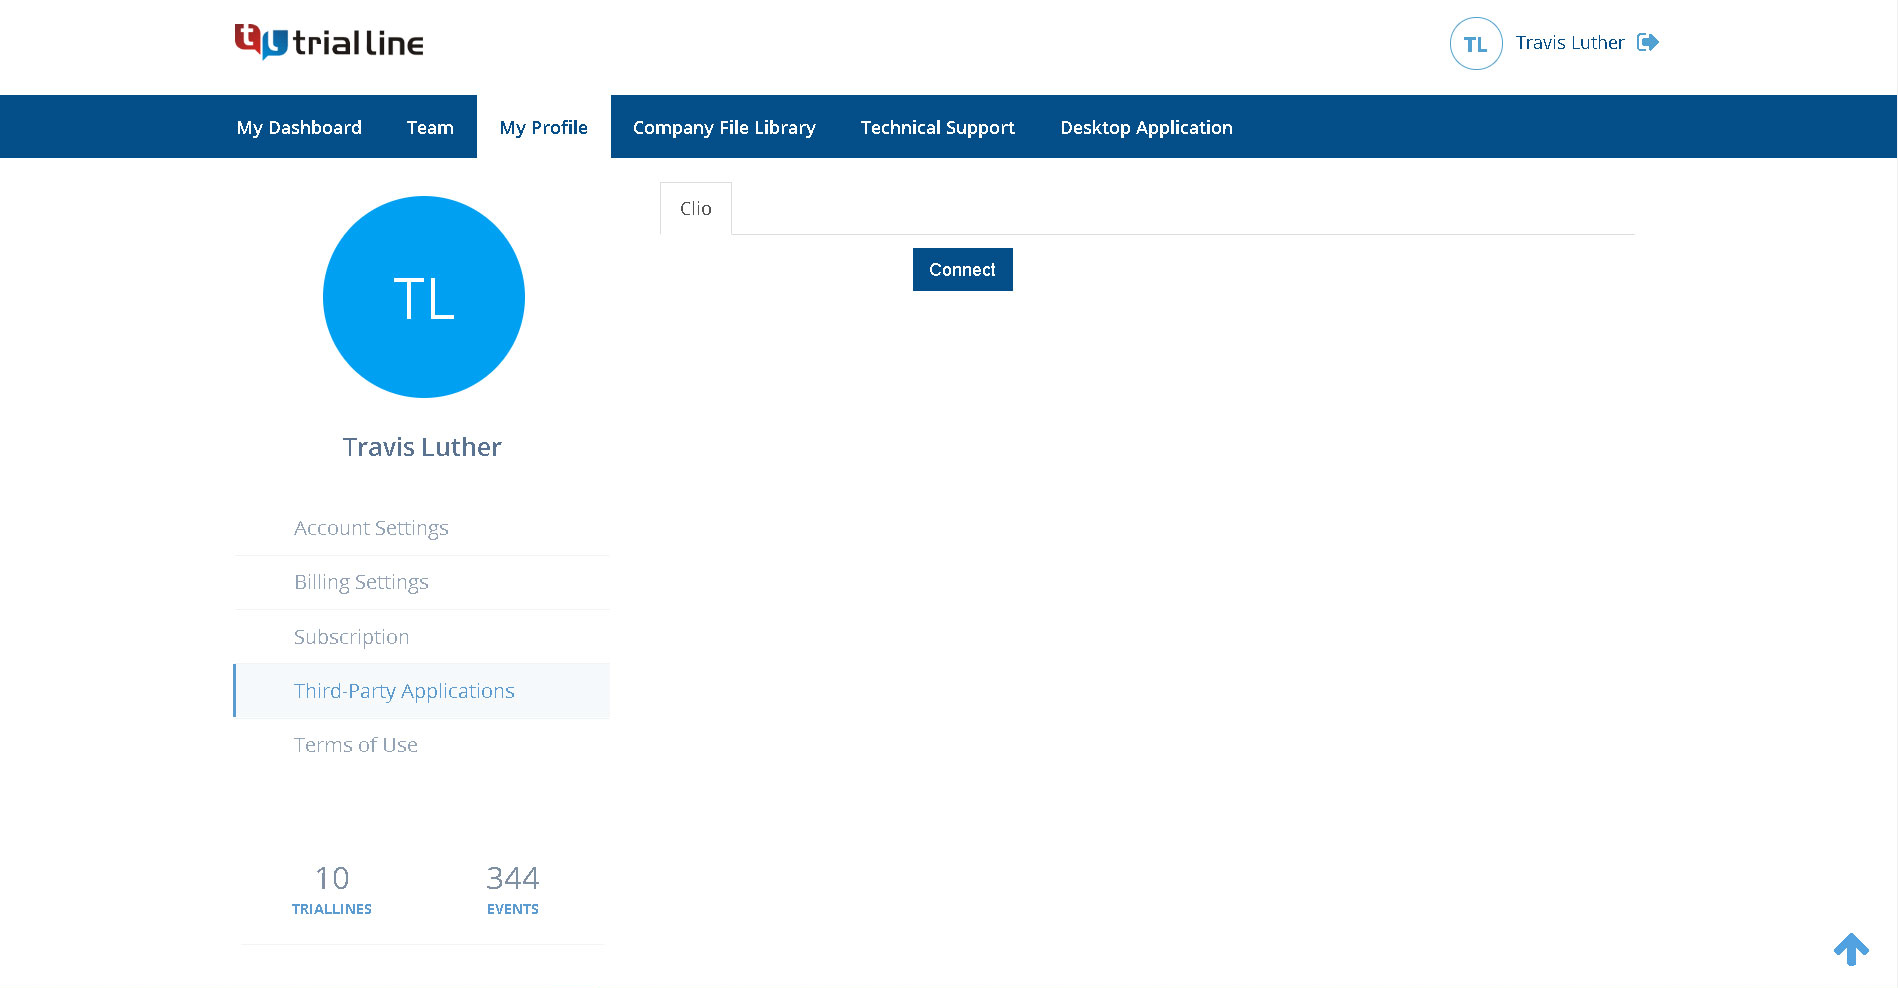
Third-Party Applications
Connect your account to Clio and future third-party applications that TrialLine will develop here:
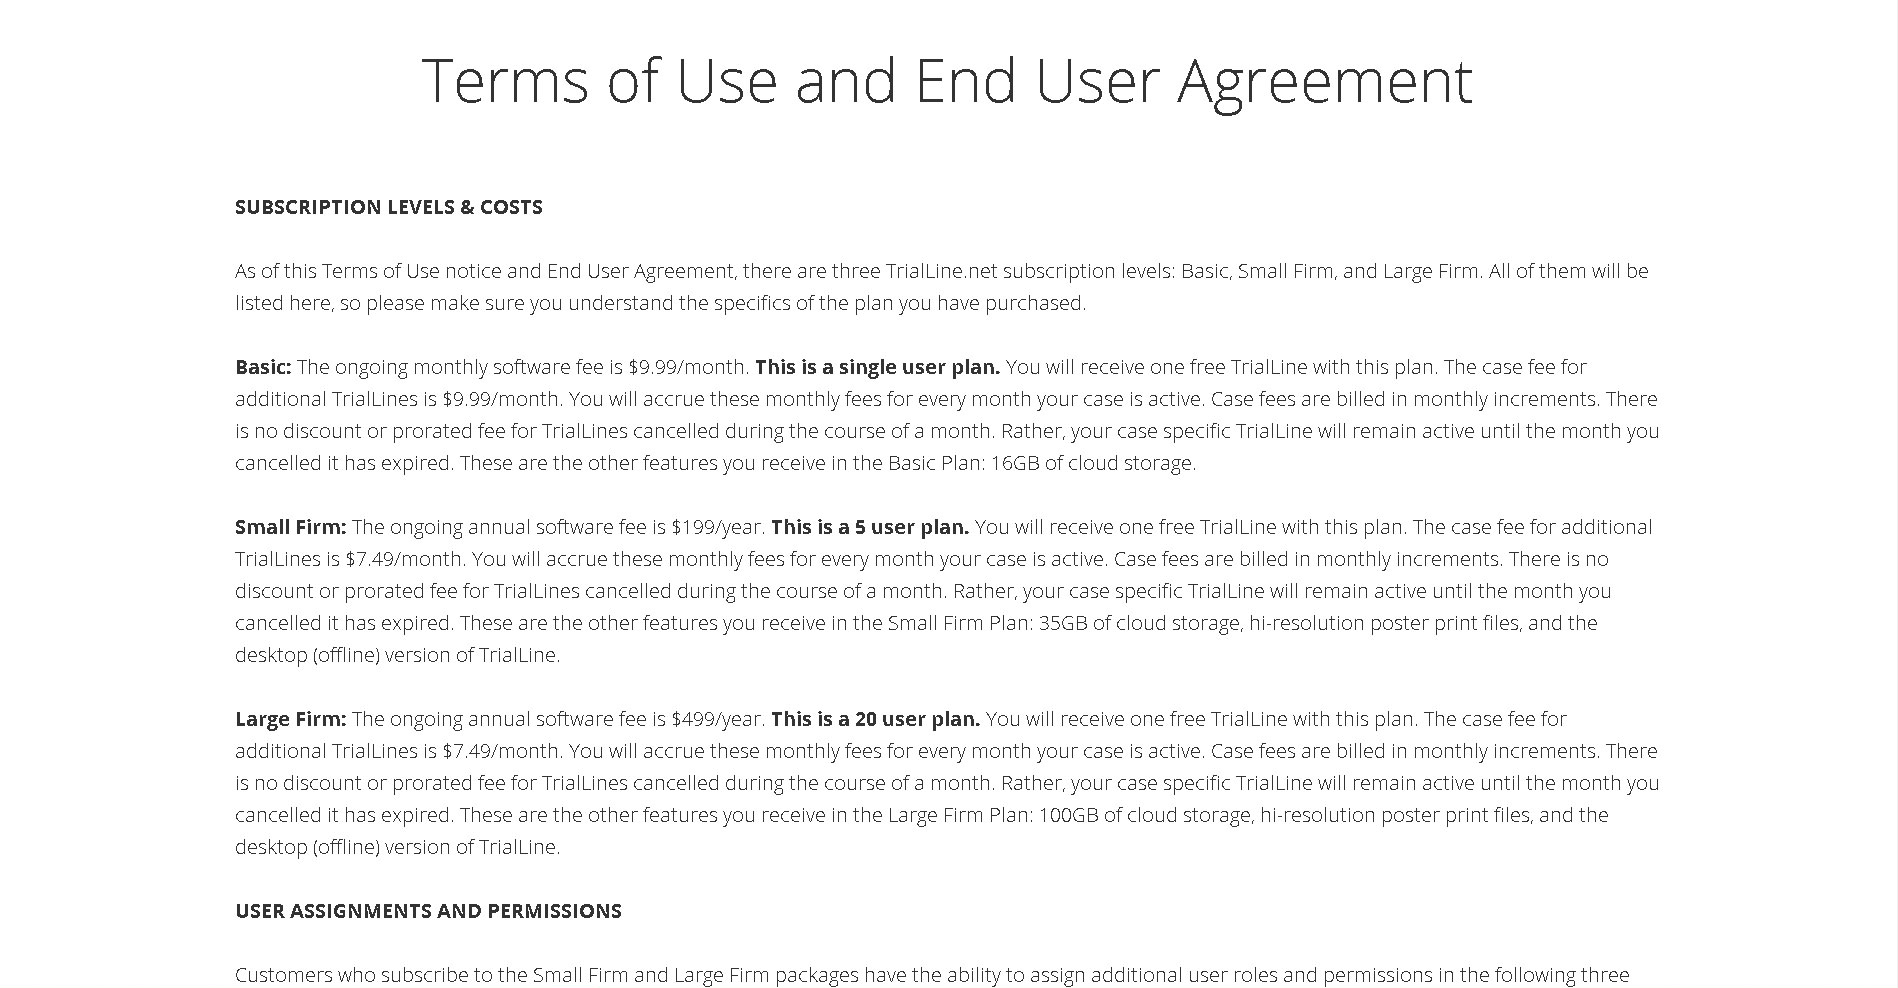
Terms of Use
Click ‘Terms of Use’ under ‘Third-Party Applications’ to see the TrialLine terms of use, and find more information about data storage, privacy protections, subscription information and more:
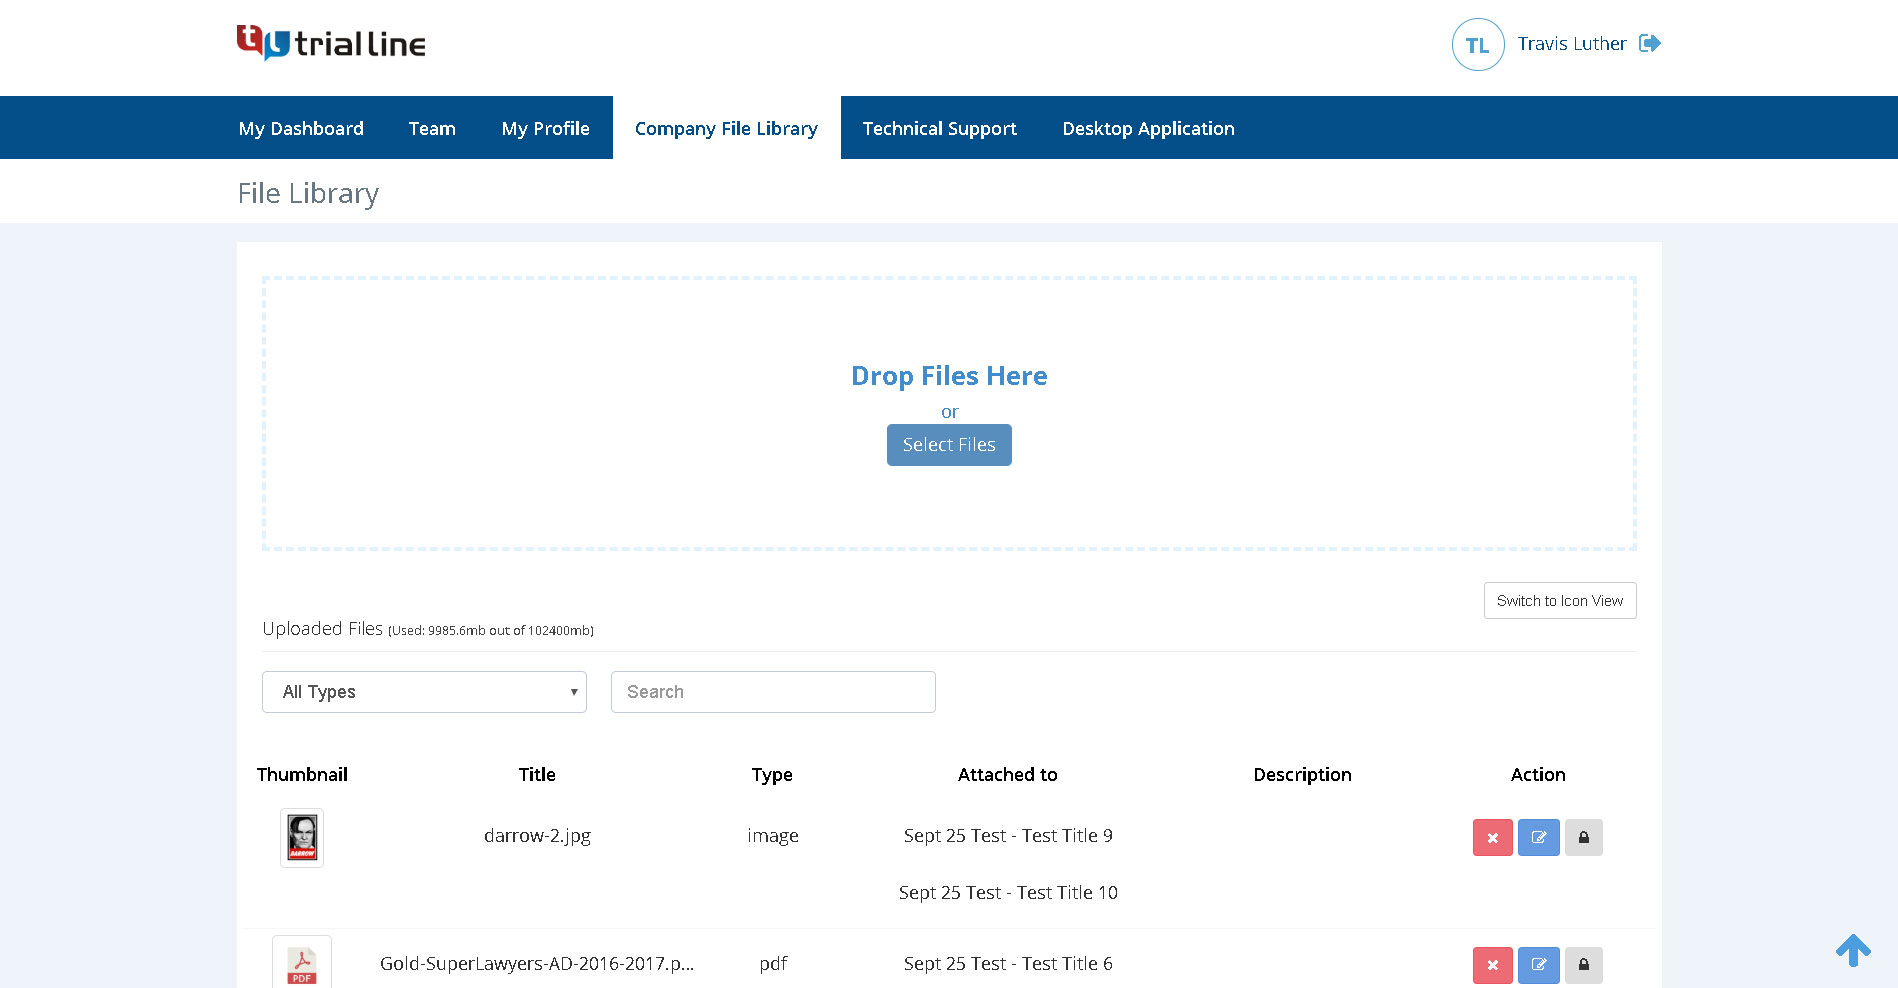
Company File Library
Next to the ‘My Profile’ tab in the main navigation menu, you’ll find the ‘Company File Library’, which is where you will store files that will be used on multiple TrialLines. Contrast this file library to the ‘Case File Library’, where you will store files specific to a single TrialLine and that TrialLine only. Here you’ll see the different files in this library, their file type, what TrialLines they’re attached to, file descriptions, and will be able to delete, edit and hide files as needed:
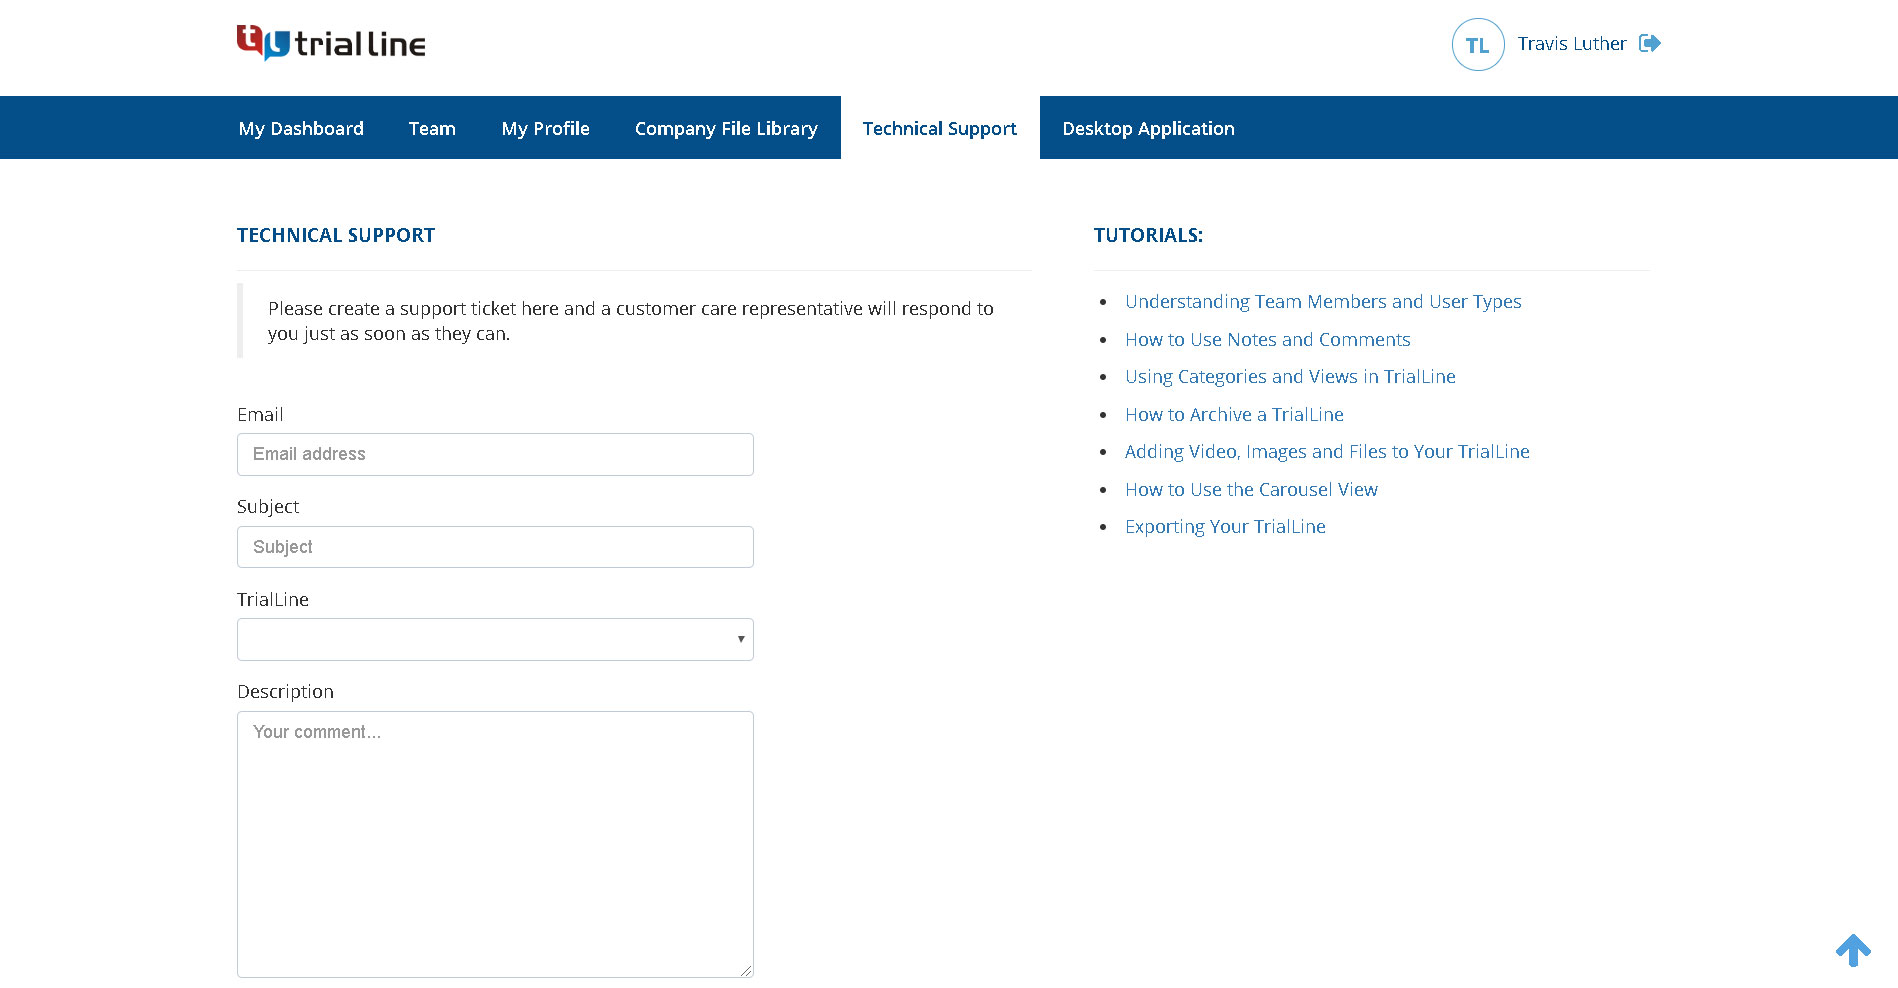
Technical Support
On the next tab over you’ll see a contact form you can use to create a support ticket that will be responded to by our customer care team, and also links to a number of helpful tutorials that will help you get comfortable using TrialLine:
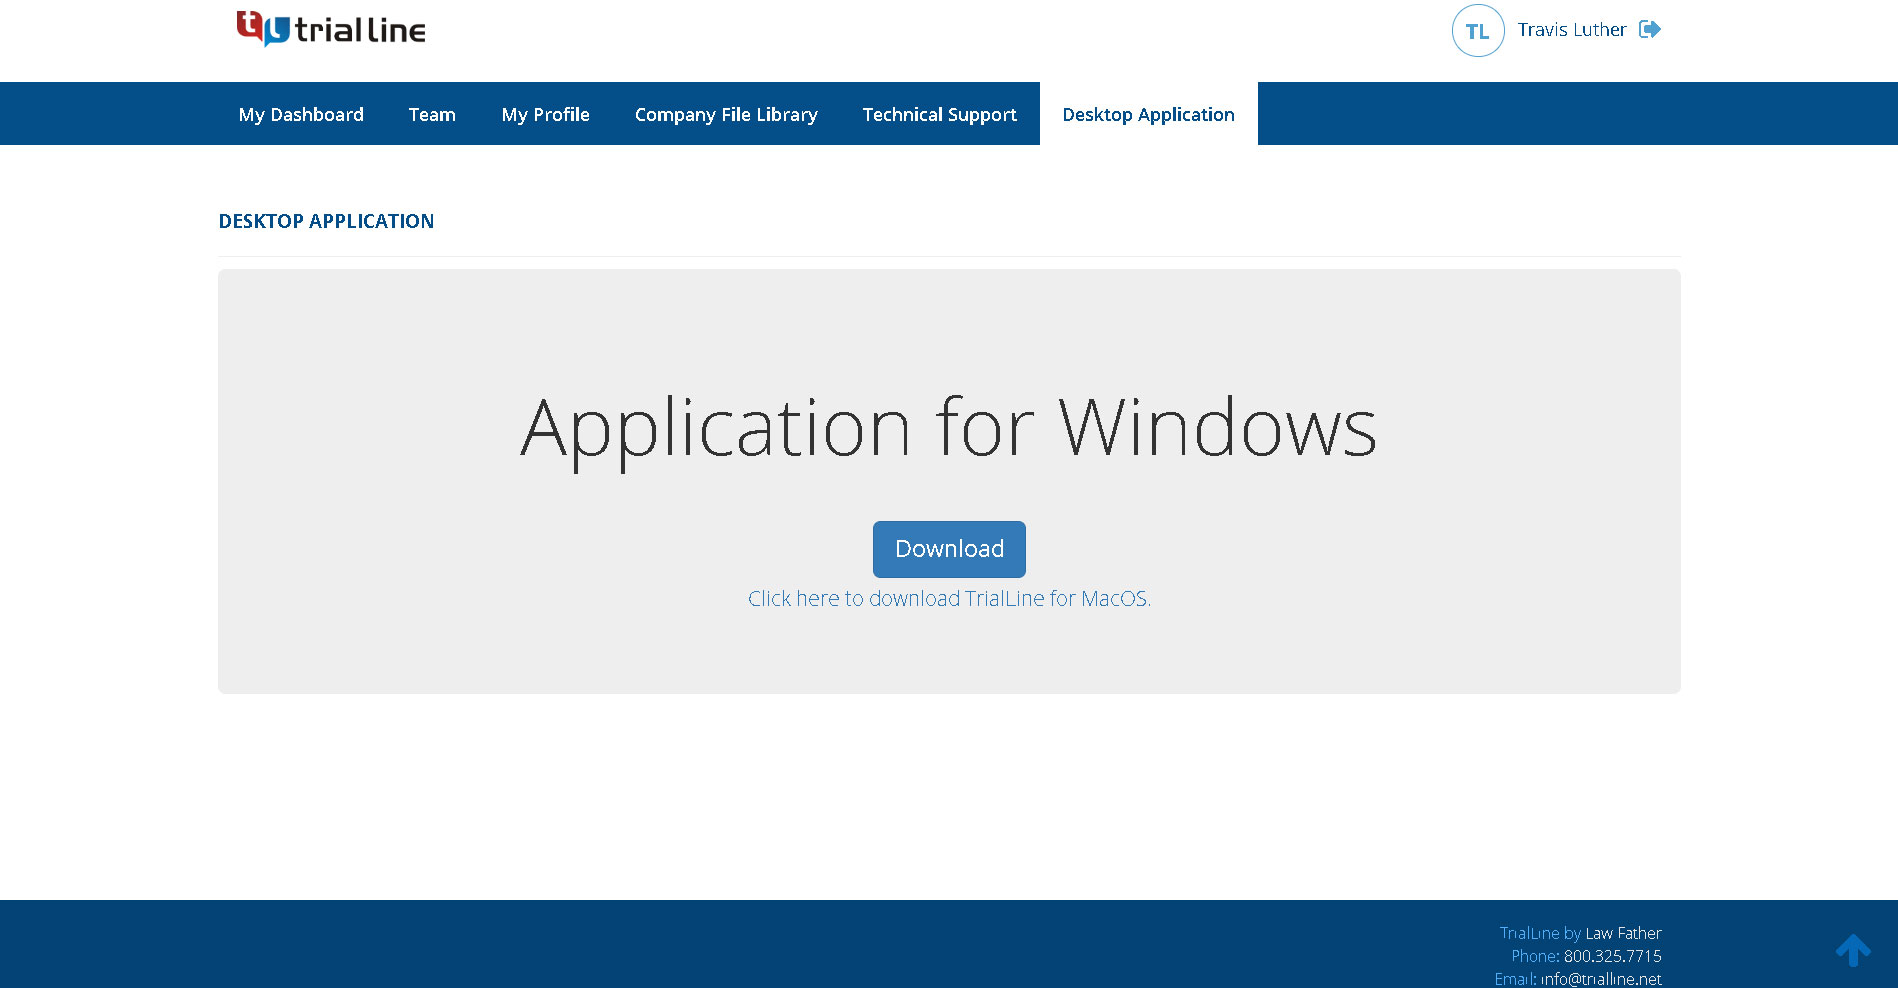
Desktop Application
The final tab in the main navigation menu is the ‘Desktop Application’. Here you can download a local desktop version of TrialLine that you can use to display your TrialLines when you are in a situation where you don’t have internet access. Please note, all changes and updates to TrialLine must be made in the online application, and then downloaded to the offline desktop version on your local computer. At this time, the desktop application is for display purposes only:
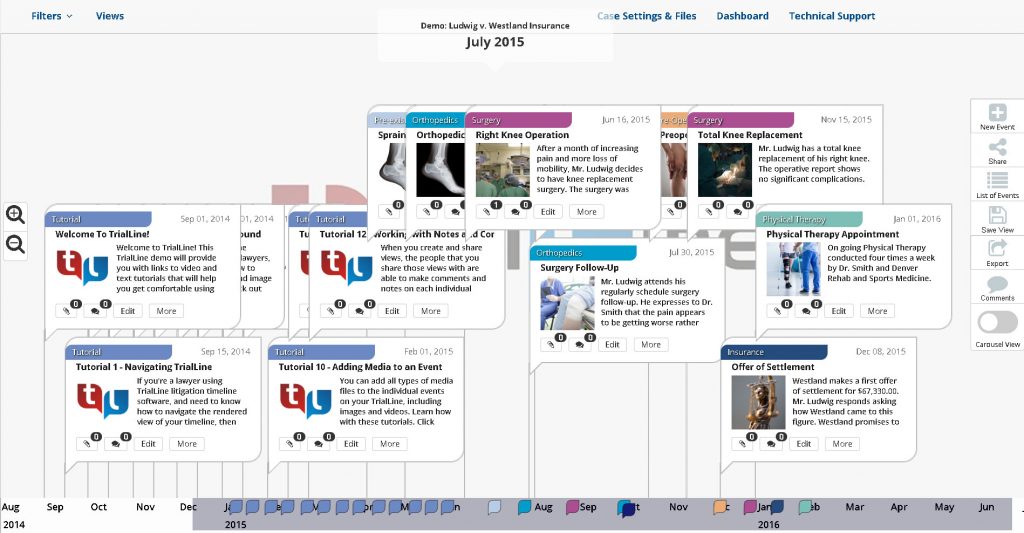
The Rendered View
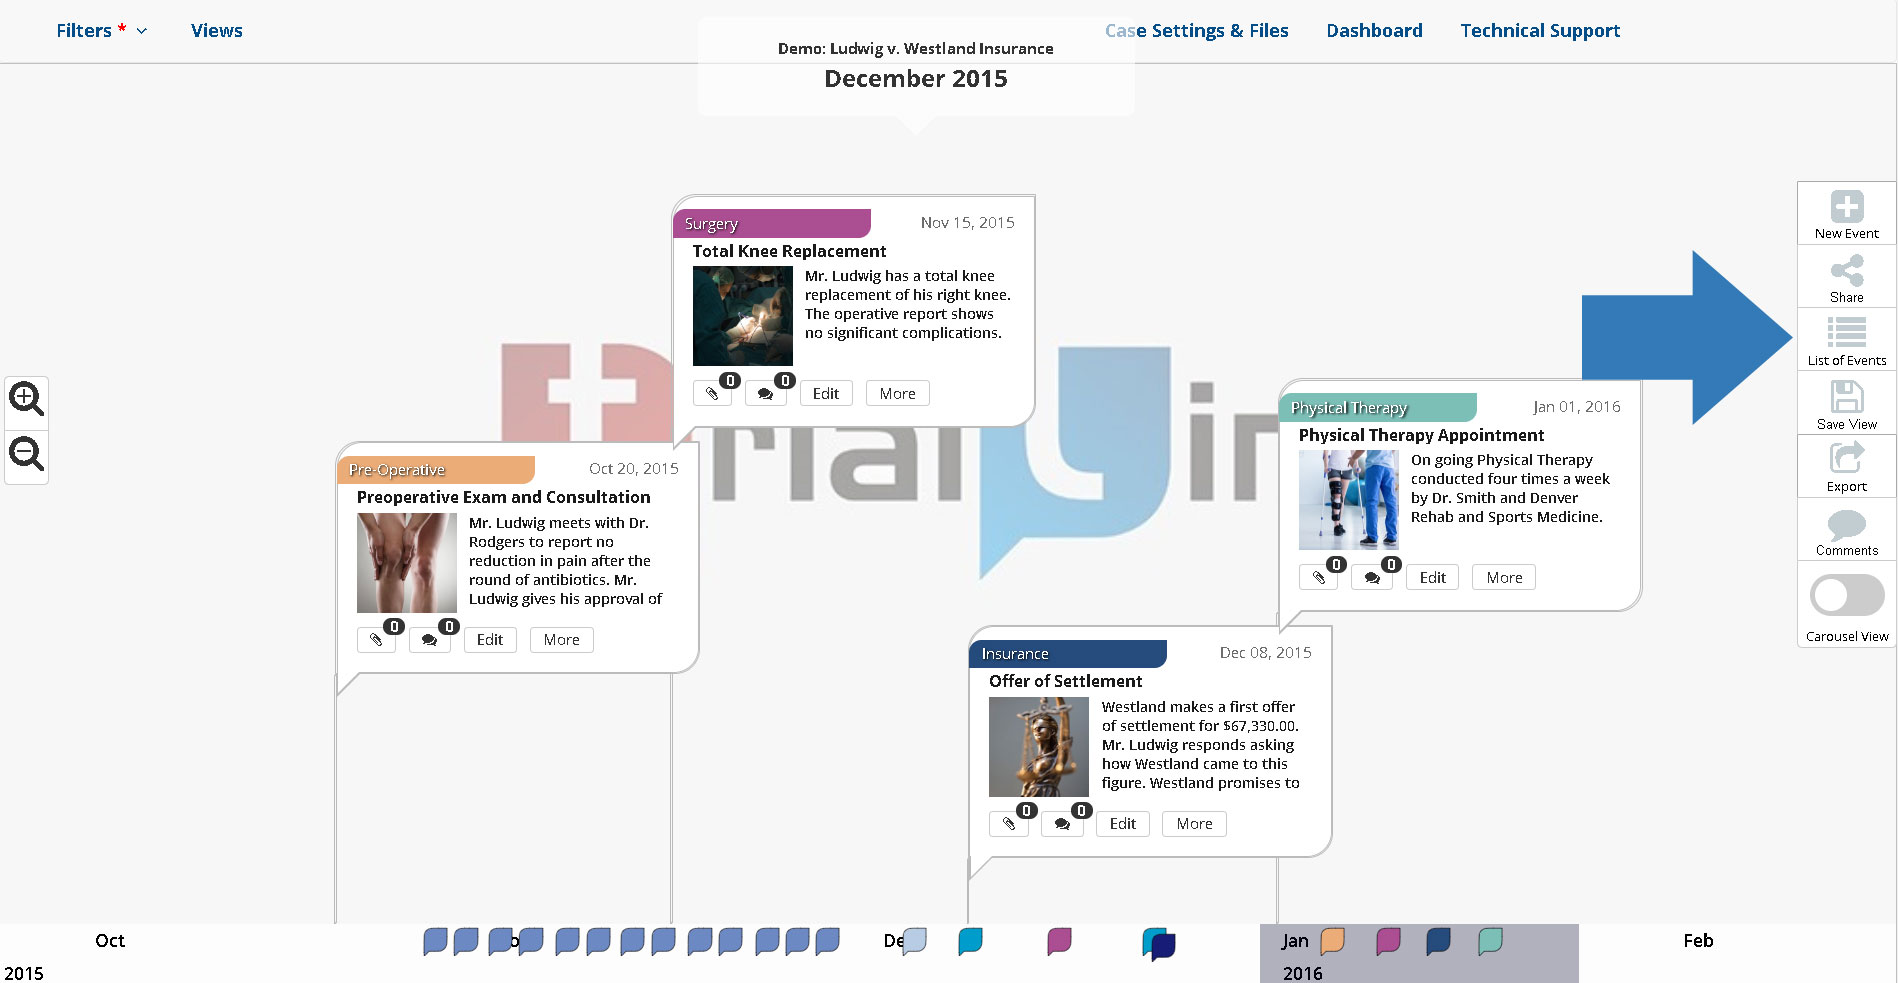
Once you click the ‘View’ button for a specific TrialLine from your dashboard, you’ll be taken to what is called the ‘Rendered View’. This view shows the events on your TrialLine relative to each other along the timeline based on when the events occurred:

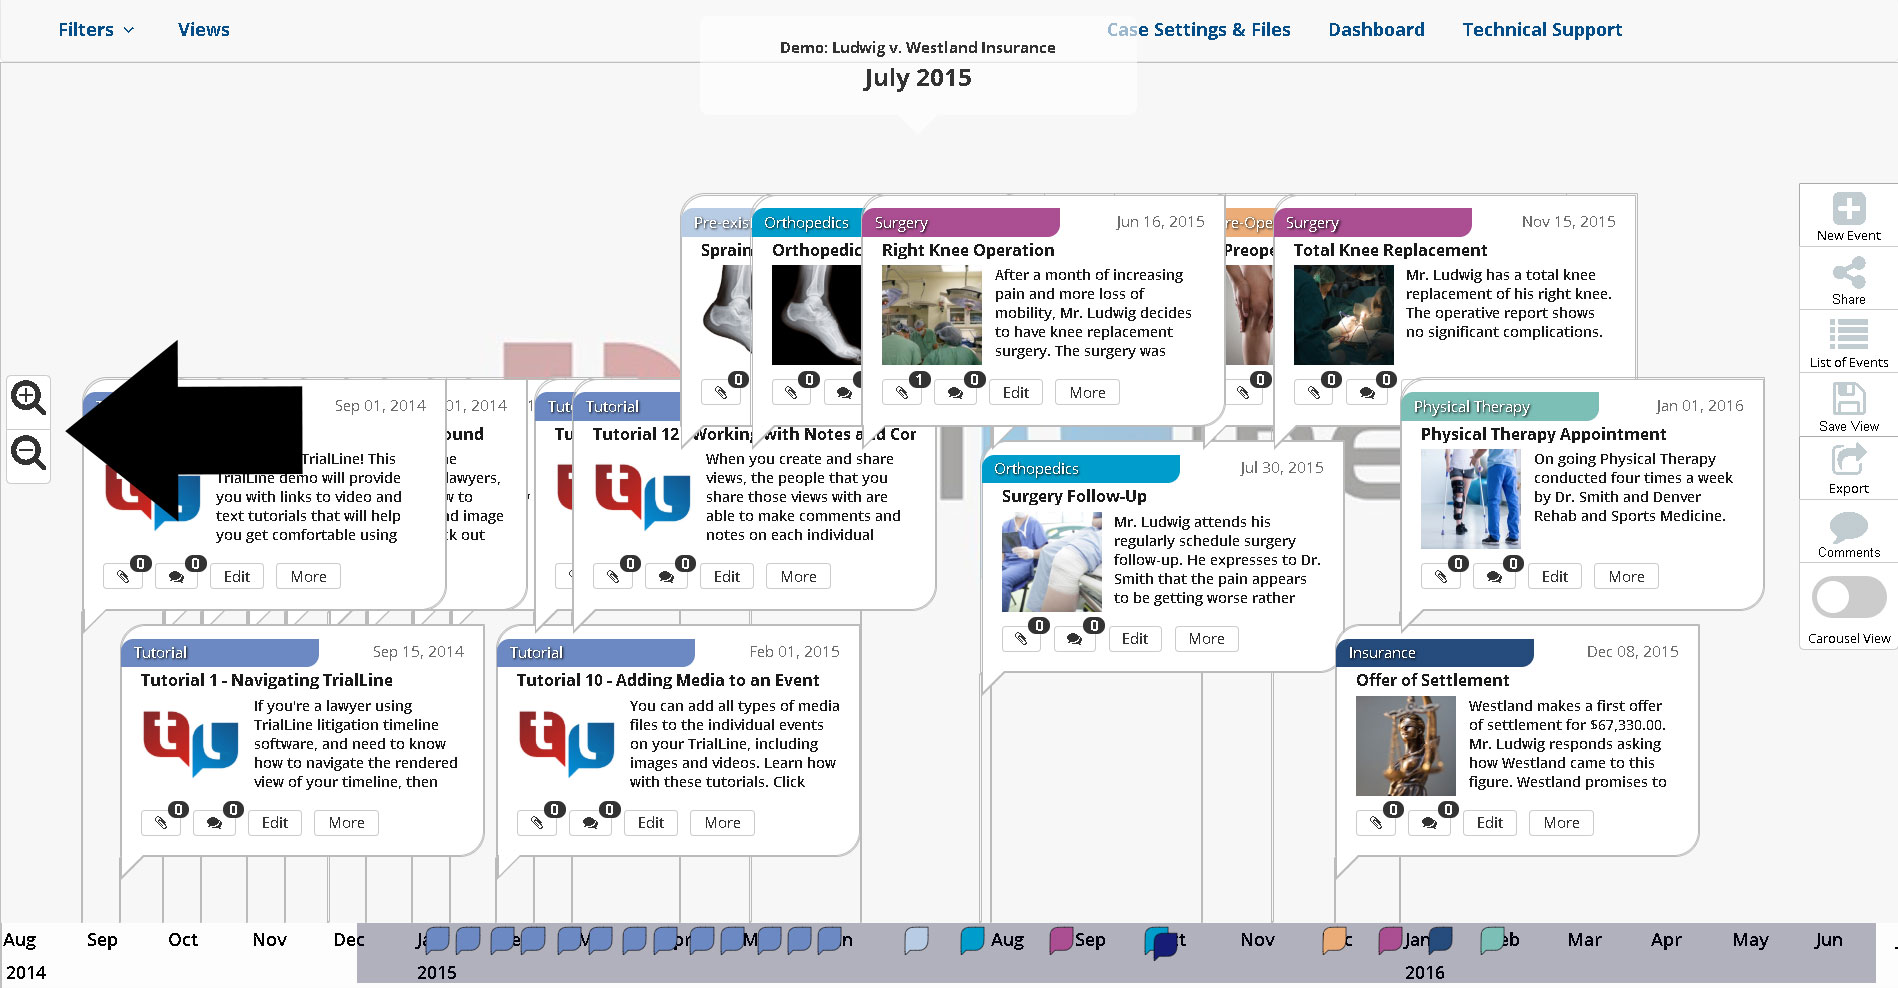
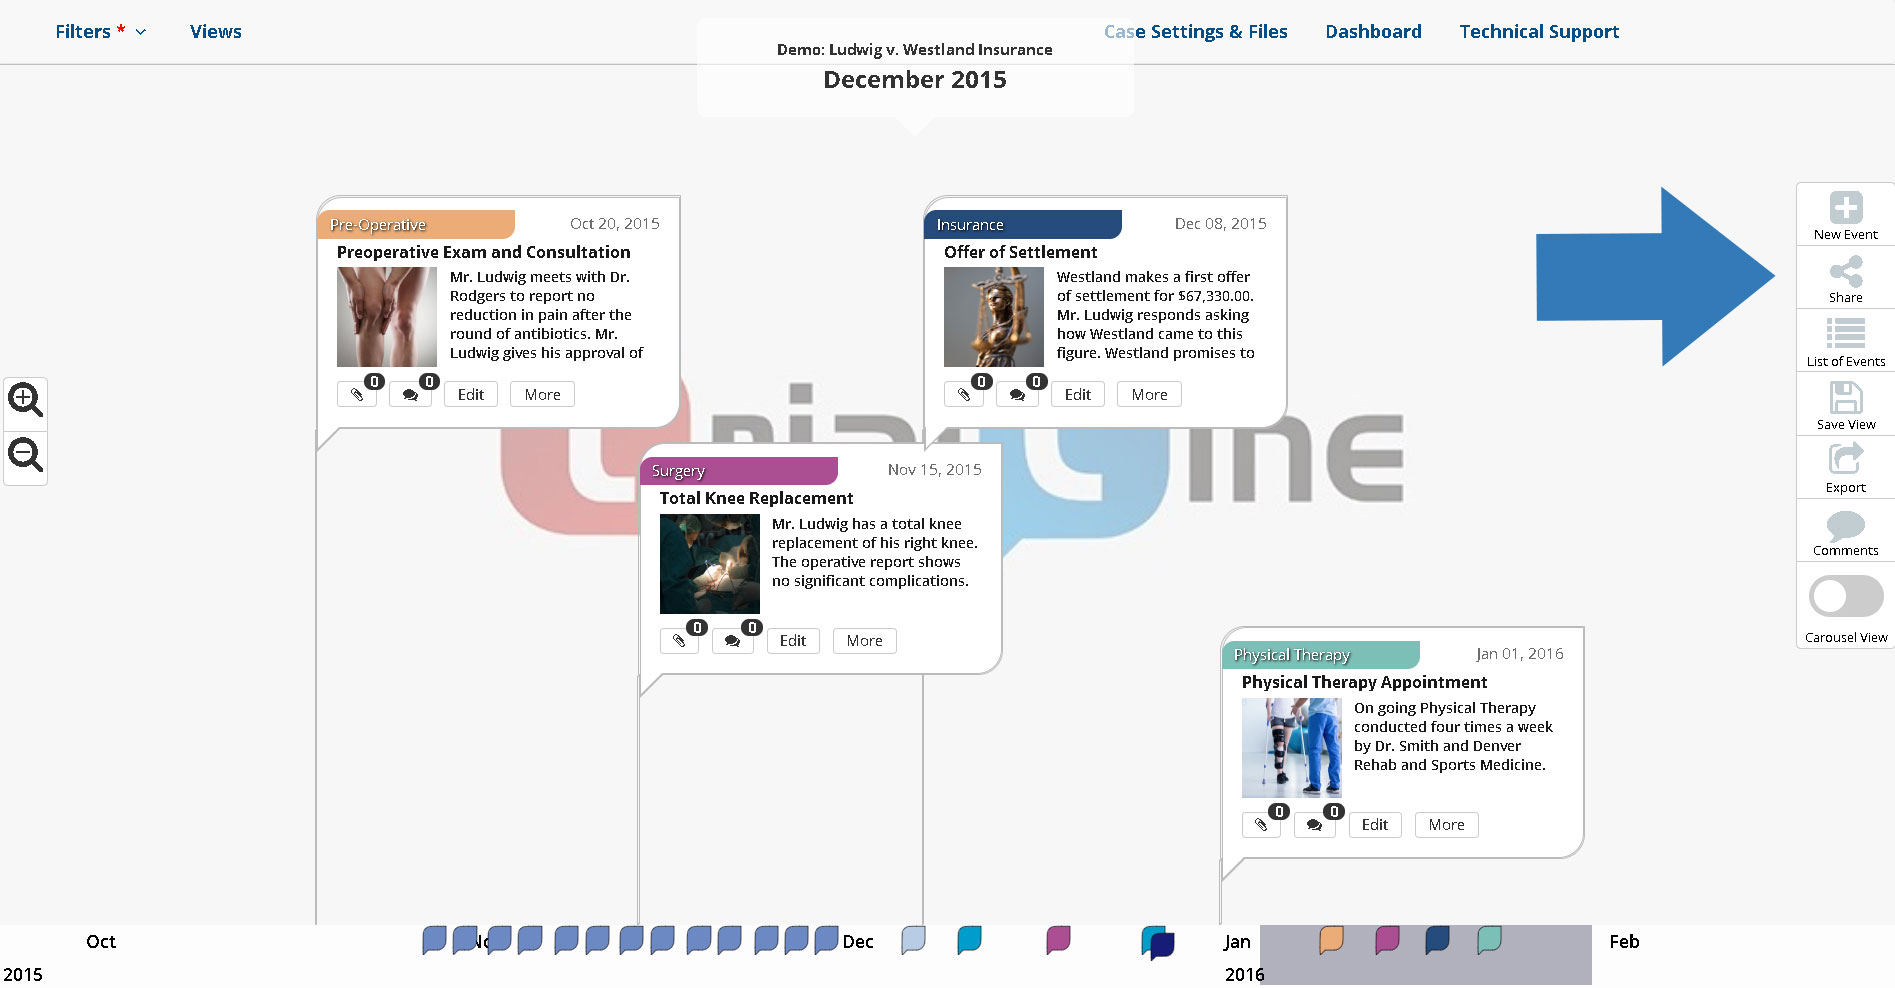
This is a responsive view, which means you can zoom in and out to see more or less of your TrialLine. There are a number of different ways you can zoom in and out of the rendered view, including using the up and down arrows on your keyboard and using the scroll wheel on your mouse. There are also zoom options built into TrialLine, including:
Magnifying Glasses
Click the magnifying glass icons on the left hand side of the screen to zoom in or out as needed:
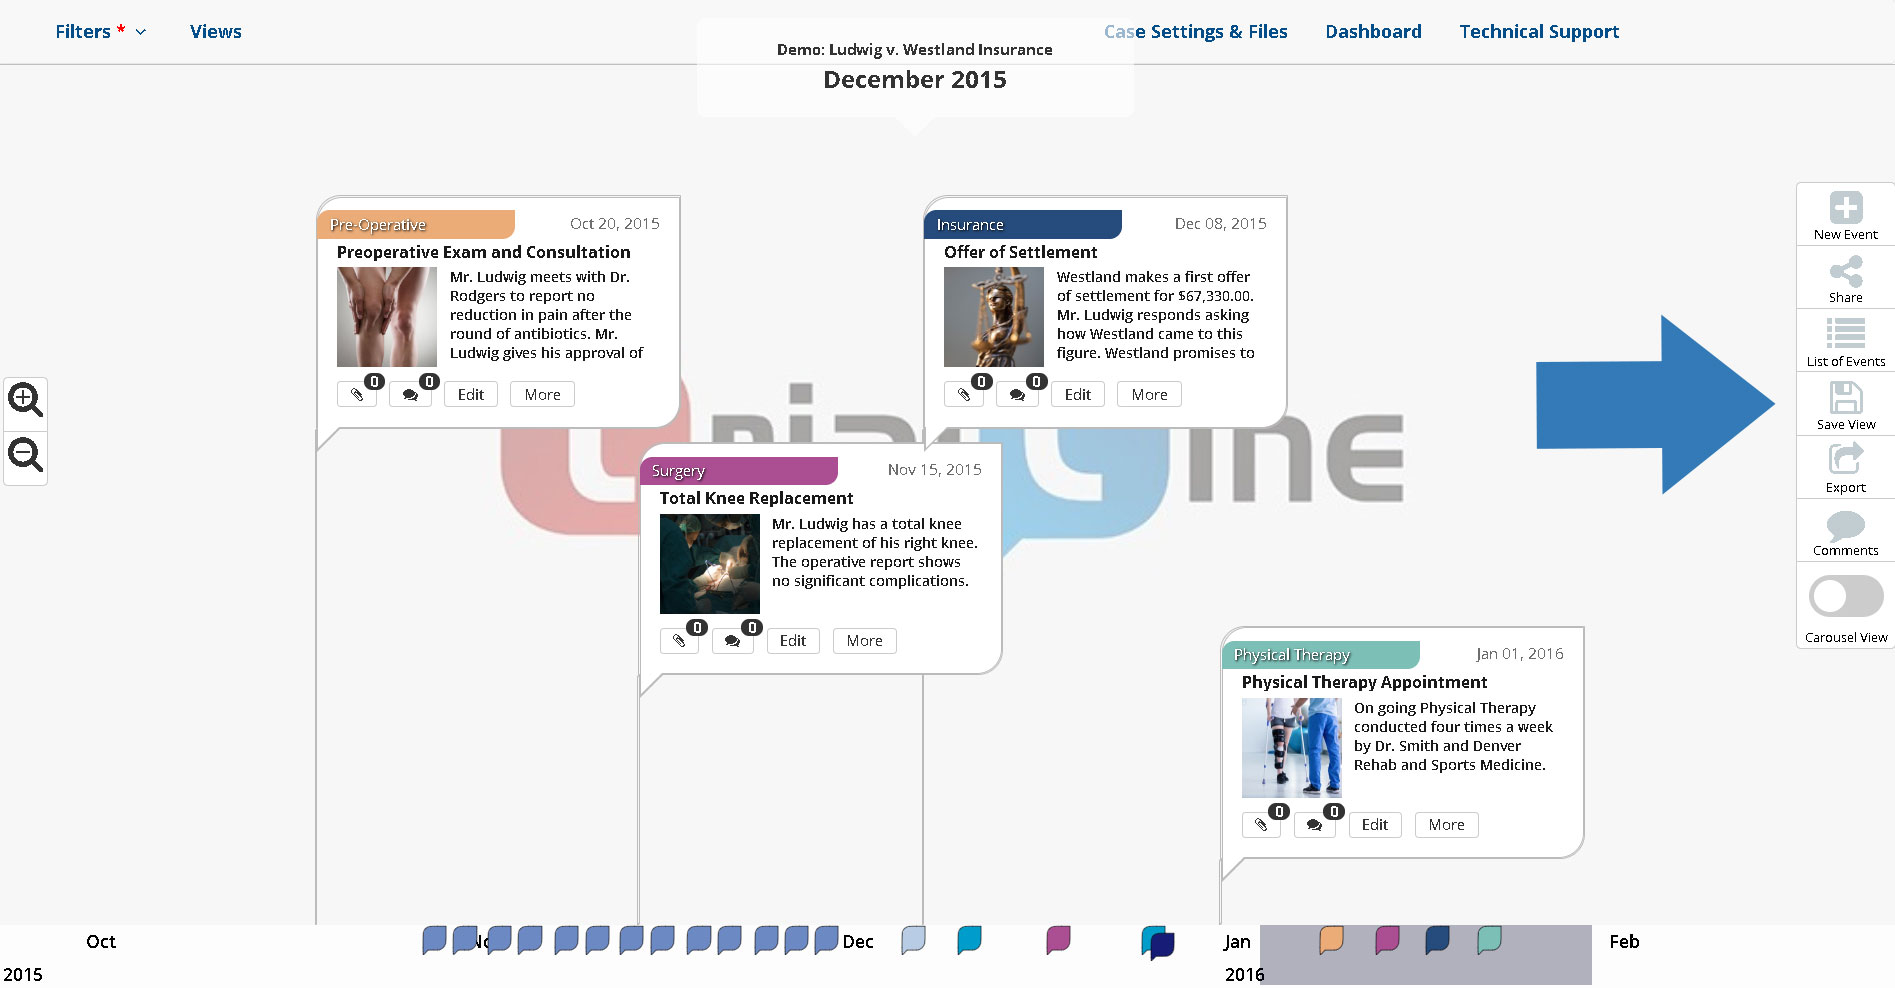
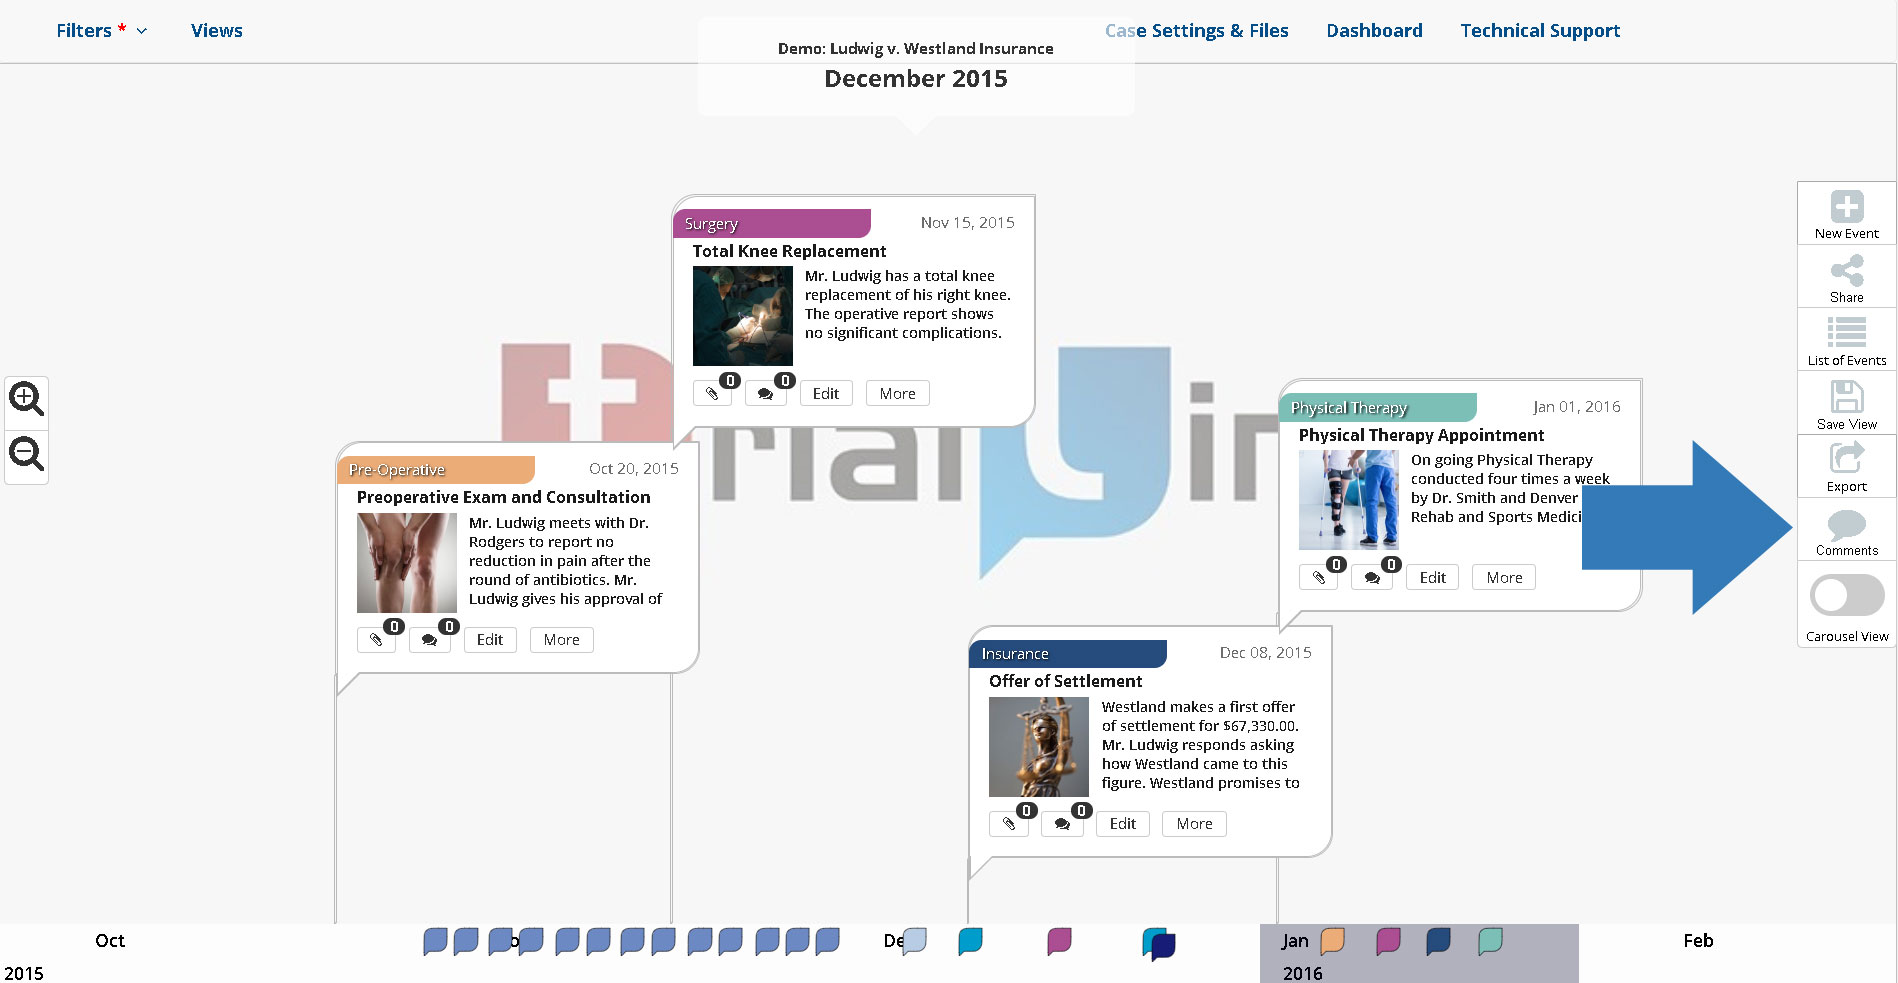
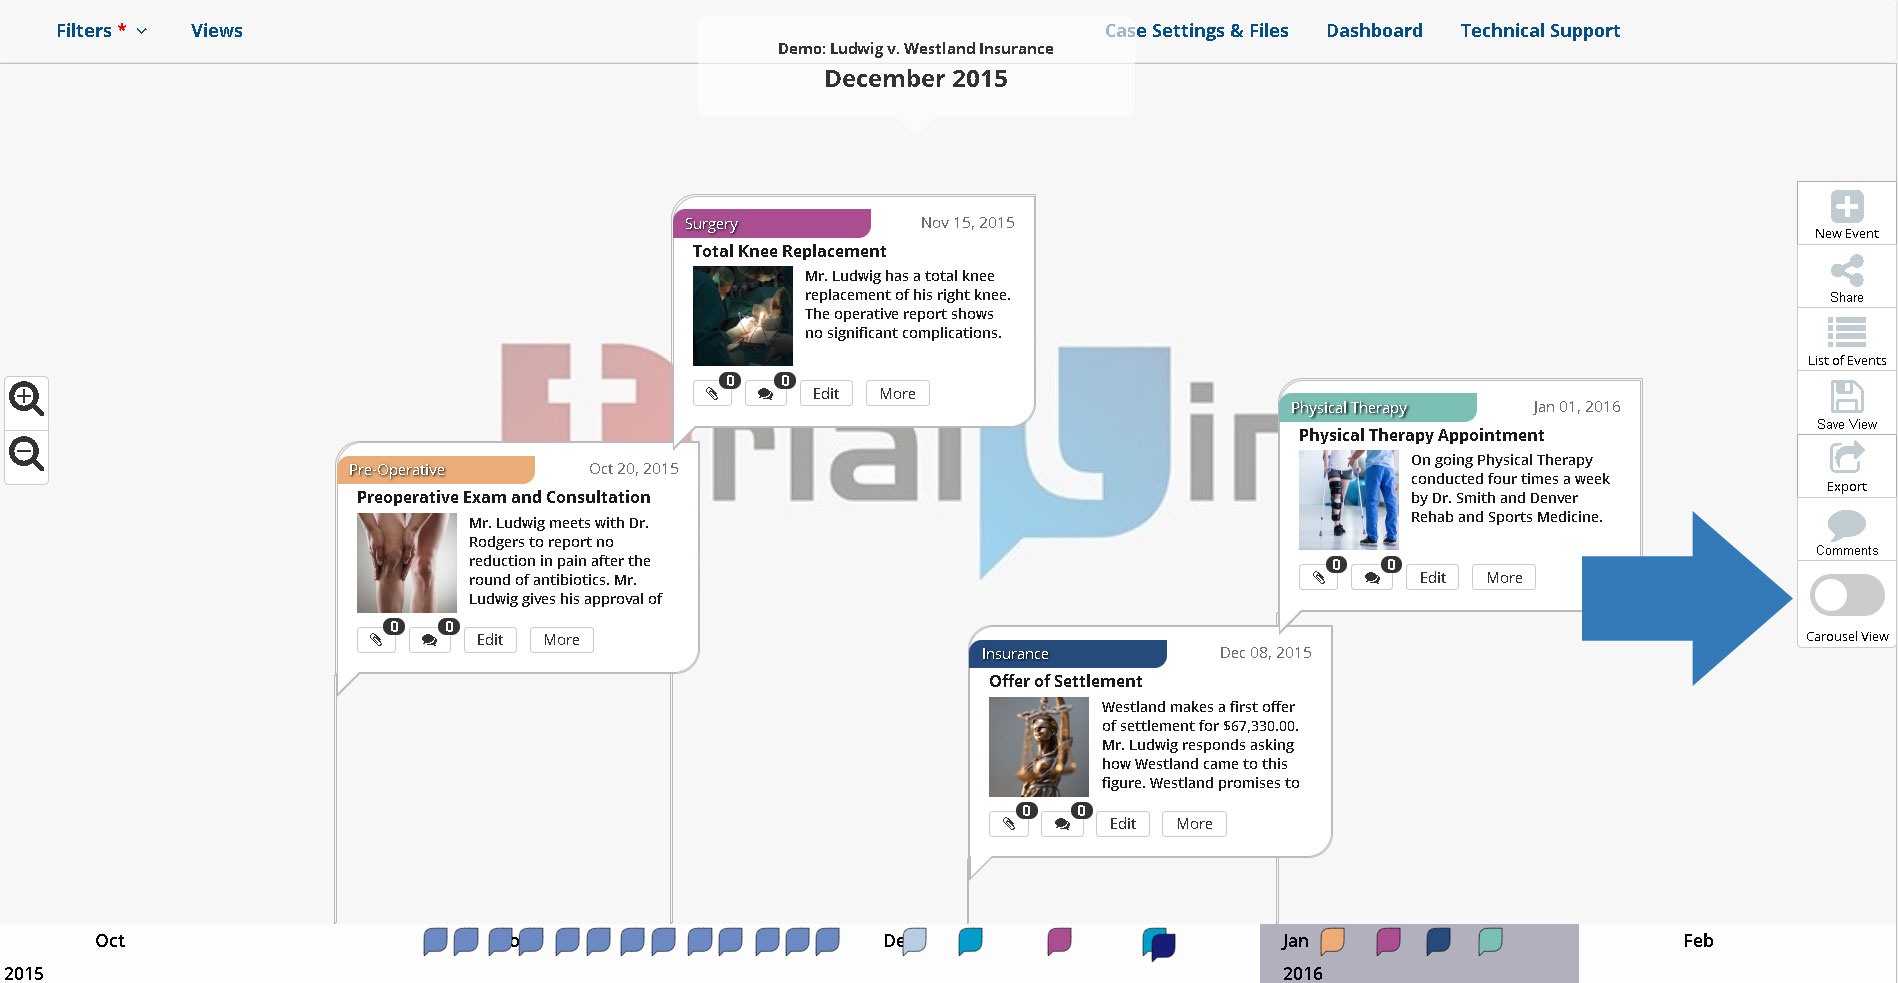
Event Bubbles
If you know where the event you are interested in viewing is along the timeline on the bottom, you can click on the event bubble icons along the bottom of the screen and be taken to that event automatically:
![]()
Events
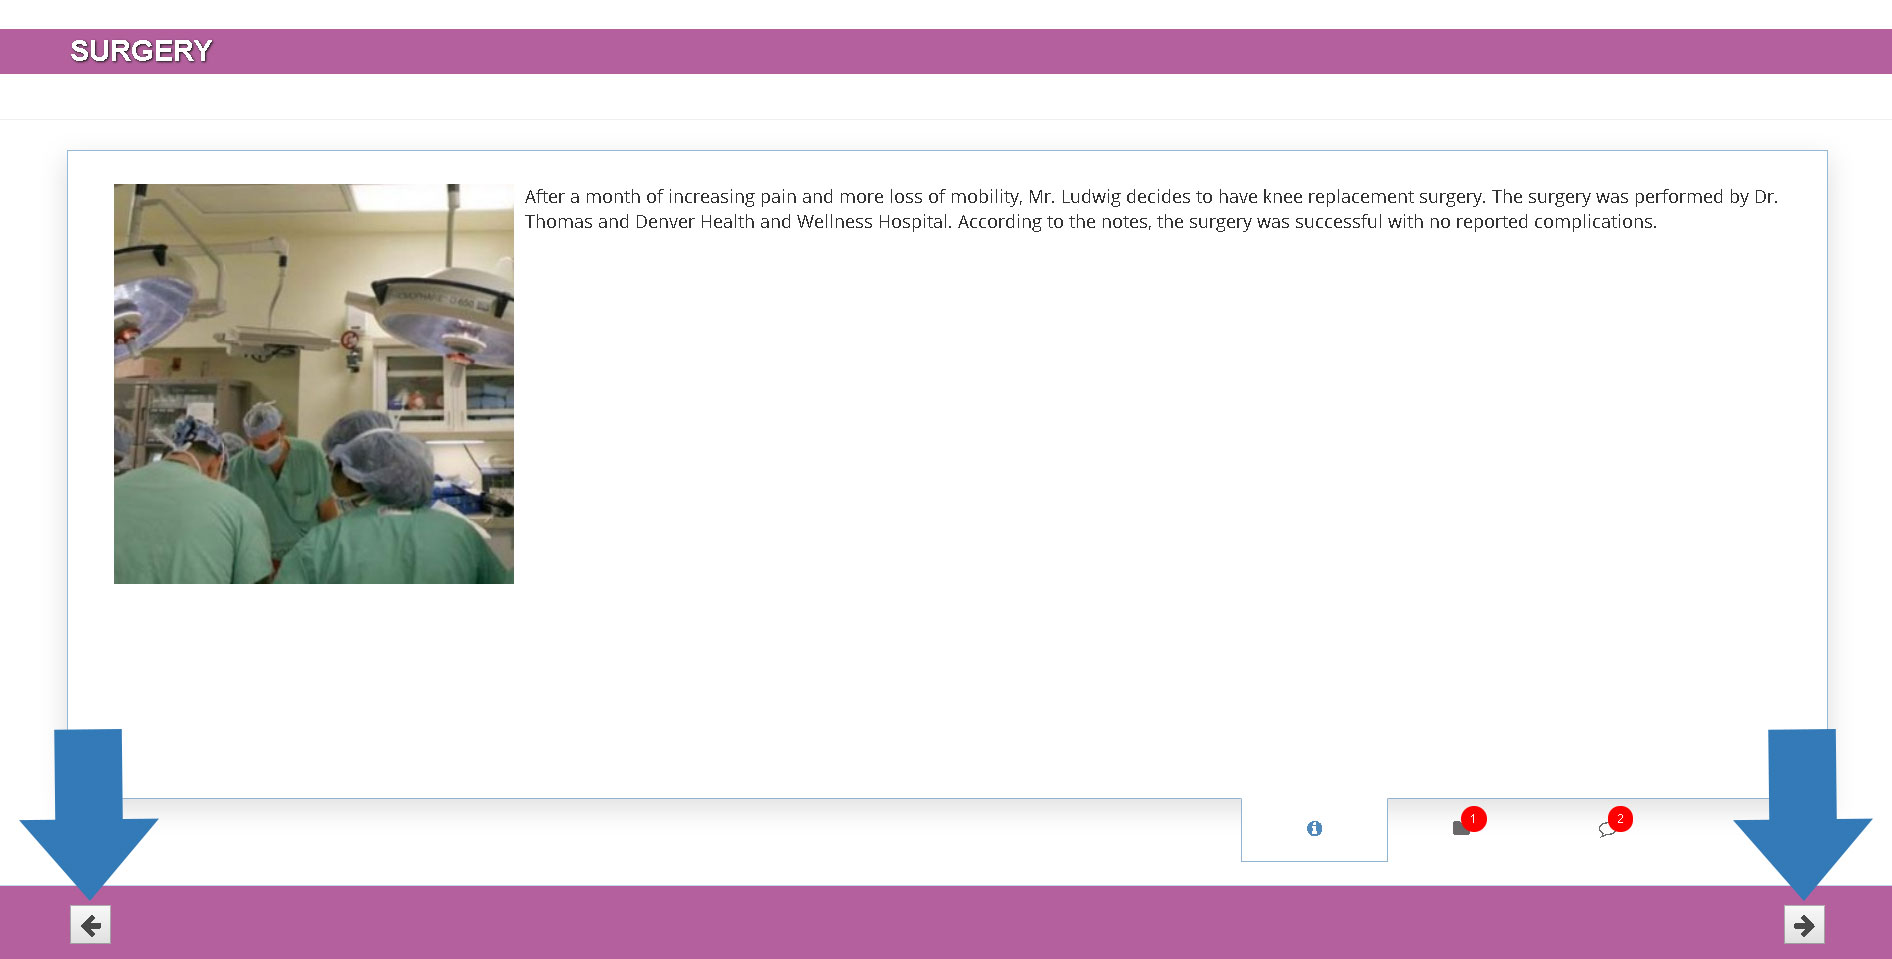
Events are, of course, the most important aspect of your TrialLine, since they have all of the information relevant to your legal case. From the rendered view, clicking on the ‘More’ button for any one event will bring up a larger version of the event bubble where you’ll be able to see the information for that event in greater detail. You’ll see the event description and thumbnail:
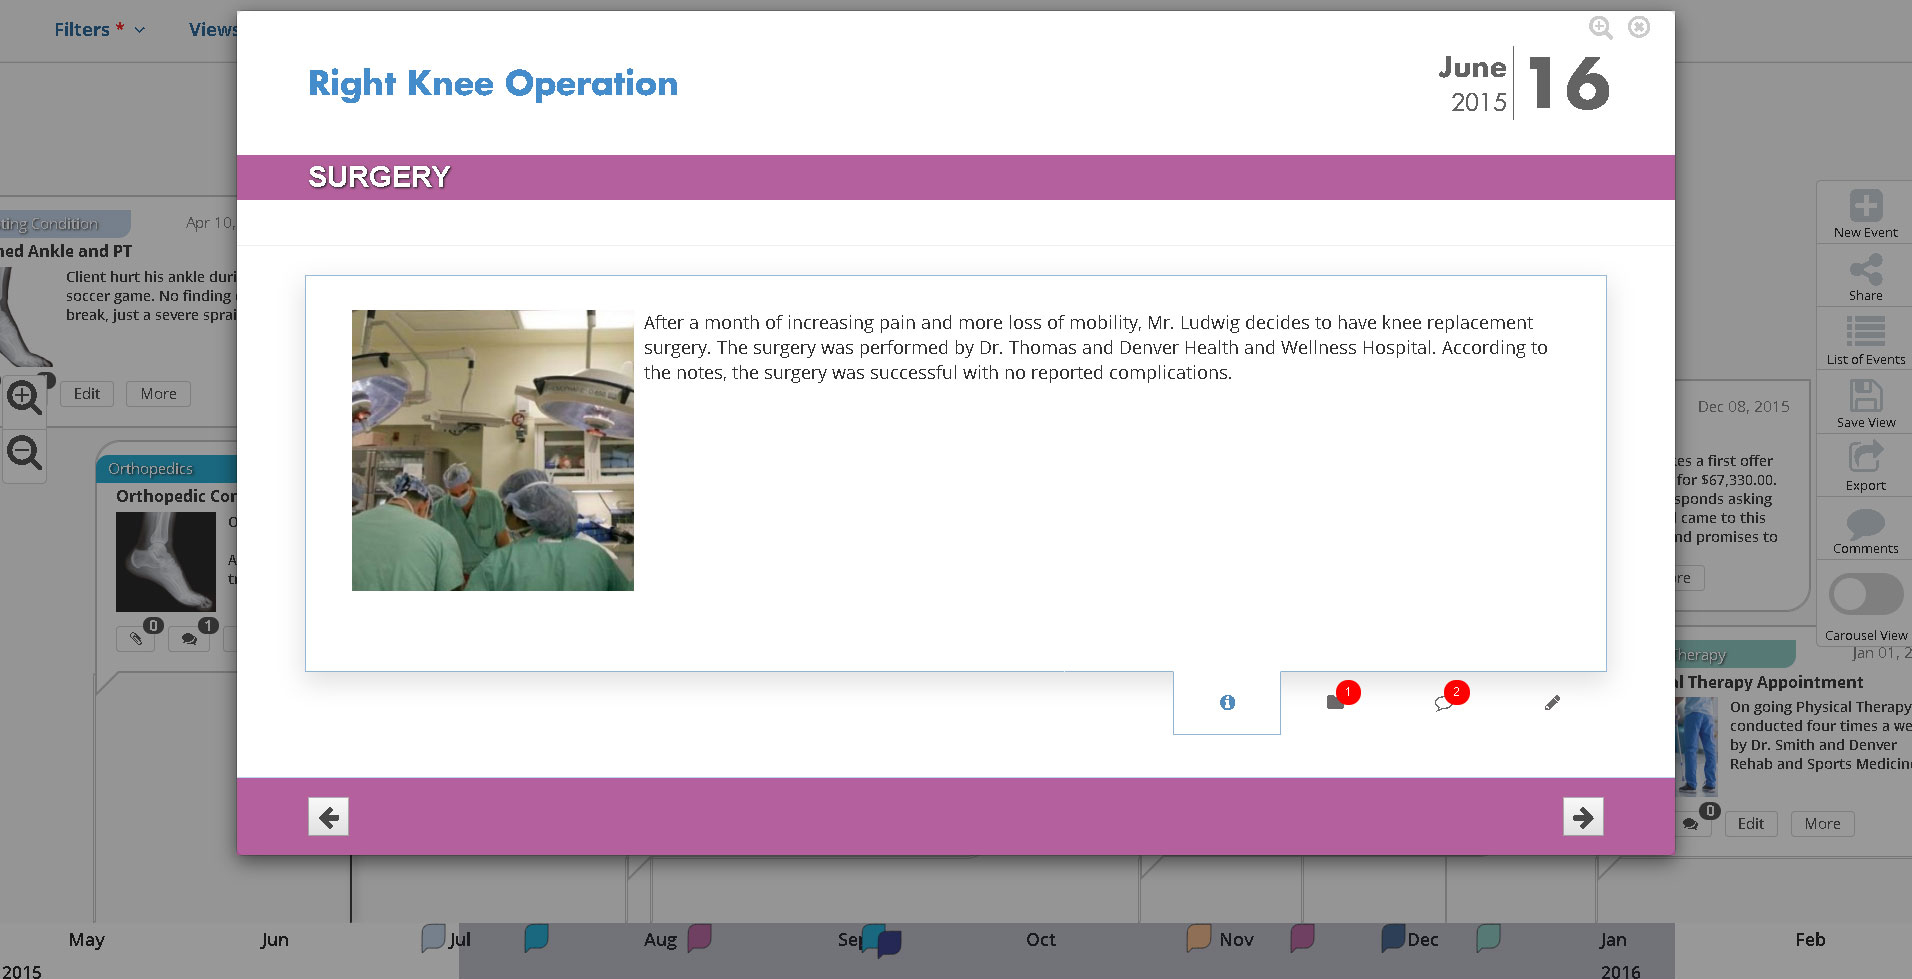
Any files that are attached to the event:
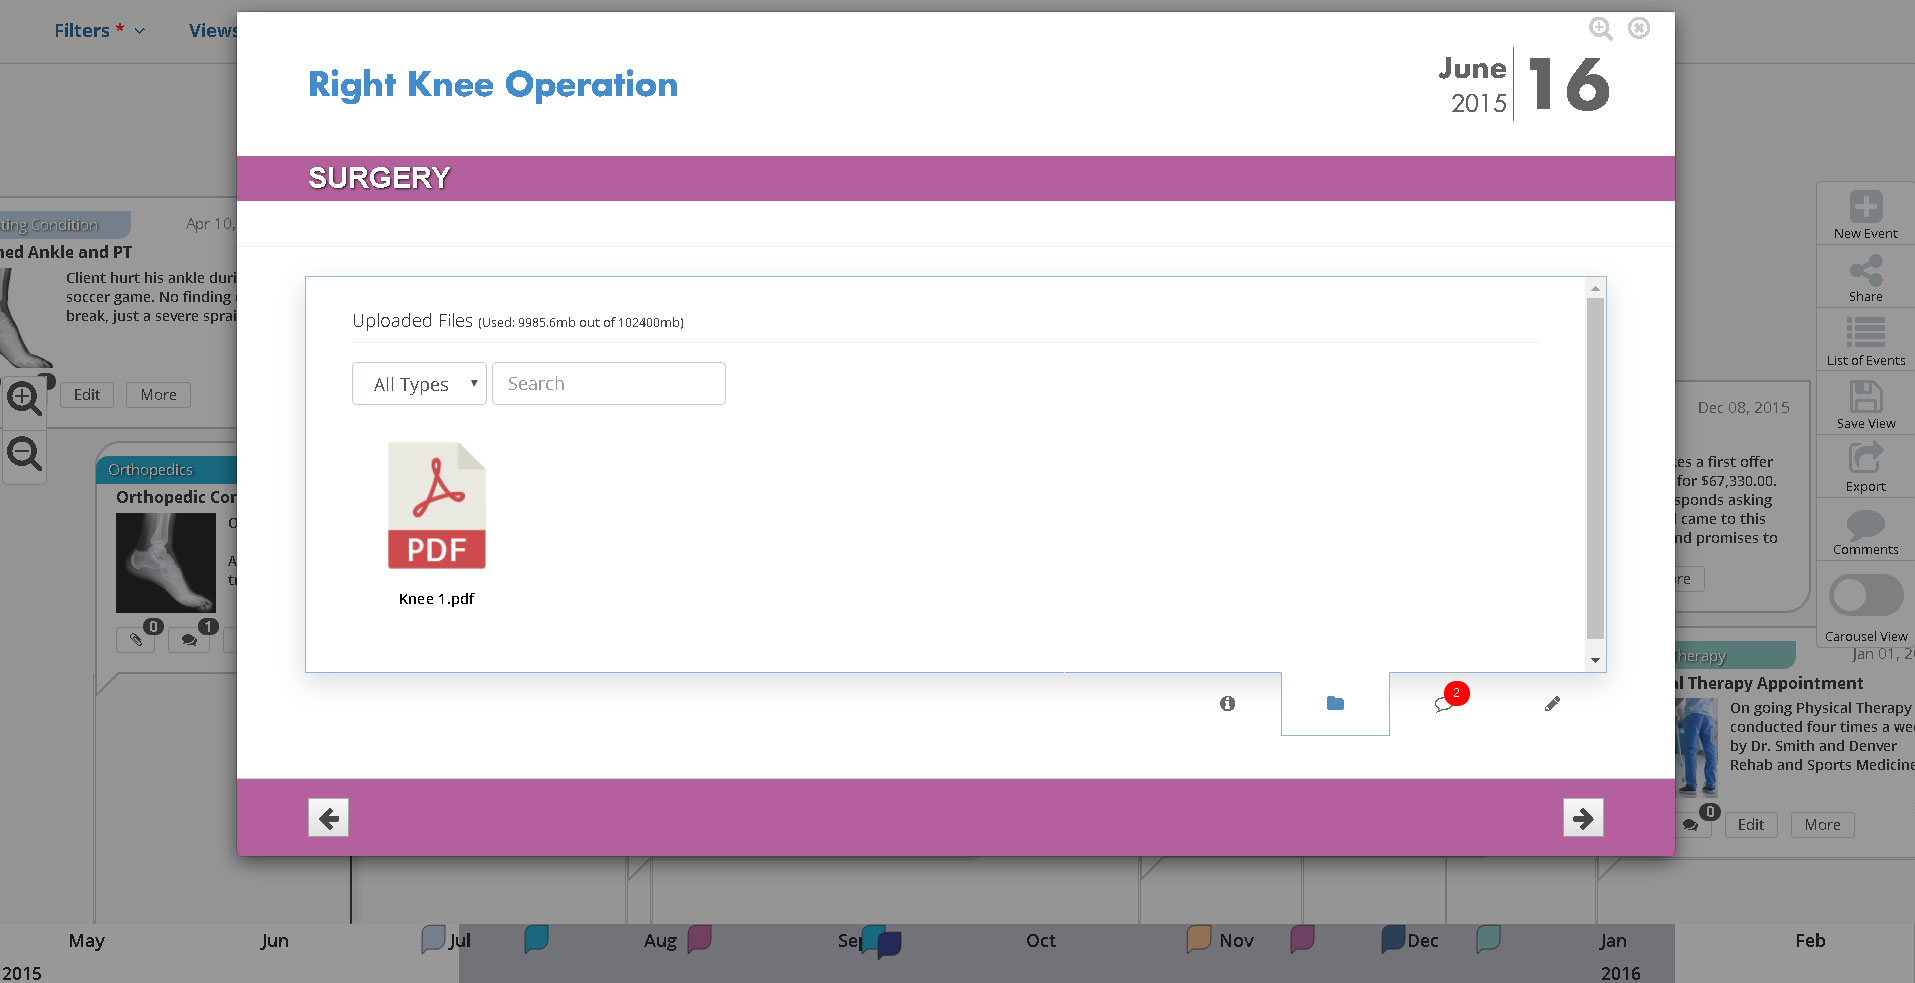
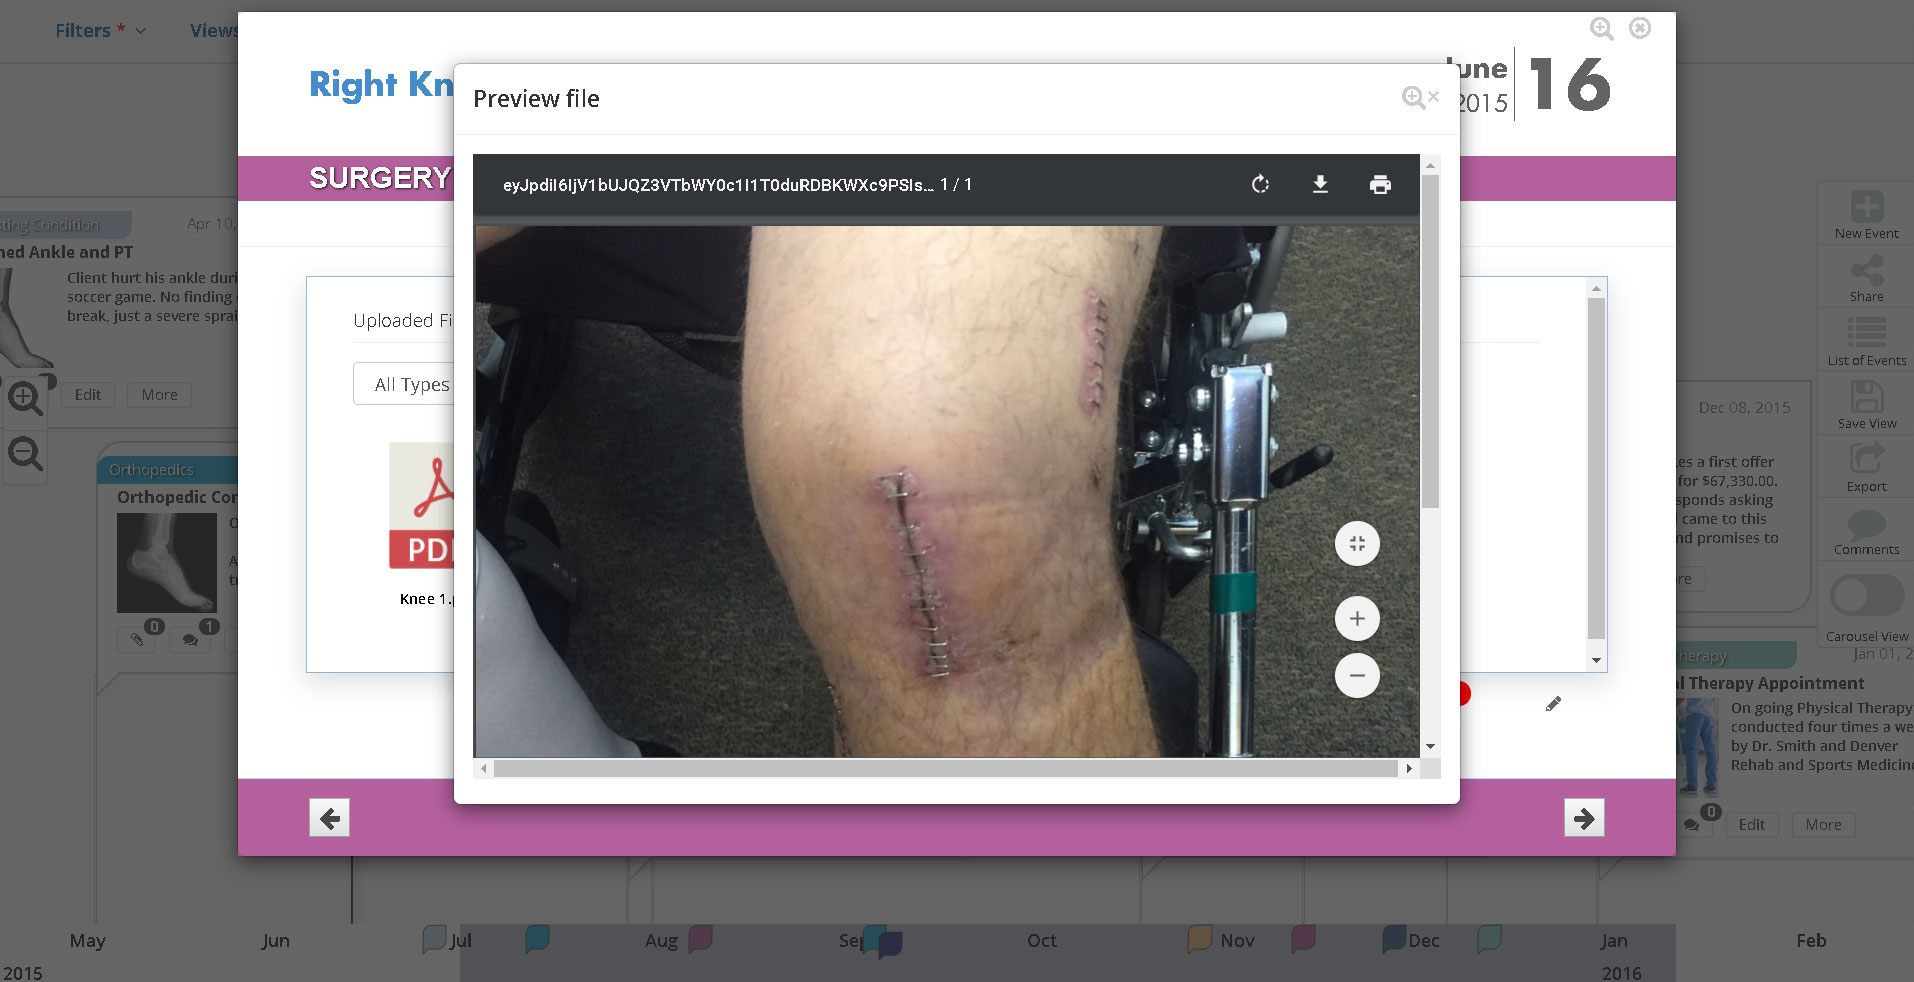
Clicking on the file icon will open the file directly in your TrialLine:
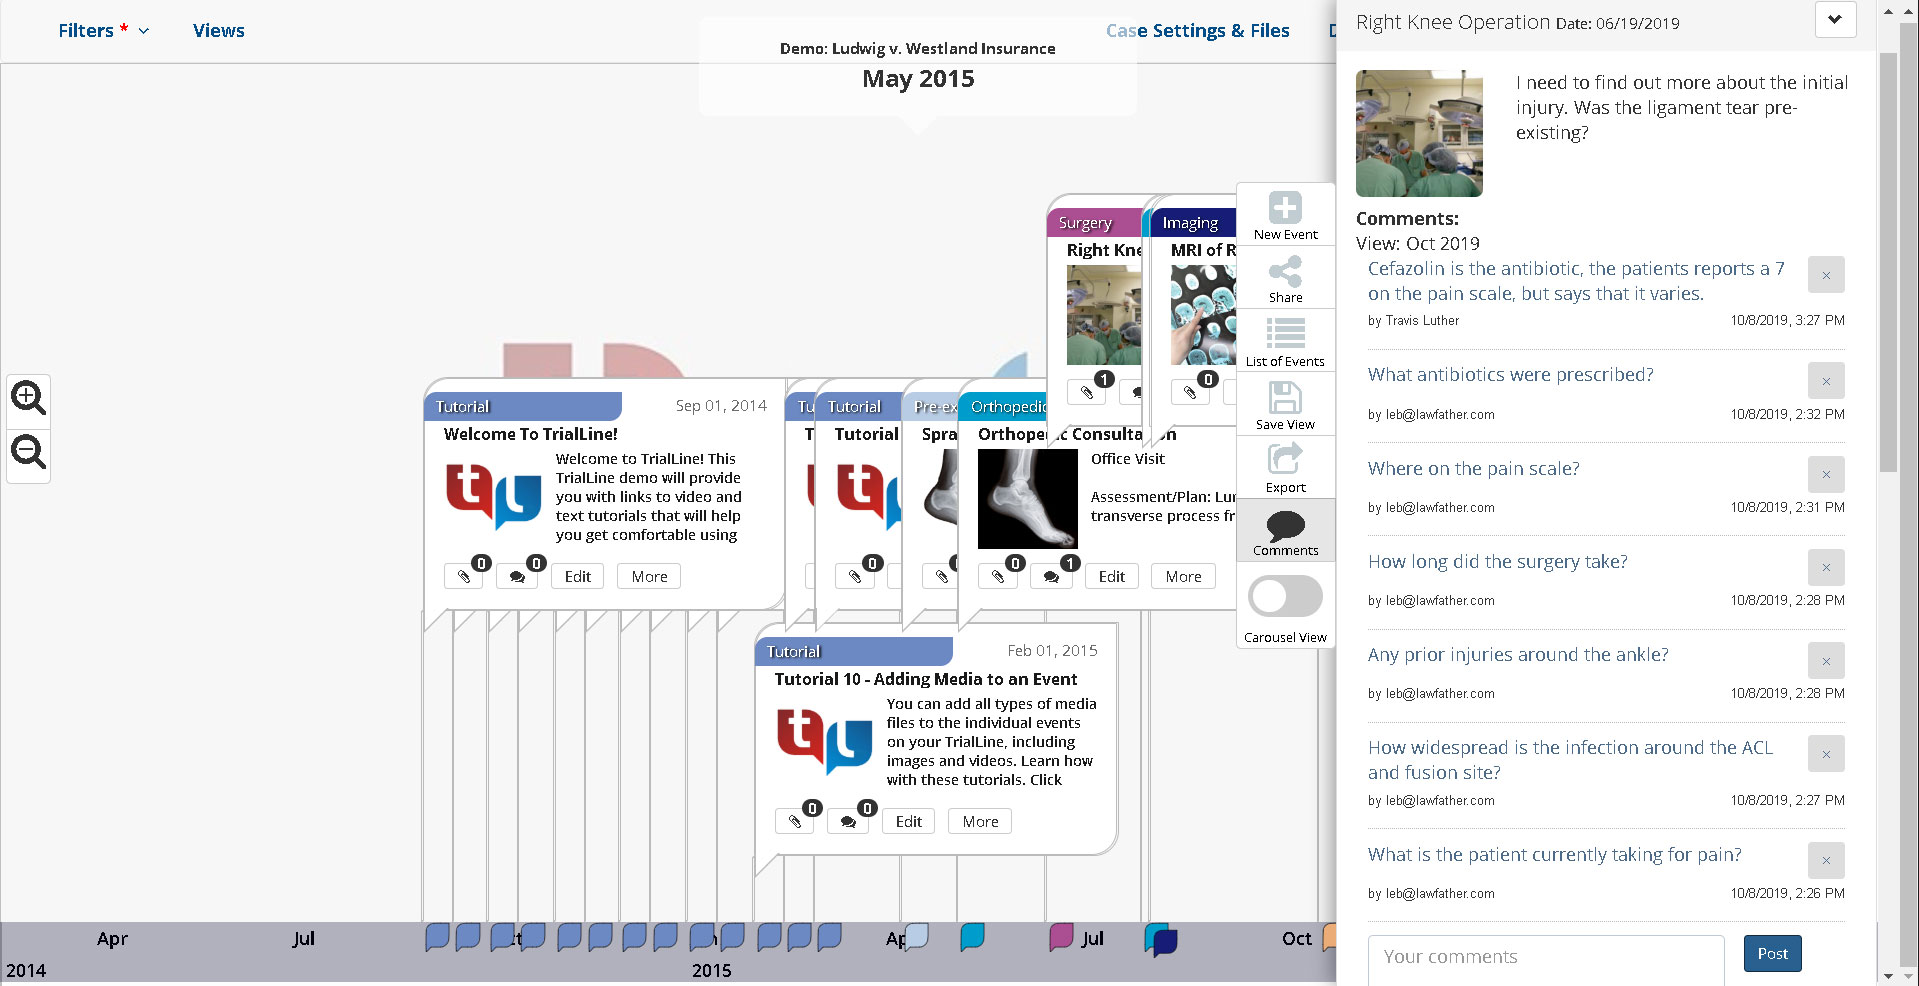
You’ll also see any comments that have been made on this event:
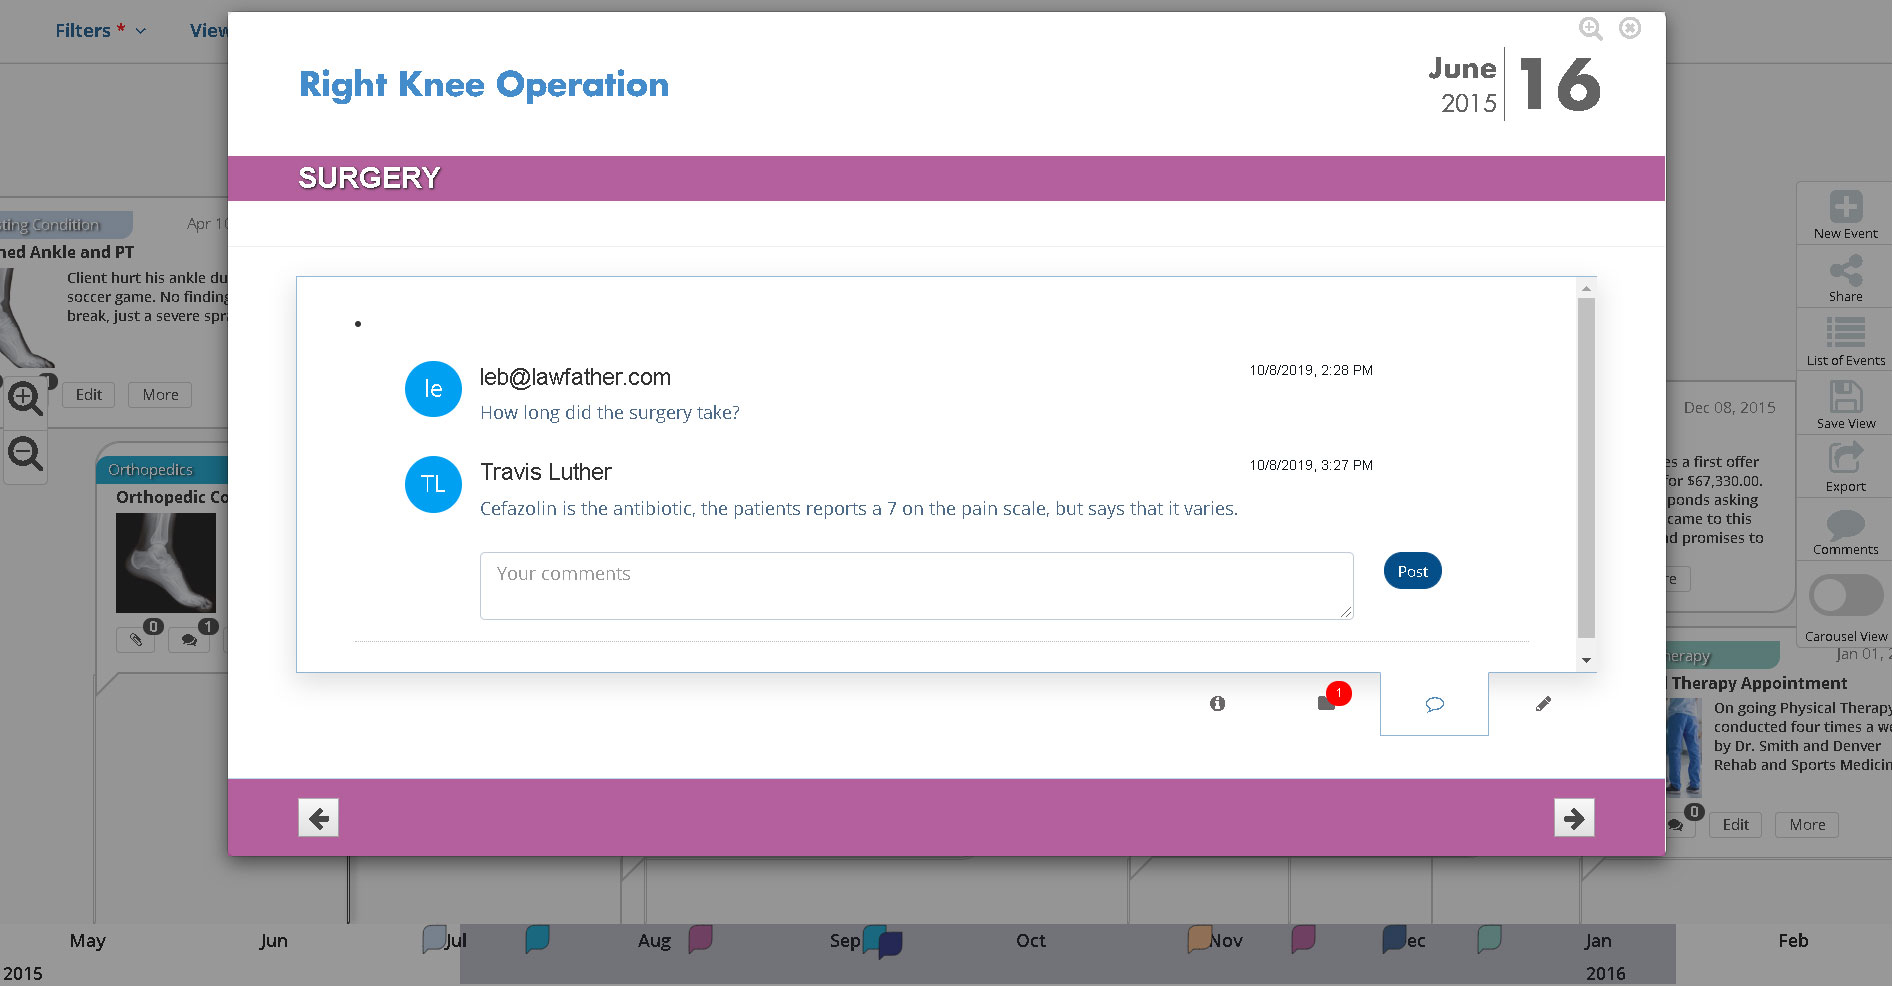
And also any notes that you have made:
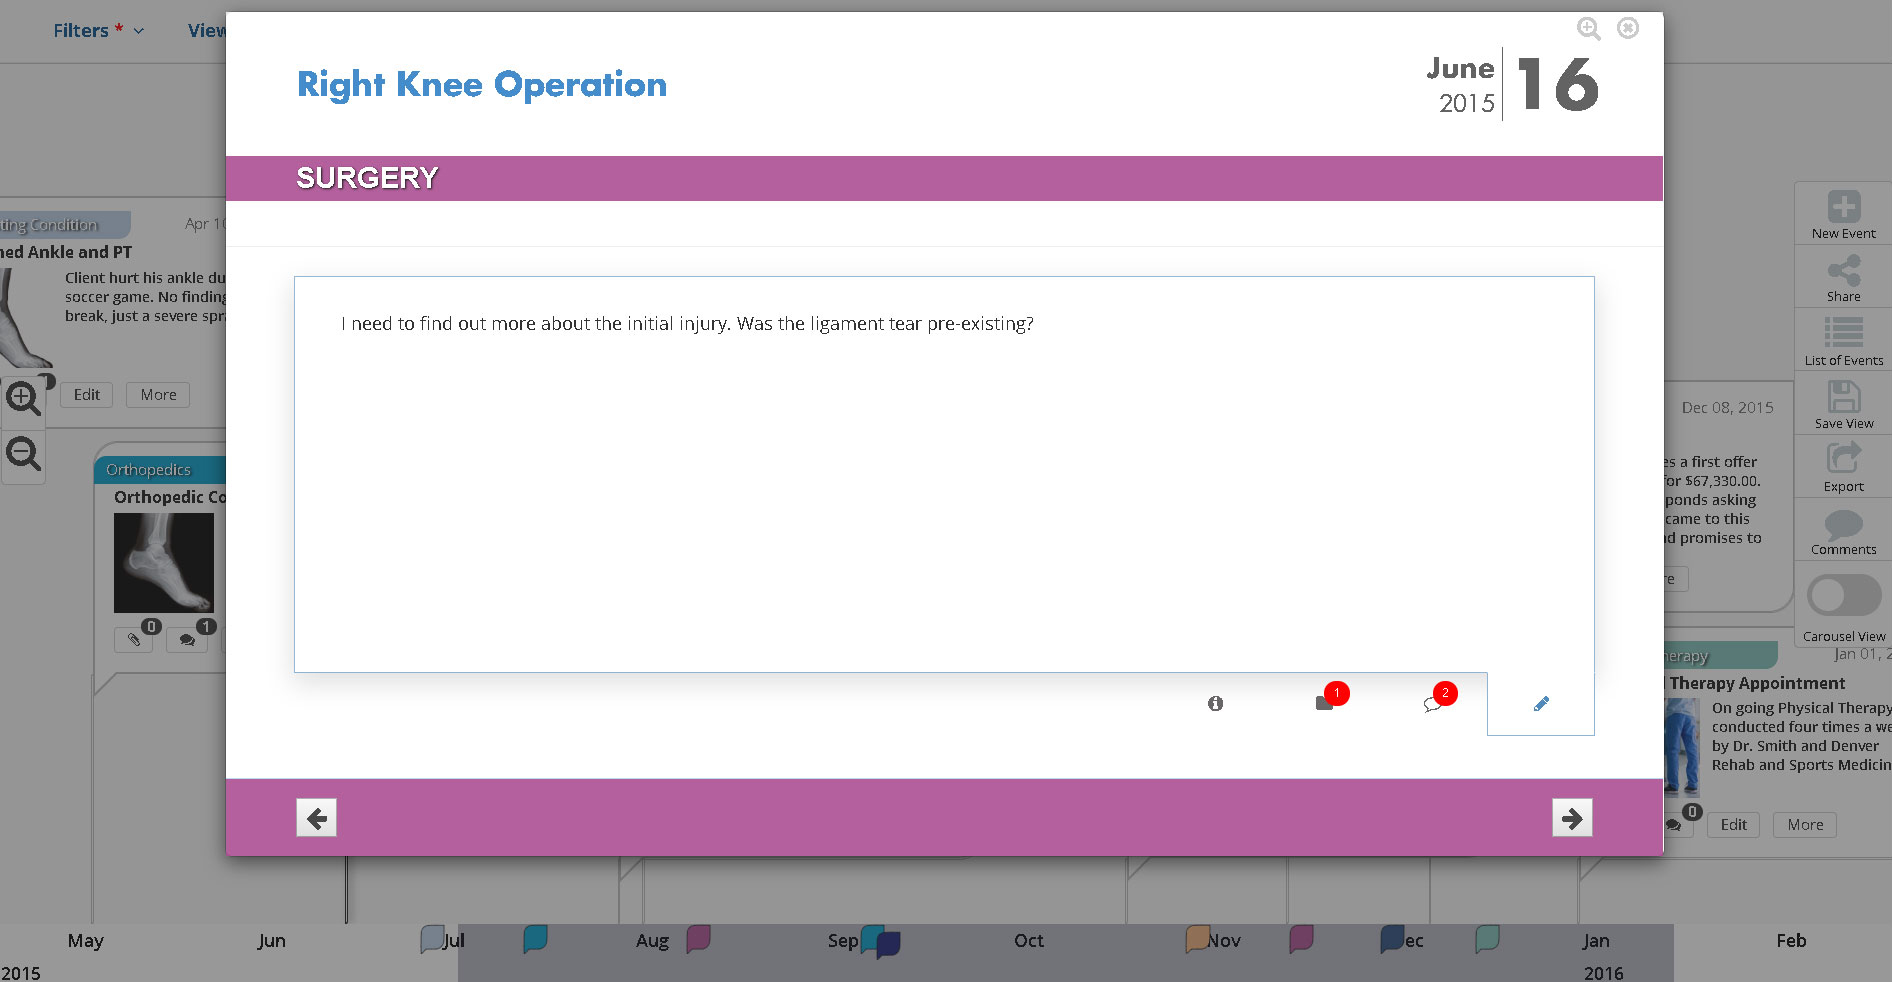
You can also expand this event so that it displays full screen, and you can even move sequentially through the events on your TrialLine using the arrow buttons at the bottom of the screen:
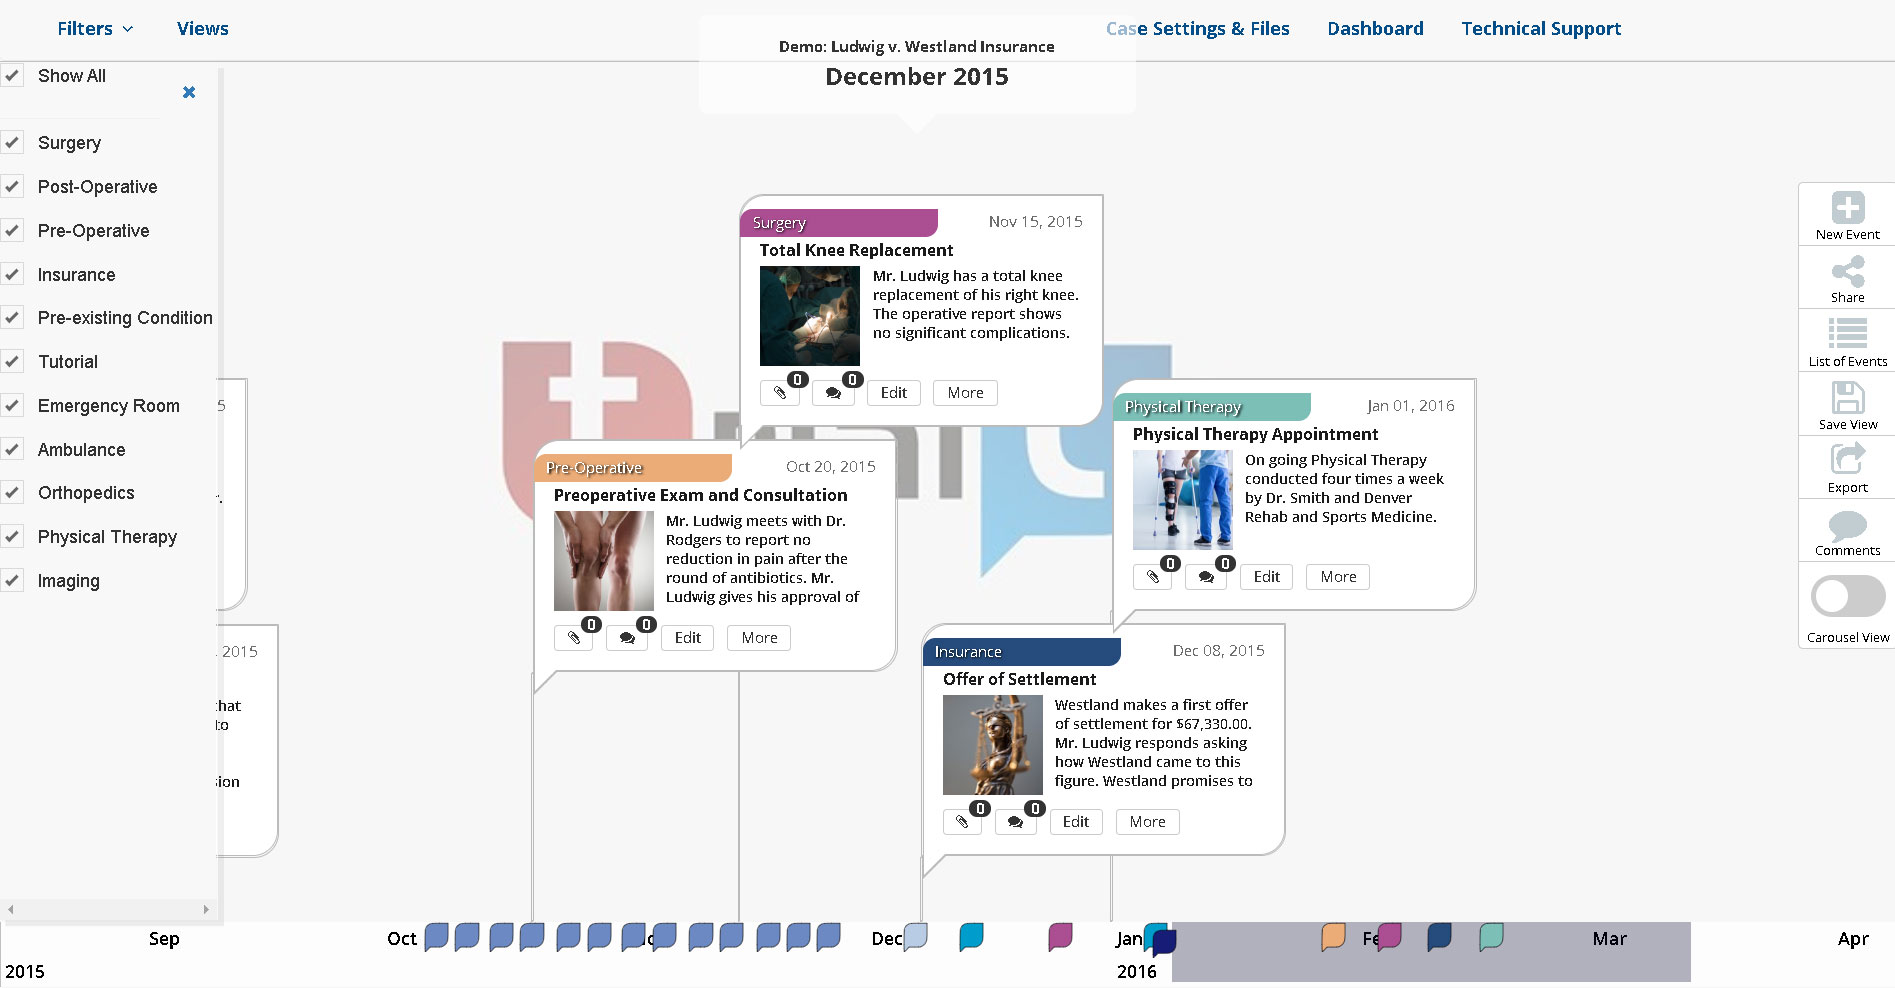
Categories and Filters
Each event on your TrialLine gets assigned to a ‘Category’. This allows users to ‘filter’ the events displayed in the ‘Rendered View’ by category (Learn more about categories and filters here). Simply click the ‘Filters’ button in the top left corner to open the filters drop down menu, and select which categories you would like to display, only the events in the selected categories will be displayed in the Rendered View:
Views
TrialLine users can use filters to create specific ‘Views’ that display only specific categories (Learn more about views here). They can then share these views with collaborators, staff members, other attorneys, or expert witnesses, by clicking on the ‘Share View’ button:
A new window will then appear where you can give the view a name and description, decide whether or not you want to allow commenting on the events in this view, and then enter an email address to send the view to:

That email address will get a password protected link to access the view, along with the password. Once they click the link and enter the password, the shared view will display right in their web browser.
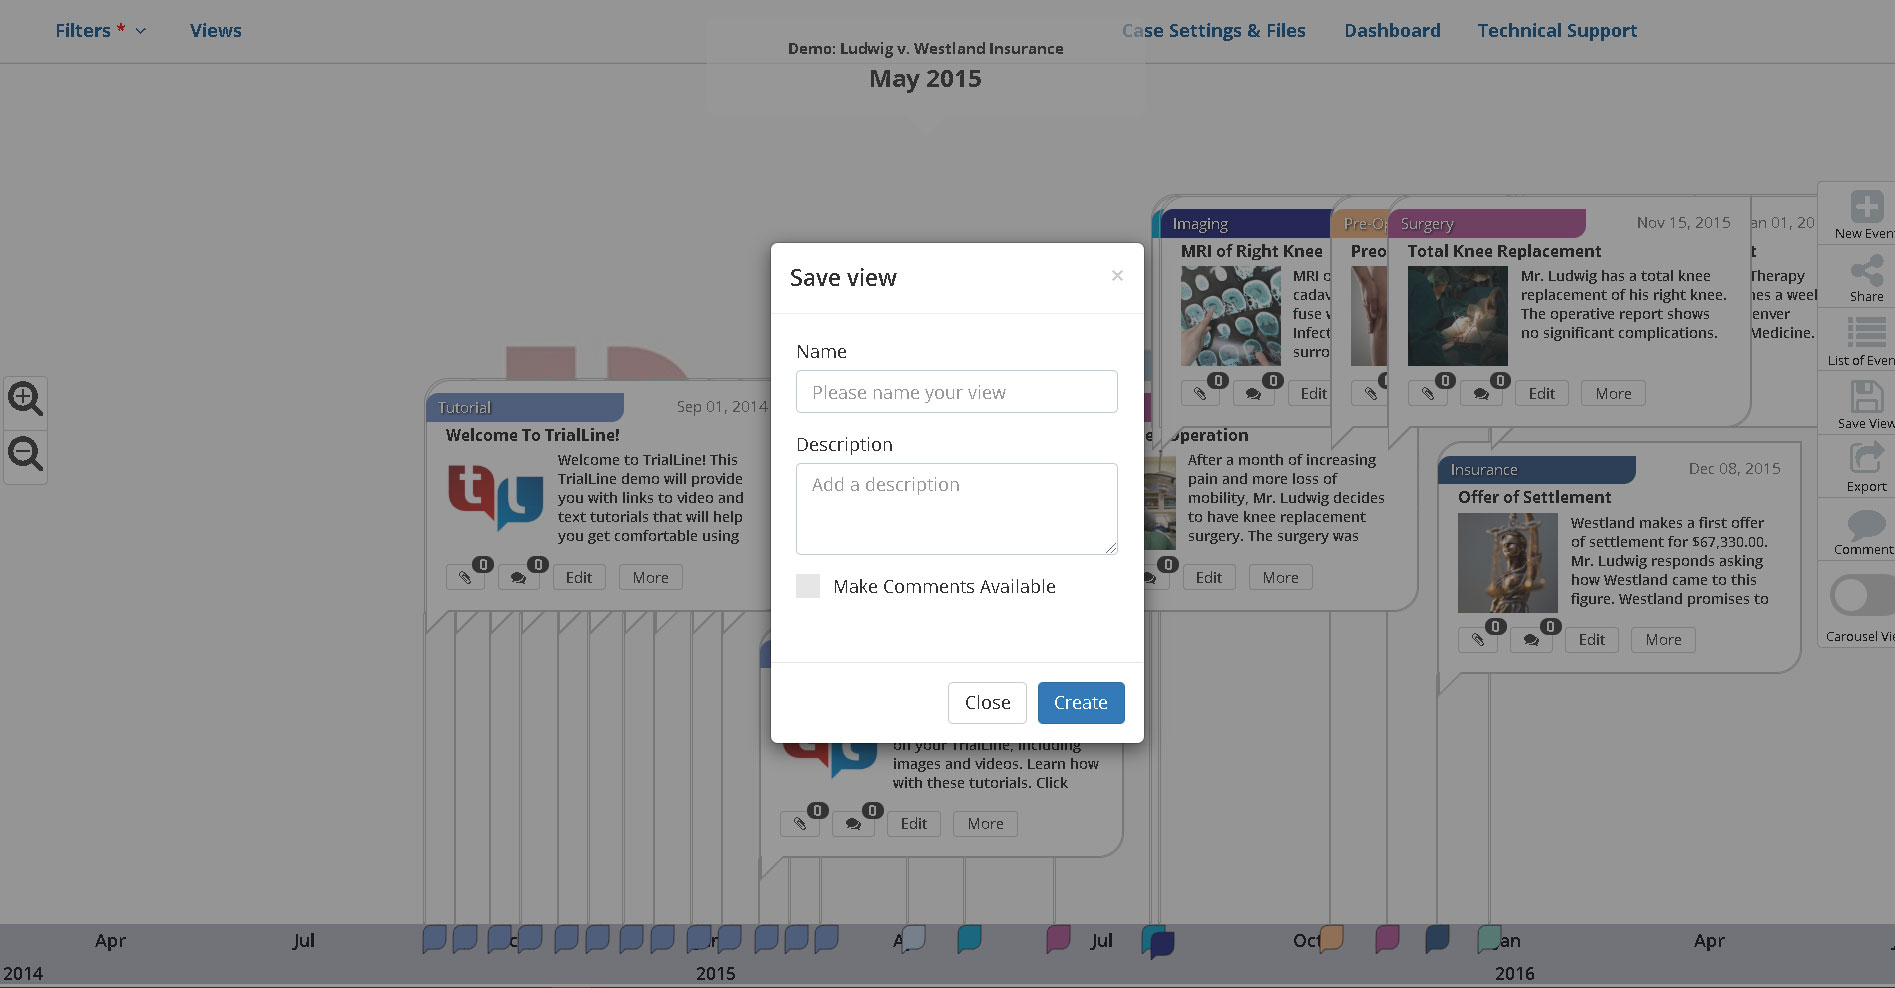
Alternately, users can save the view for later by clicking the ‘Save view’ button:
A similar window will open where you can name and describe the view, and decide whether or not you want to allow comments:
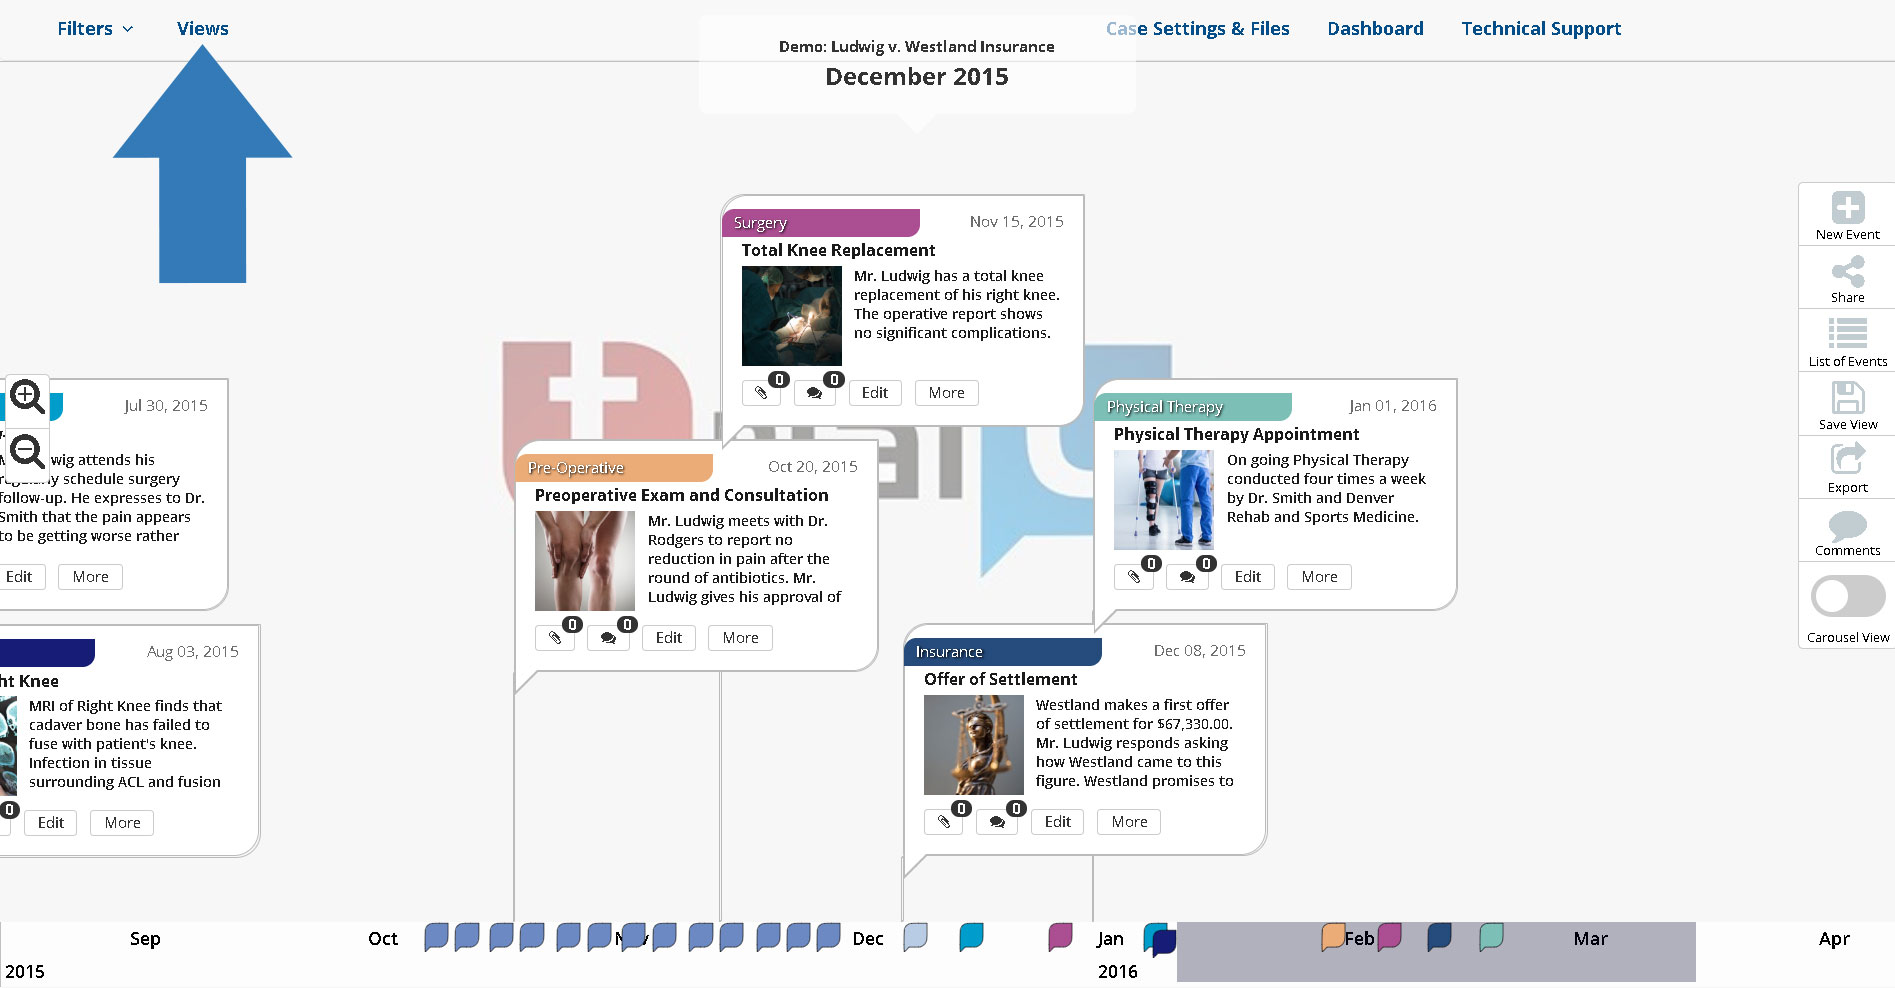
All shared and saved views can be seen by clicking the ‘Views’ button in the top left hand corner:
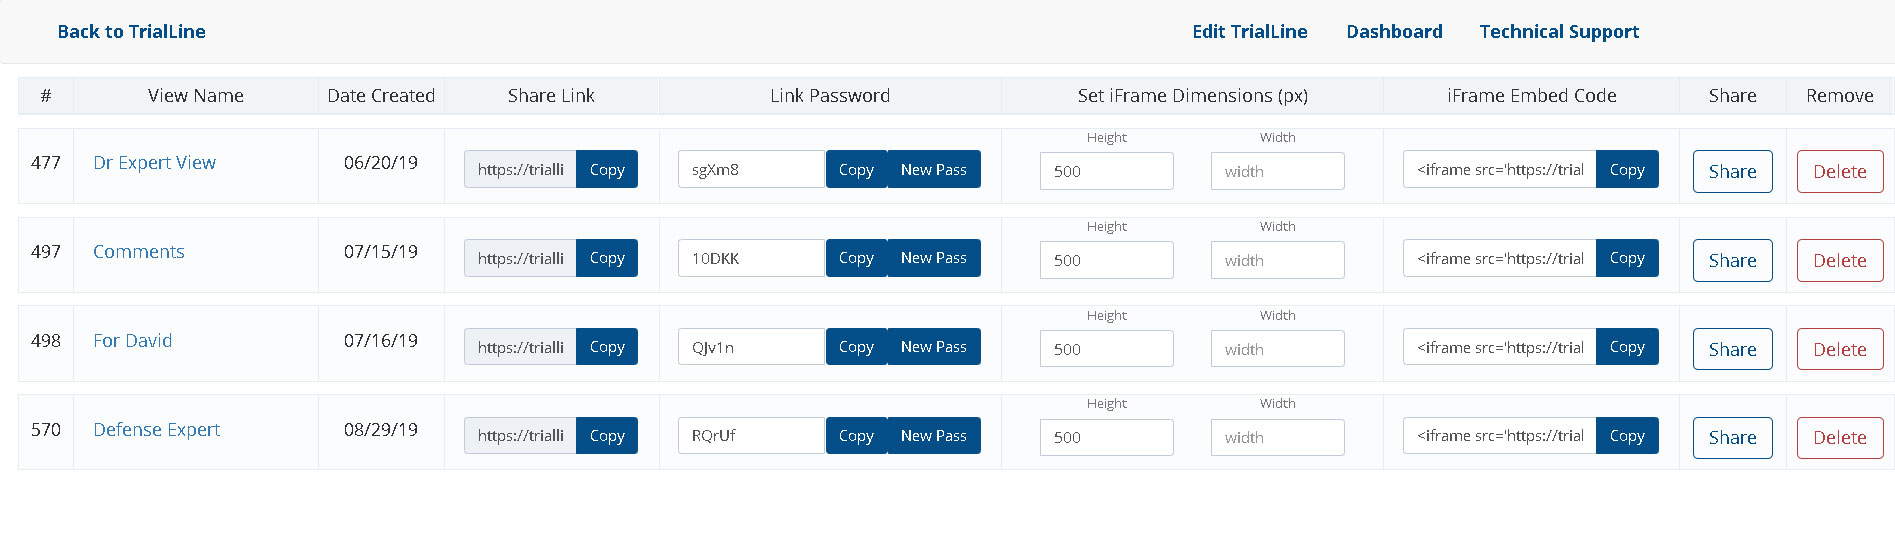
That will open the views window where you’ll be able to see all of the views that you have saved or shared, the date they were created, the link and password to use for sharing, as well as iFrame embed options. You can also share or delete views from here as well:
Creating New Events
Creating new events is quick and easy in TrialLine, and it can be done directly from the ‘Rendered View’ by clicking the ‘New Event’ button from the side menu on the right:
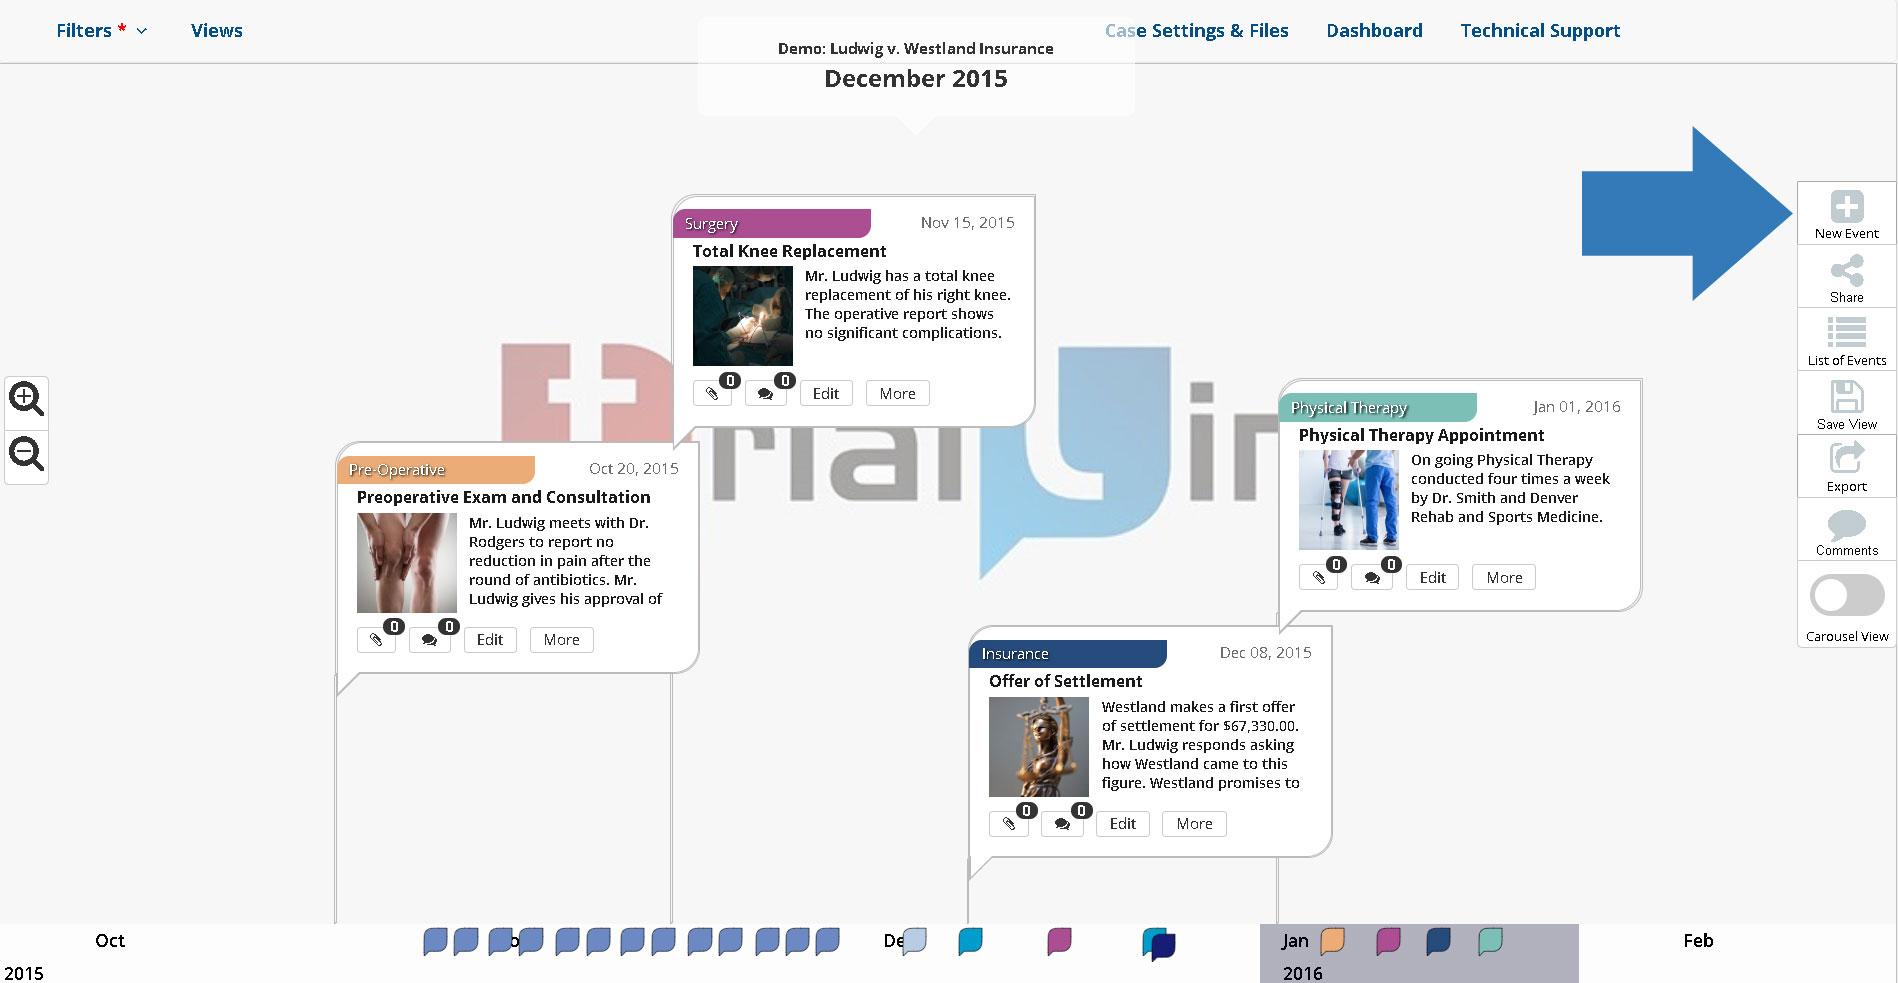
That will open the ‘Event Editor’ window where you will enter the information for the new event. The event editor window has four different tabs where you can provide information:
General
The ‘General’ tab is where you’ll enter in the basic information for your event. Fields that have an asterix next to them are required fields, so please be aware that you must enter in a ‘Title’, ‘Start Date’ and ‘Category’ for your event. You can also choose to add an end date, times, assign a category by choosing from existing categories, or by creating a new category, list bates and exhibits numbers, and also choose whether or not you want to display a thumbnail for the event, and even upload custom thumbnails. For best results, we recommend you use thumbnail images that are 200 x 200 pixels:
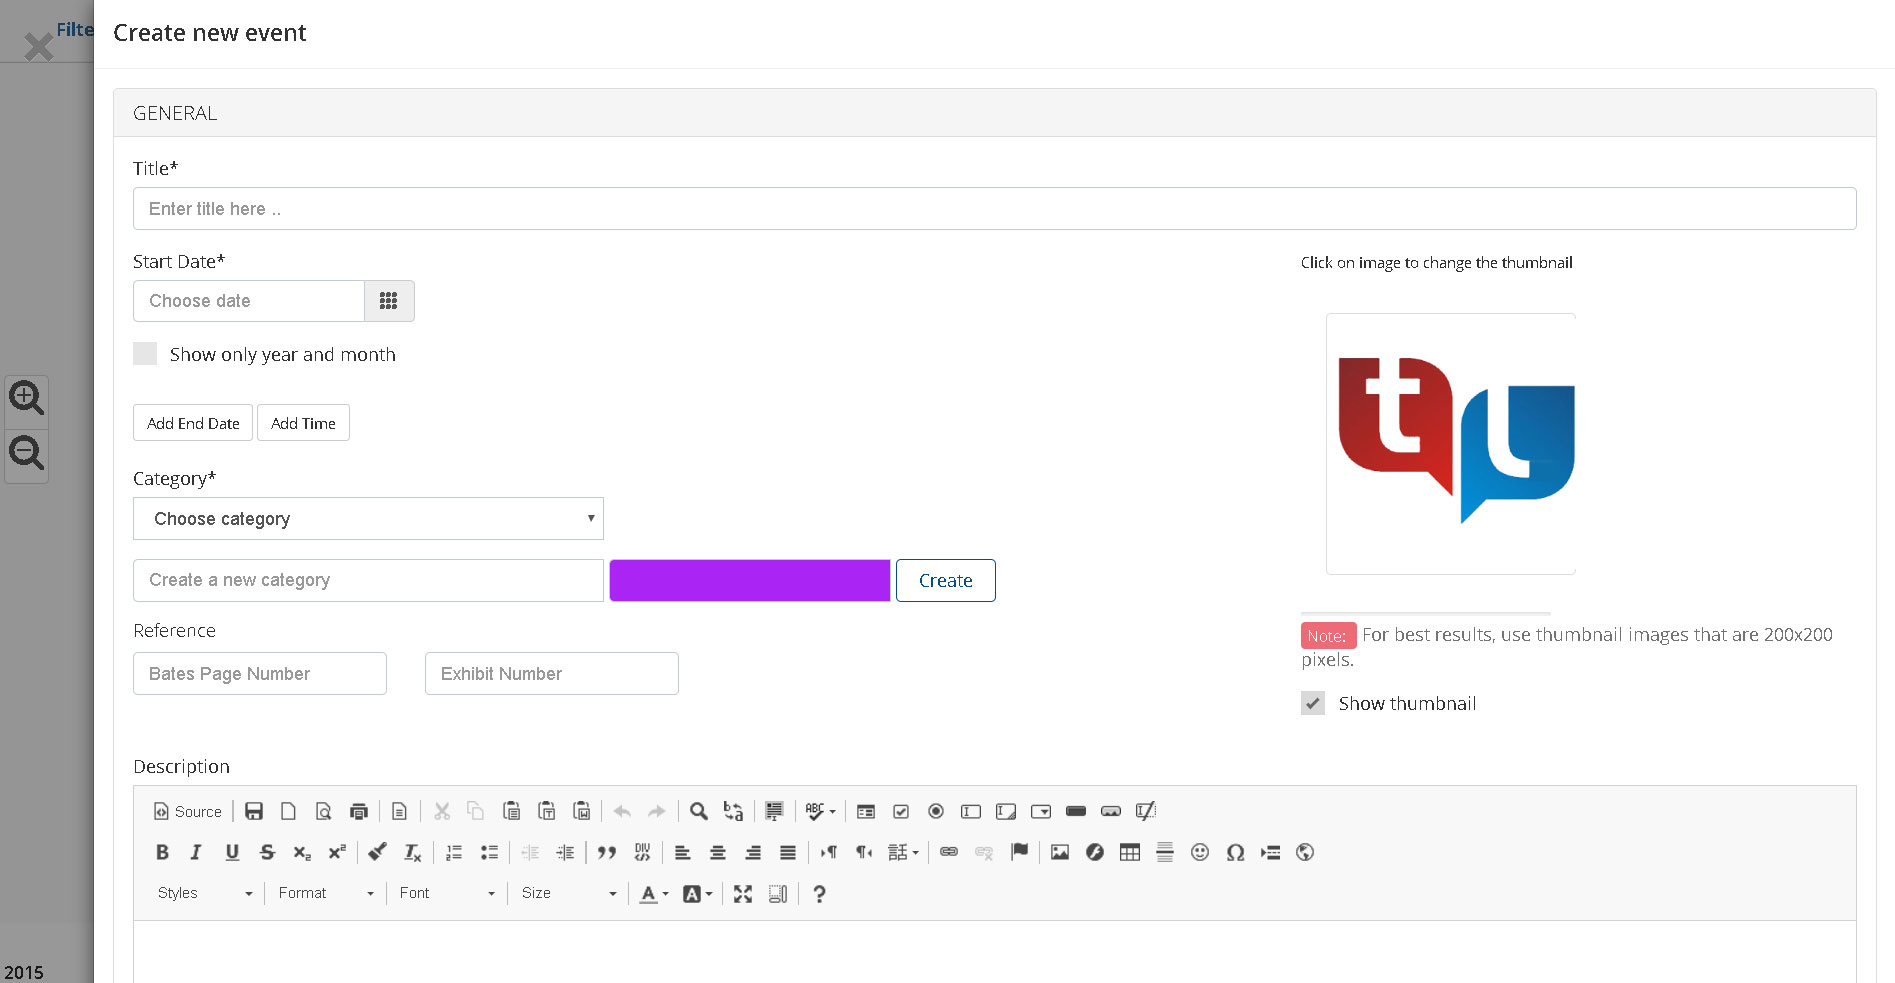
Provider Details
The ‘Provider Details’ tab allows you to enter in medical provider details including facility name, address and contact information, as well as provider specific information. You can also attach medical records and other files here:
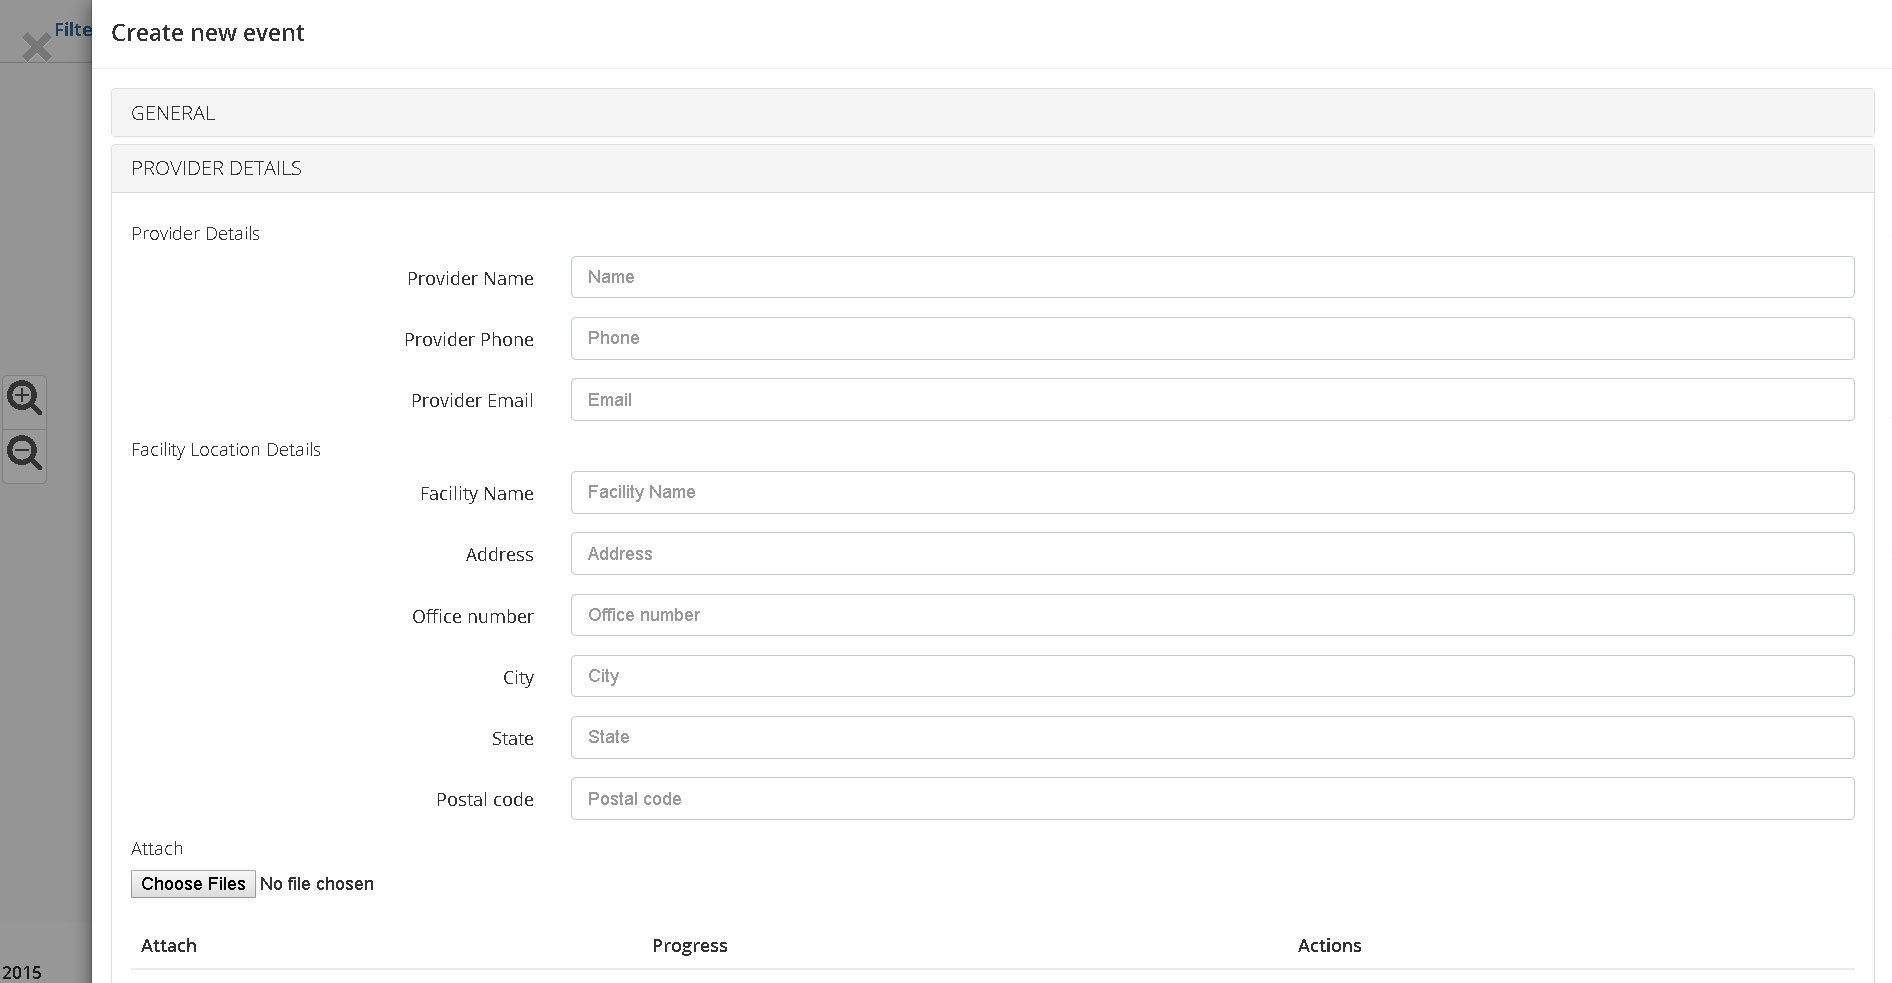
Add Media
The ‘Add Media’ tab is where you’ll add supporting documents and other files directly to a specific event (Learn more about adding video, images and files to your TrialLine here). You can drag and drop files in, select them from your computer or choose from existing files stored in your company file library. TrialLine supports all common file types, even video and image files. You can also link to a YouTube video here as well:
Notes
The ‘Notes’ section allows you to add additional information, be it notes to yourself or others, or information that you don’t want to include in the description, for whatever reason:

Please be aware that notes will not be visible in shared or saved views, only in the standard rendered view.
Export
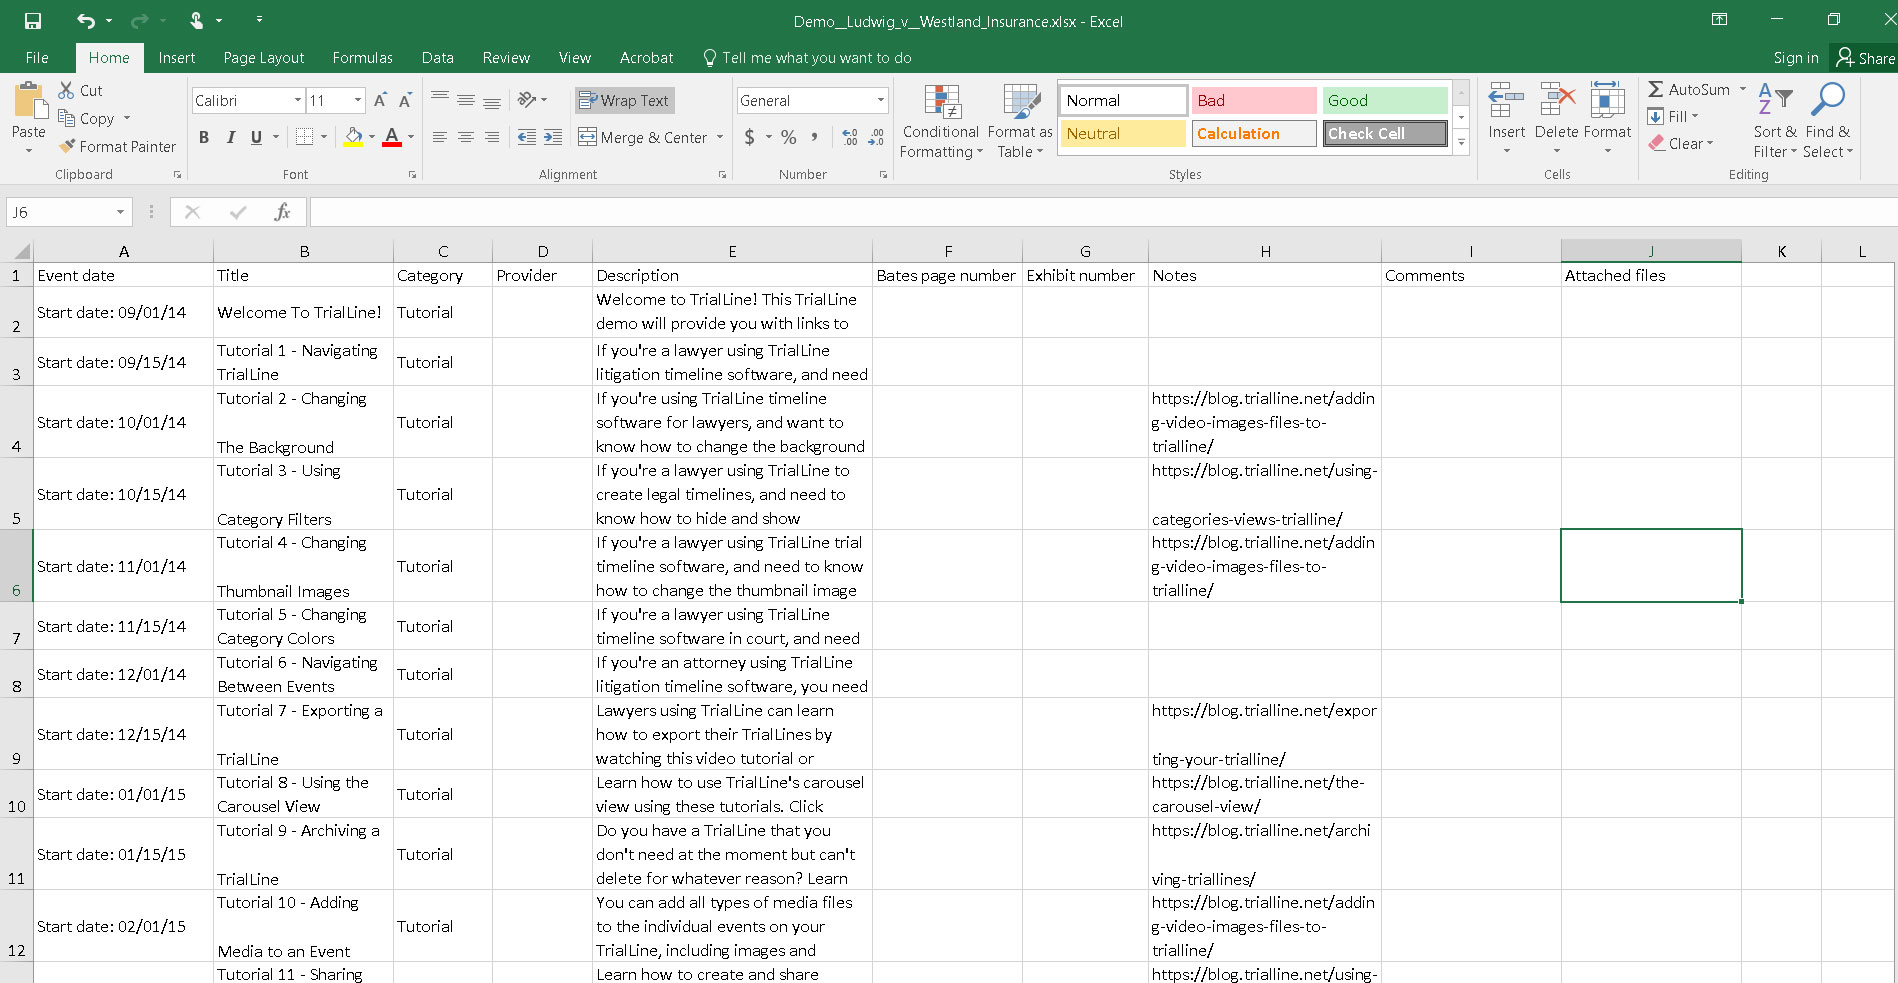
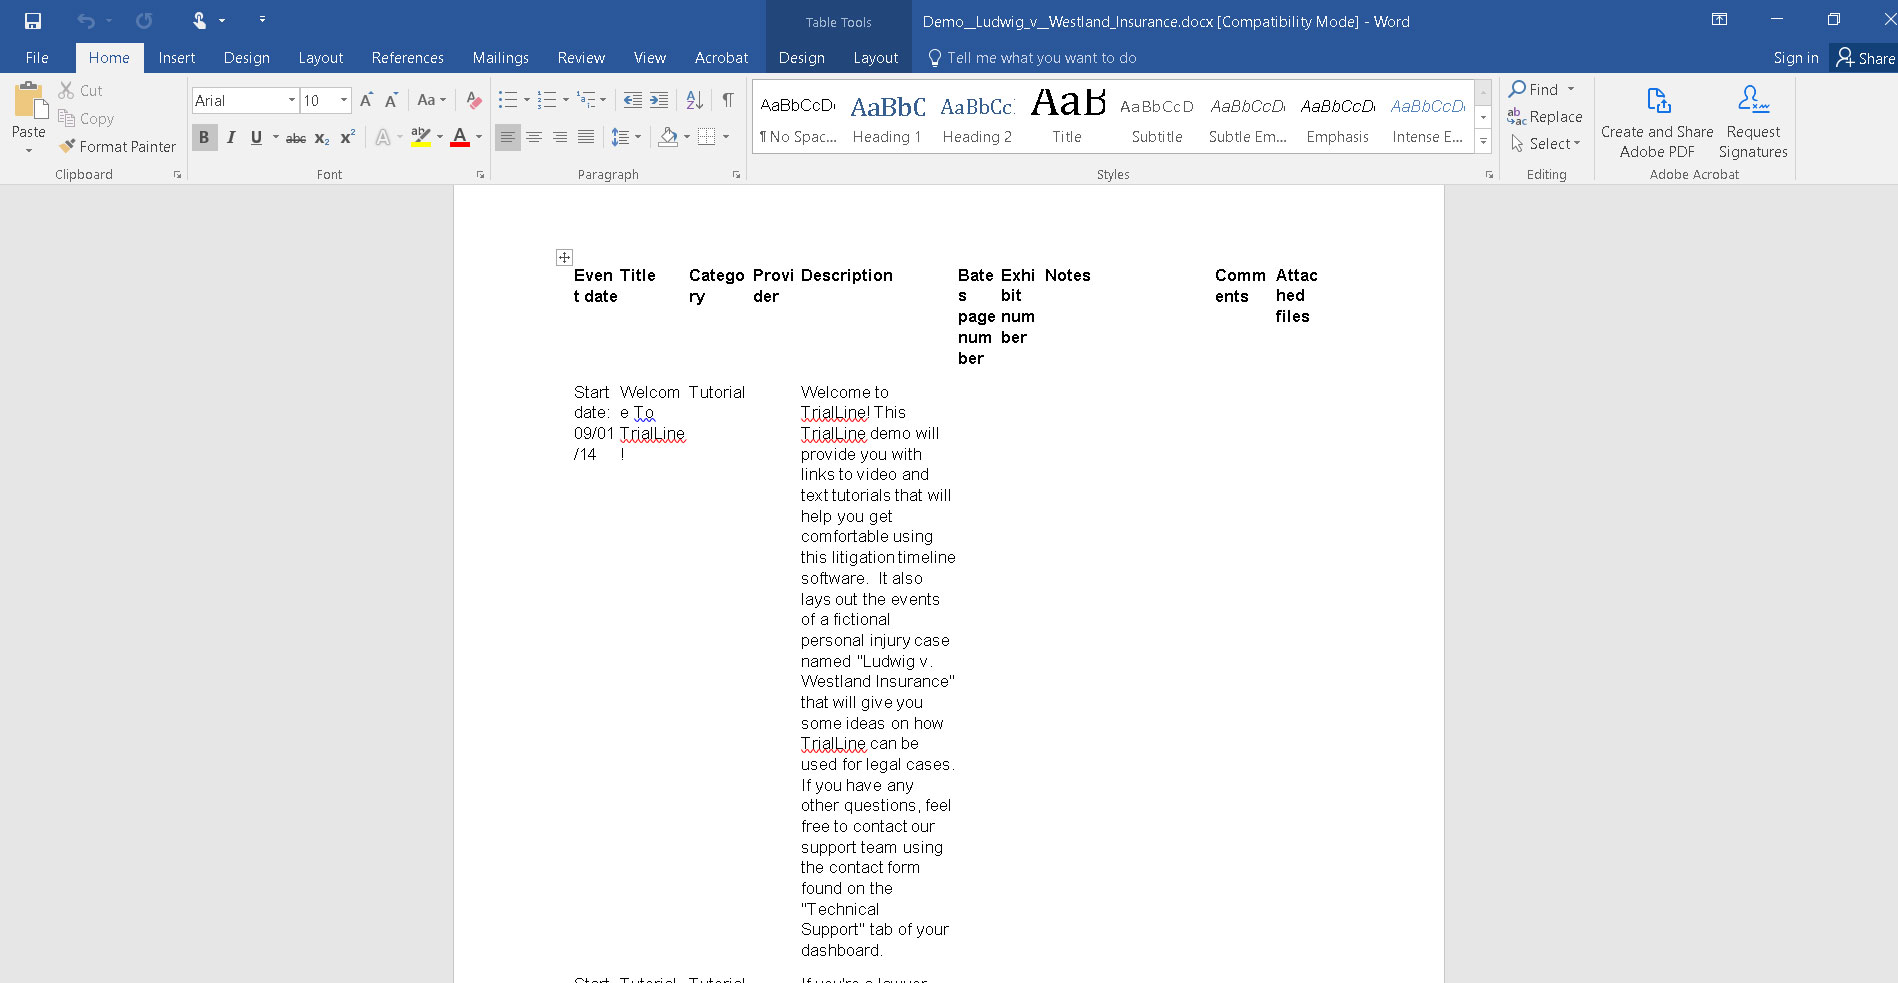
It is possible to export the data on your TrialLine as an Excel or Word file by pushing the ‘Export’ button (Learn more about exporting your TrialLine here):
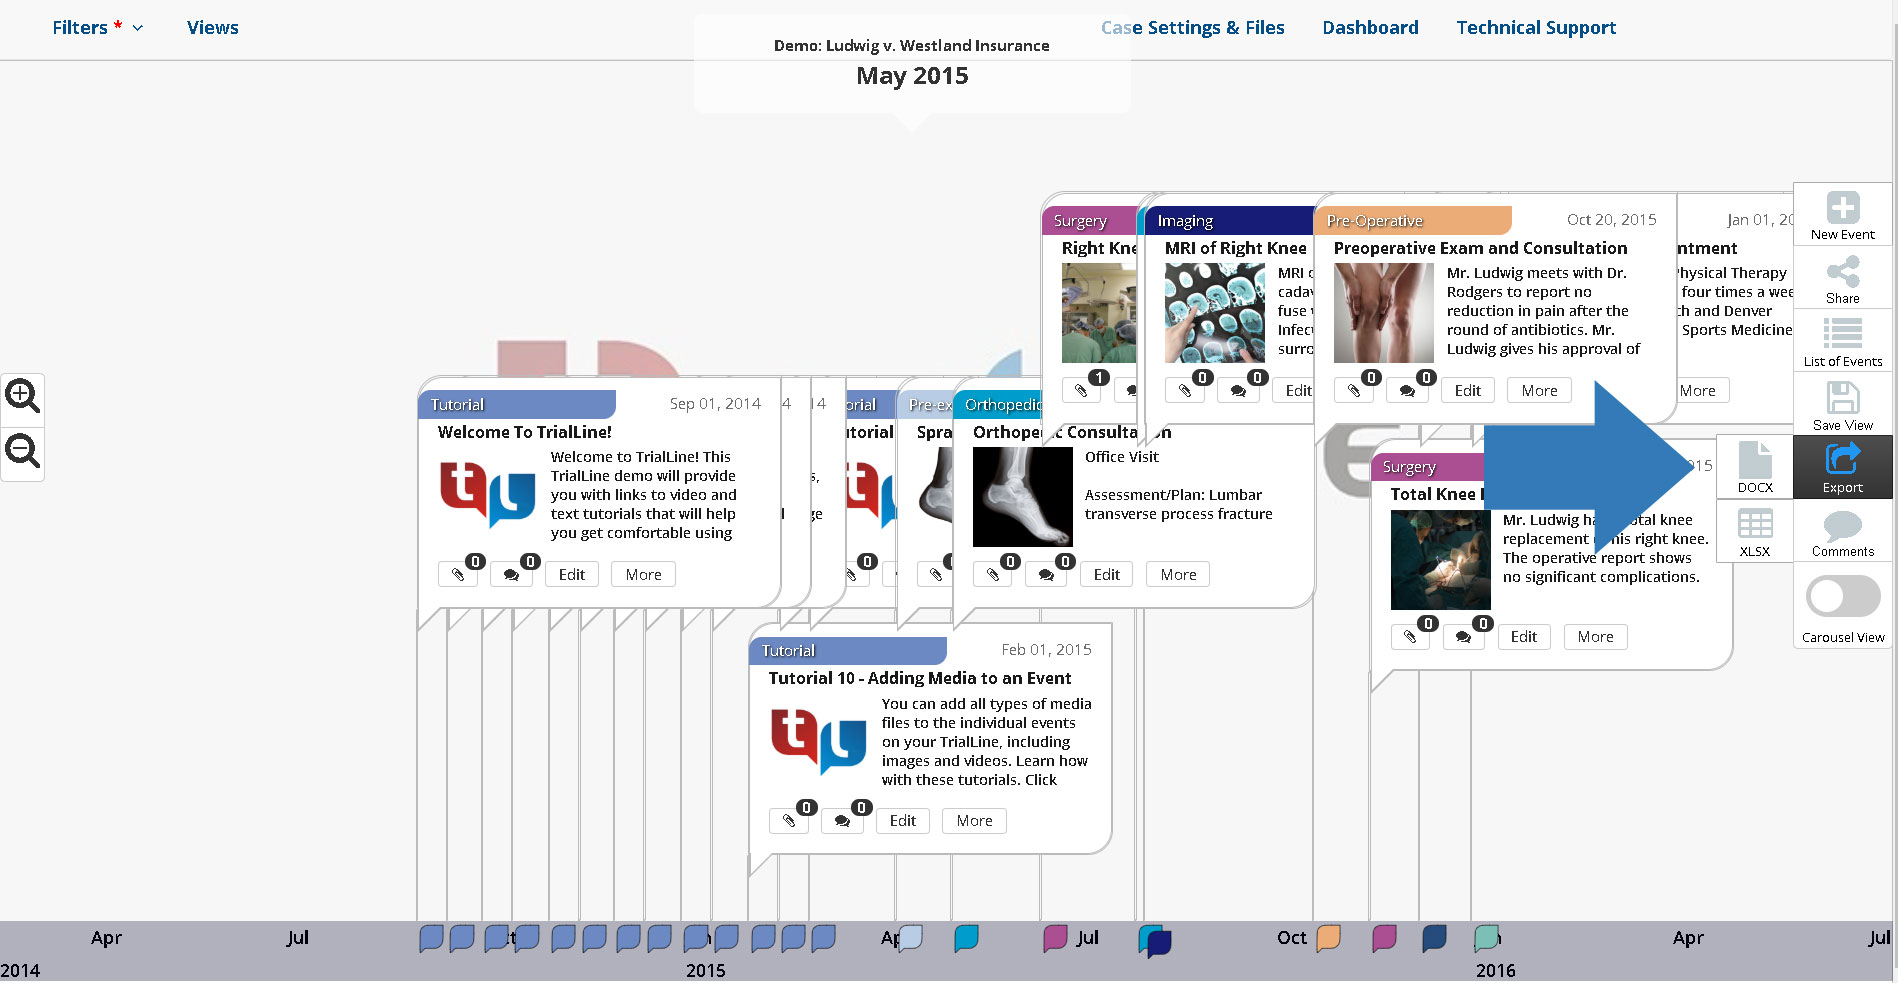
Once you choose which file type you want to export as, DOCX or XLSX, a new window will popup that allows you select the data that you would like include in your export:
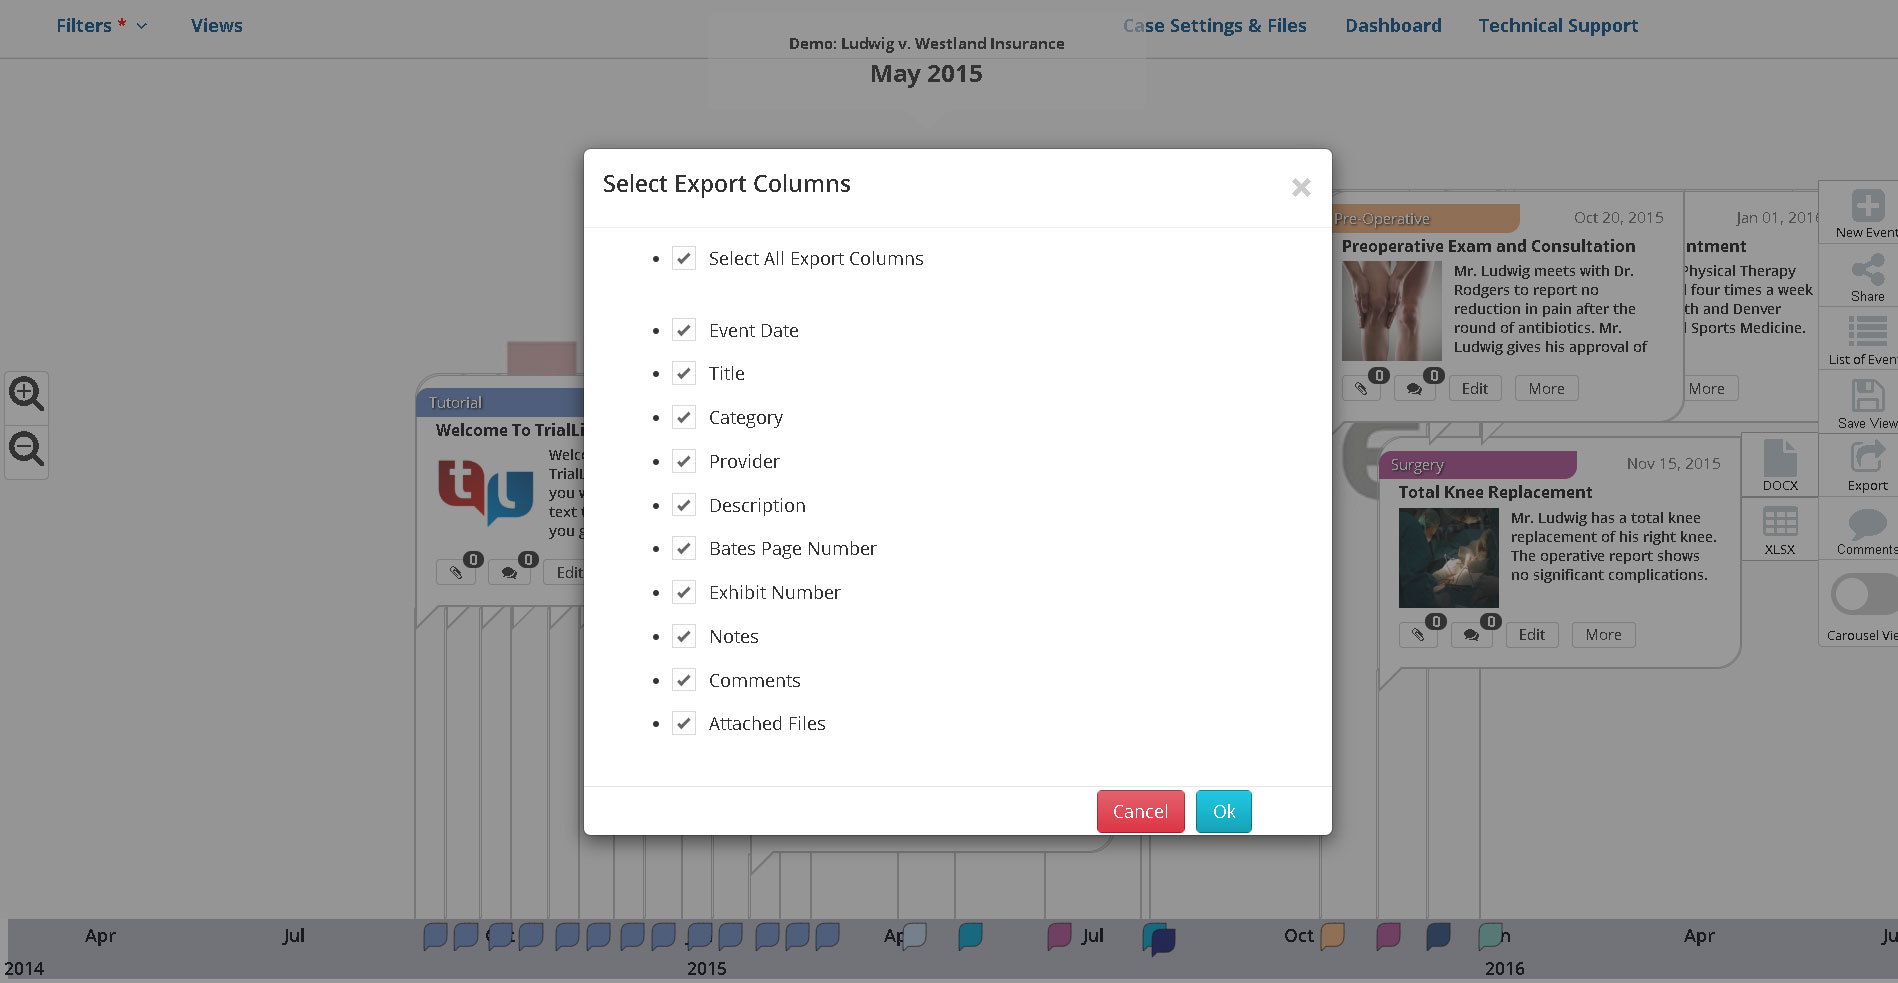
Simply check the boxes for the data that you want to export, and then once you click ‘Ok’ the file will export in your chosen format with the columns that you have selected:
Comments
TrialLine users and their collaborators can use the ‘Notes’ and ‘Comments’ functions to communicate about a case timeline (Learn how to use ‘Notes’ and ‘Comments’ here), and keep track of the conversation directly in the rendered view:
Clicking the ‘Comments’ button opens the ‘Comments Pullout’ where you’ll be able to see all notes and comments made on your events, as well as respond to comments made by other people. The entire conversation will be visible directly from the rendered view:
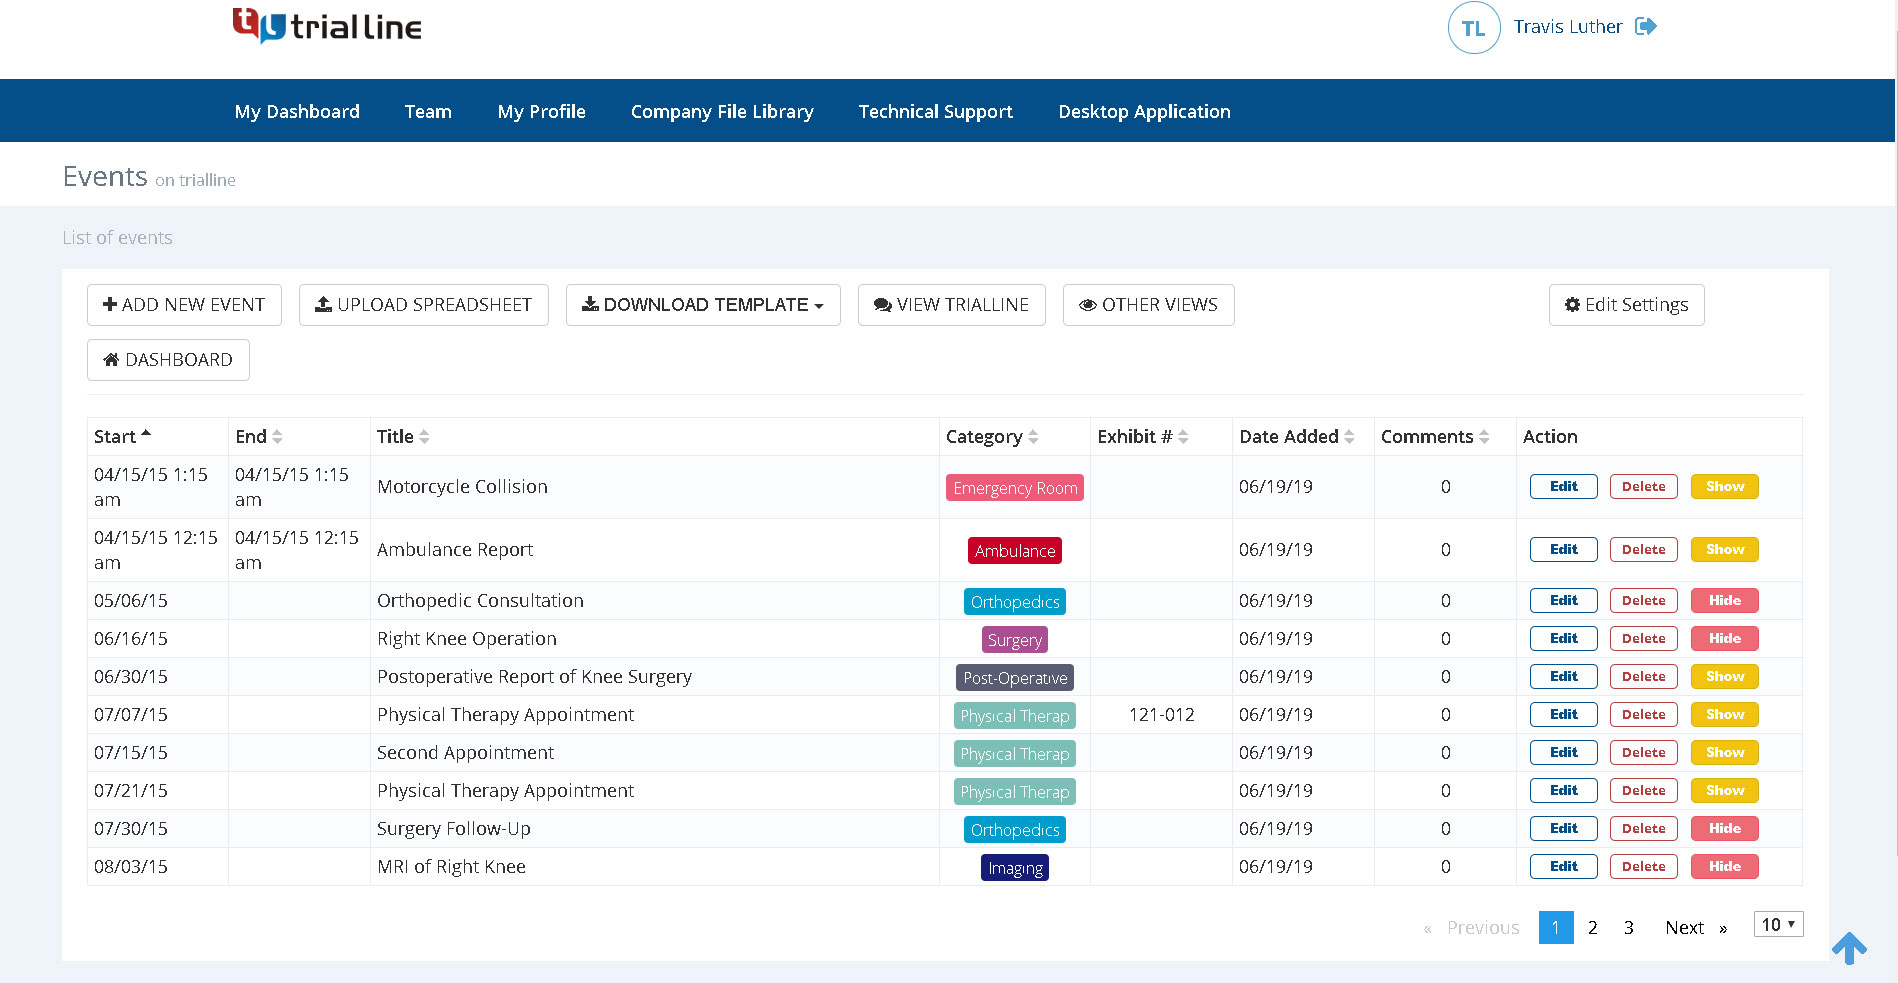
The List View
Clicking the ‘List of Events’ button from the right hand side menu will take you to the ‘List View’ for your TrialLine:
Once you’re in the list view you’ll be able to take a number of different actions including adding, editing, and deleting events, as well as choosing whether or not you want to hide or display individual events on your TrialLine. You can also add events by uploading a spreadsheet with all of your event information on it. Simply download one of the provided templates, enter your data, then use the ‘Upload Spreadsheet’ button to upload the file. Your events will then be displayed on your TrialLine. You can also access the ‘Edit Settings’ and main dashboard, as well as go to the list of saved and shared views from this page as well:
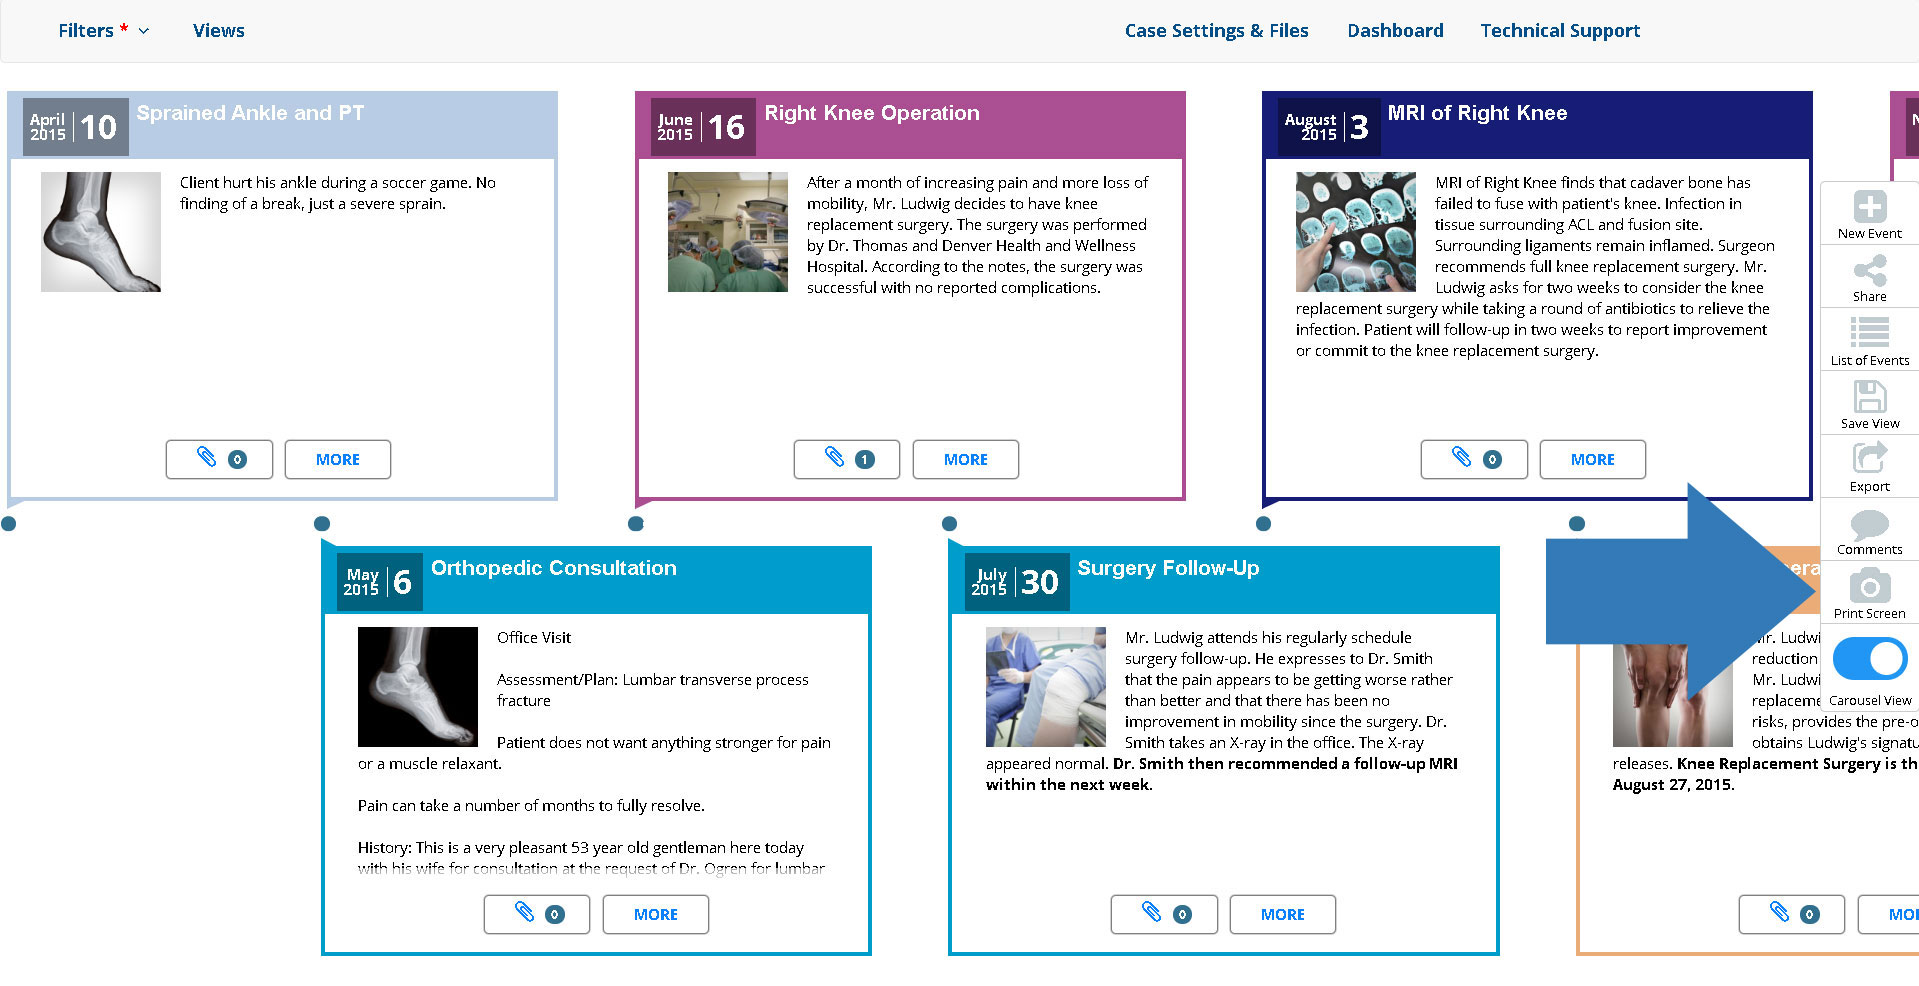
The Carousel View
The ‘Carousel View’ takes you out of the rendered view, where events are displayed relative to each other based on where they’re located in time, and into a view where all of the events are displayed side by side, one right after the other (Learn more about the carousel view here):
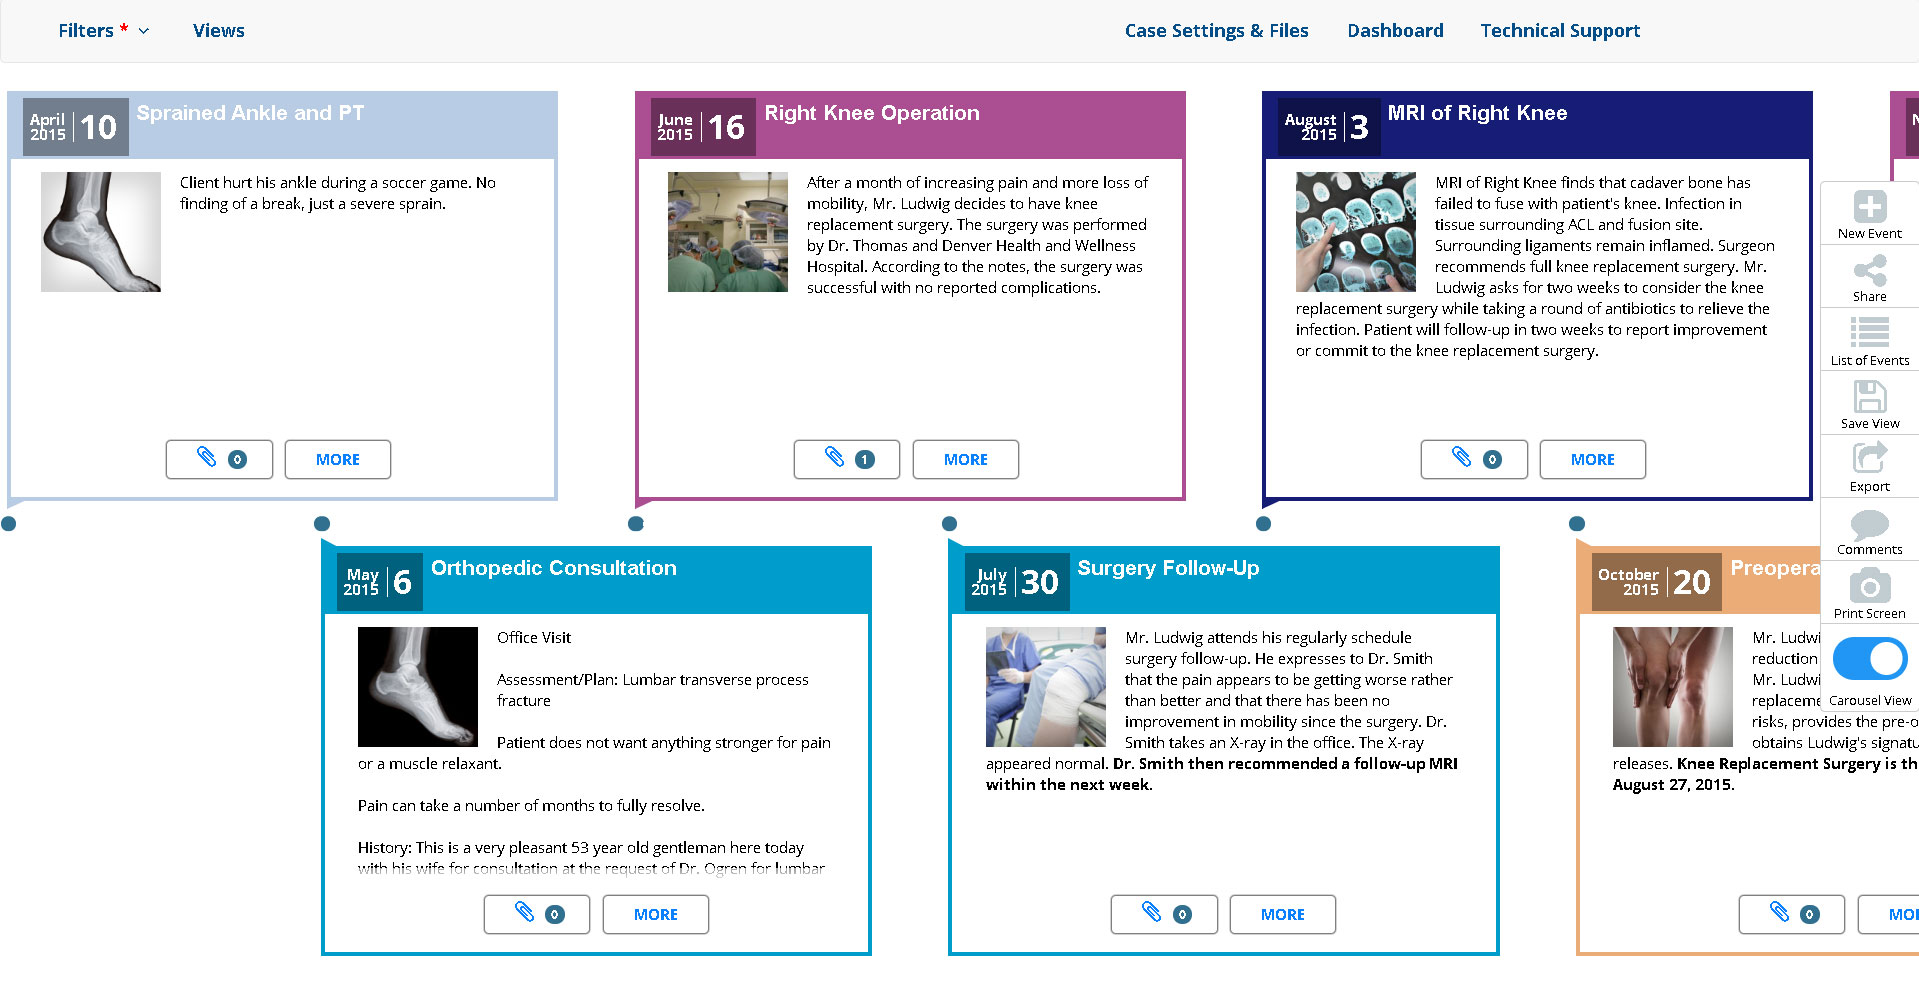
The ‘More’ button works the same way as it does in the rendered view, enabling you to see your event information in more detail. You can also click the ‘Print Screen’ button to export the carousel view as a high resolution PNG file you can use for printing a physical demonstrative:
Case Settings and Files
The ‘Case Settings and Files’ button will take you to the ‘edit settings’ dashboard for that individual TrialLine:

From the ‘edit settings’ dashboard, you’ll be able to customize your TrialLine in various ways, access your ‘Case File Library’ and manage your categories.
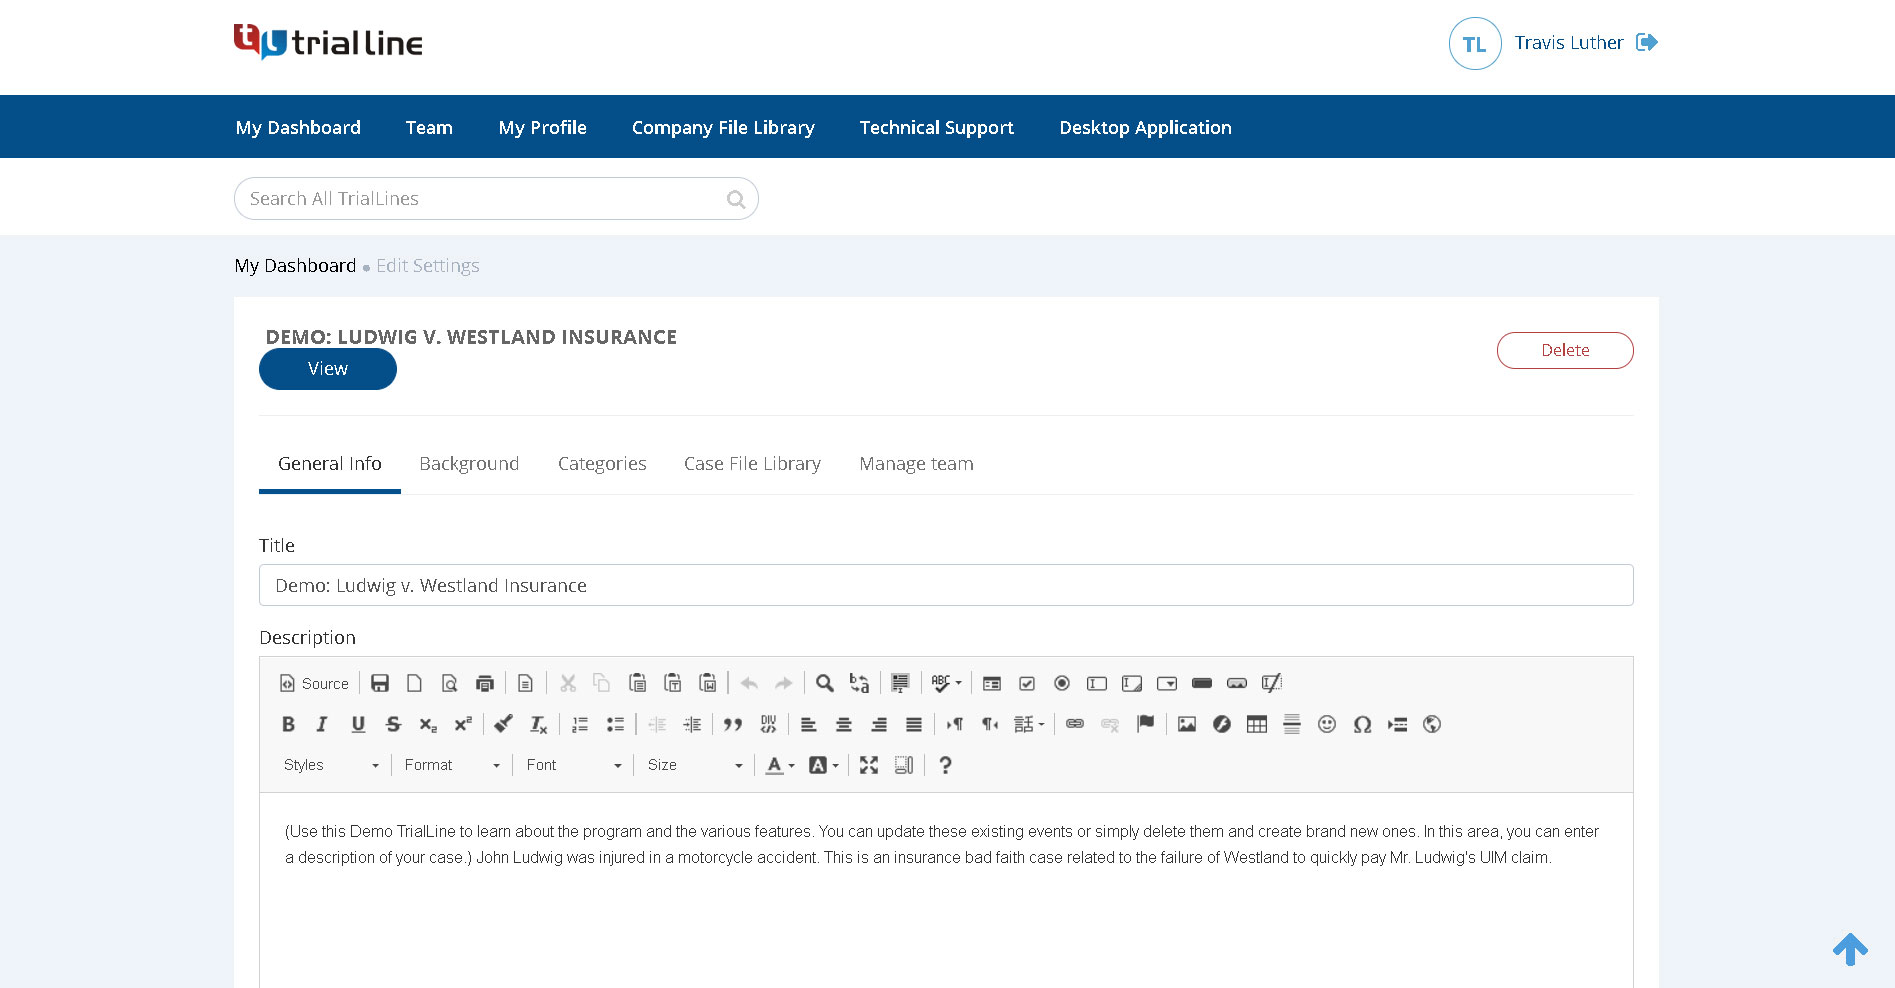
General Info
Under the ‘General Info’ tab, you can name or rename your TrialLine, as well as give it a new or updated description:
Background
From the ‘Background’ tab, you’ll be able to customize the background image for your TrialLine. There are a number of background options provided to TrialLine users, but you can also upload your own images, and even movie files, by clicking the ‘Use My Own Background’ button and uploading your file. For best results, the background image or video you are uploading should be at 1024 x 768 pixels:

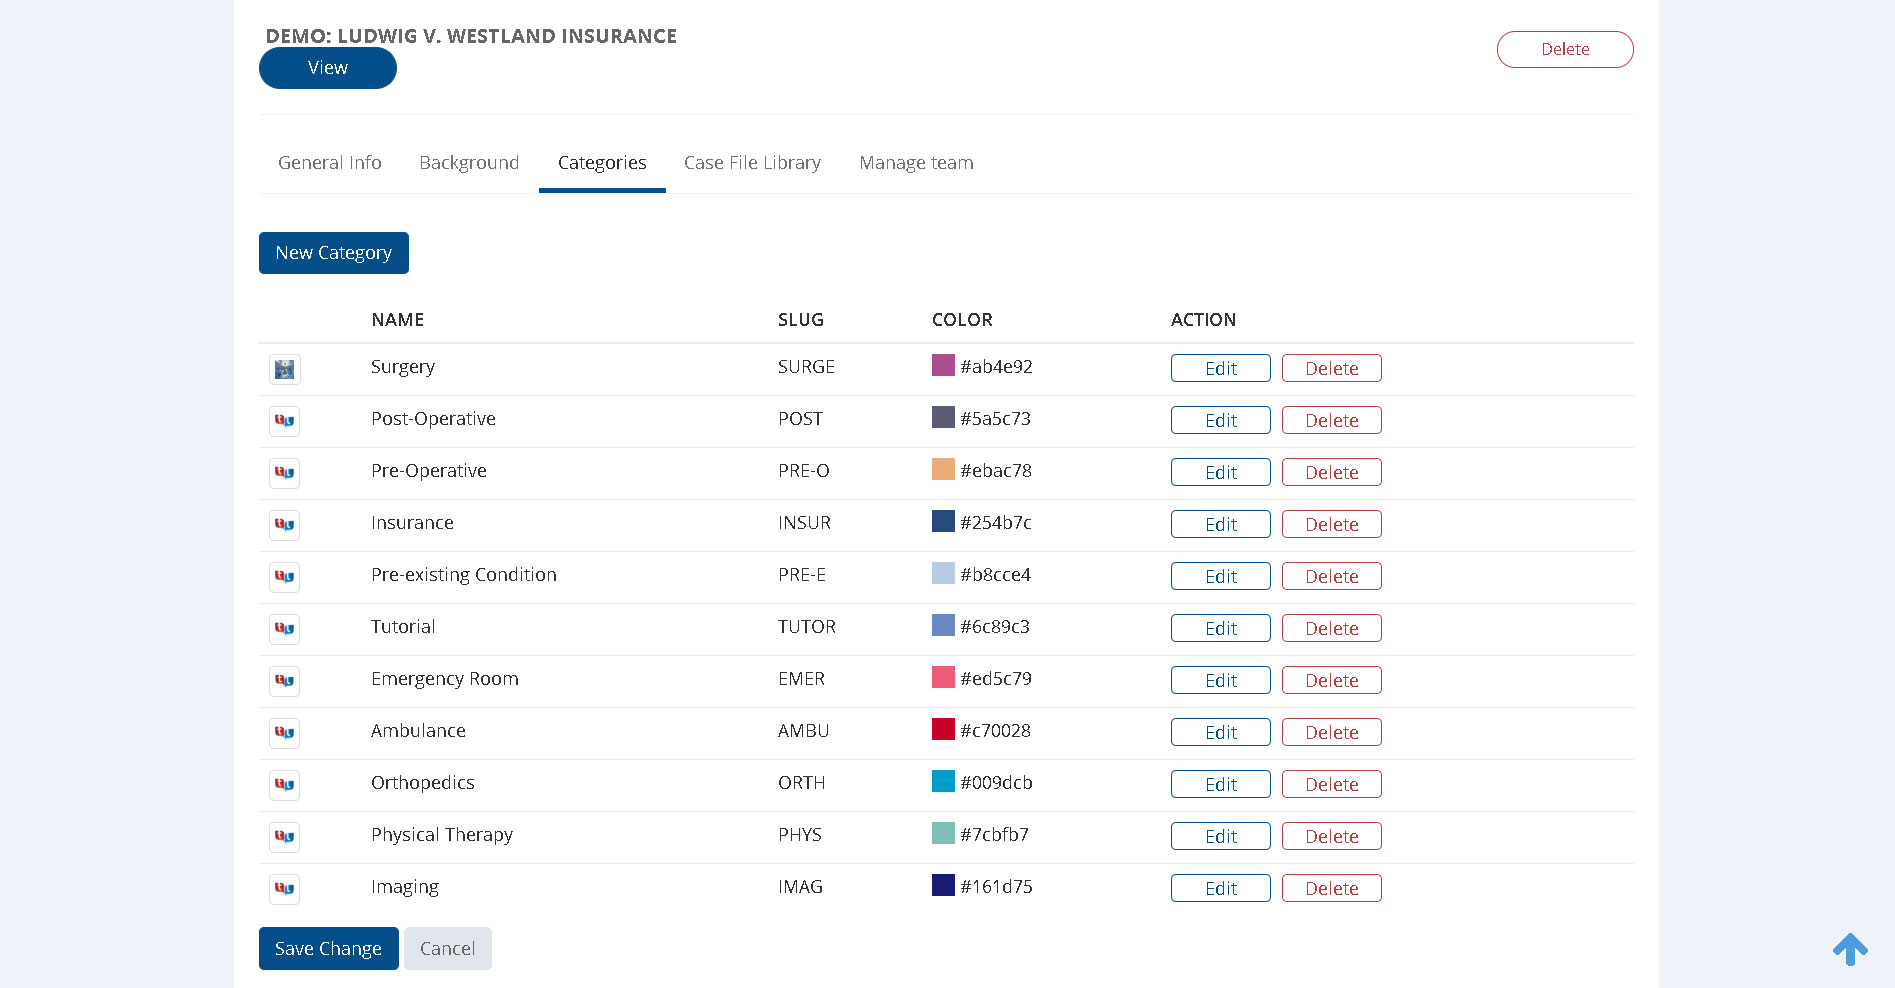
Categories
The ‘Categories’ tab is where you can see all of the different categories for your TrialLine, and edit or delete them as needed. You can also create new categories from this tab as well:
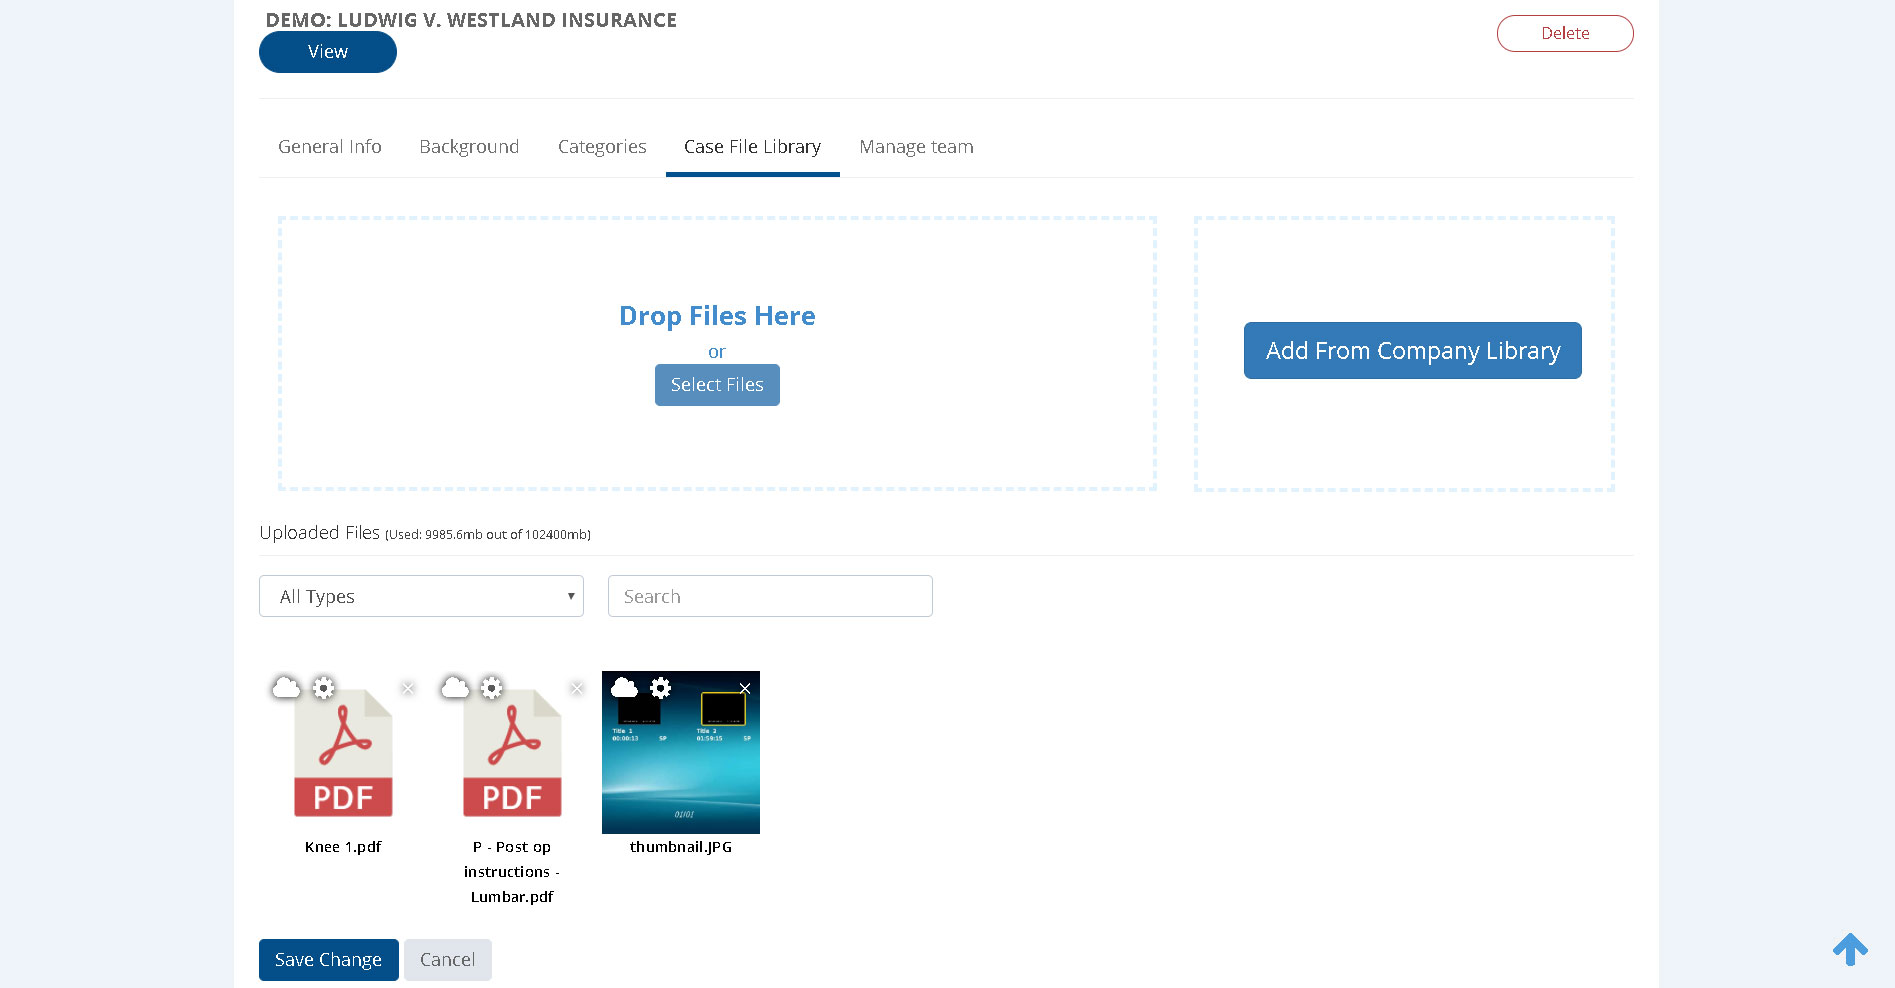
Case File Library
The ‘Case File Library’ is where you’ll find all of the files used in a particular TrialLine. This is different from the ‘Company File Library’ which is where you should store files that will be used across multiple TrialLines. The files in the ‘Case File Library’ are specific to the individual TrialLine you are working on at the time:
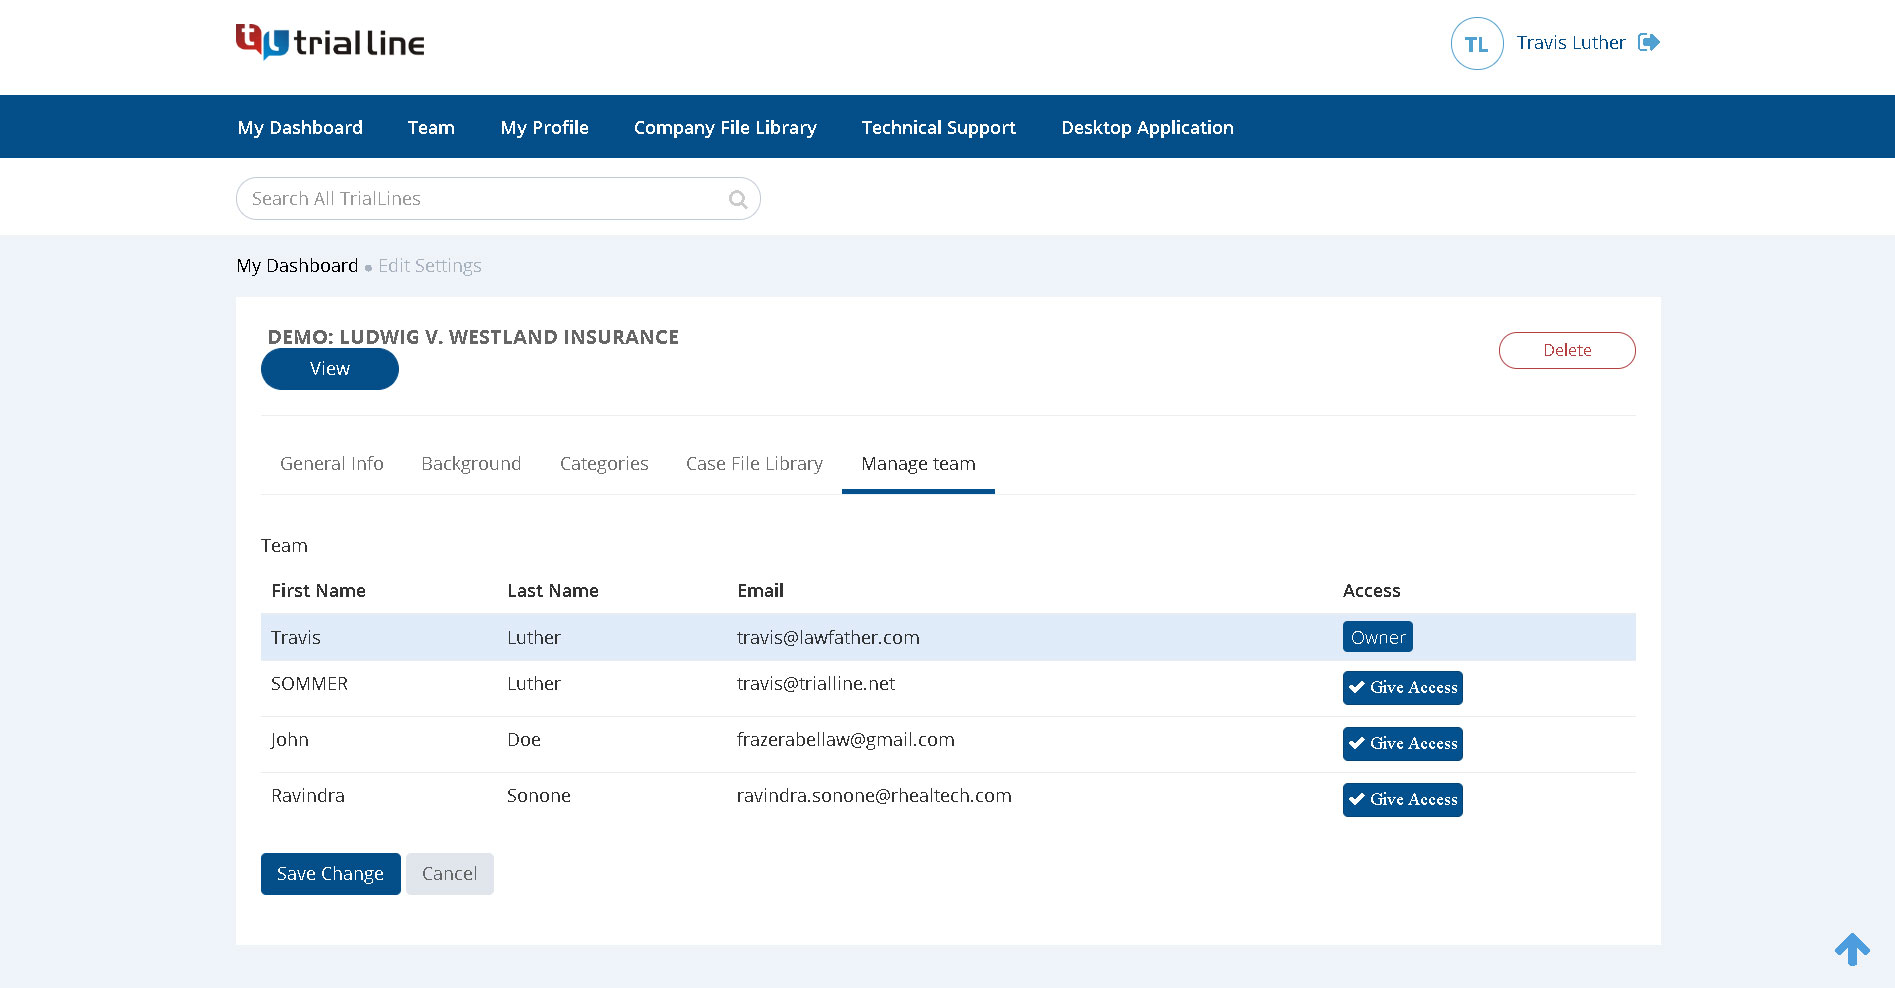
Manage Team
The ‘Manage Team’ tab is where you’ll give your team members access to a particular TrialLine. Please note that this is different from the ‘Team’ tab in the main dashboard. While the ‘Team’ tab in the main dashboard is where you’ll manage your team members across your entire account, the ‘Manage Team’ tab from the ‘Edit Settings’ dashboard is where you’ll give those team members access to the TrialLine you want them to collaborate with you on. This extra step ensures that your team members will only have access to the TrialLines that you want them to have access to:
Those are the basics of how to navigate around TrialLine.
Need More Help? Contact Us Today
![]()
At TrialLine, we’re serious about making sure you have the tools and information you need to make the most of our attorney timeline software. If you ever have any questions or issues, please contact us using the technical support form in your dashboard, and we will answer your questions and resolve your issues as quickly as possible.
“From what I’ve experienced so far, the TrialLine company as a whole has a lot of integrity and vision.” – TrialLine User Lindsay P.